
Caprice RWD V8-305 5.0L (1992)
Ball Joint: Service and Repair
Lower
1.
Raise vehicle and support at frame, and remove wheel and tire.
2.
Position a suitable jack under lower control arm spring seat, and raise jack to compress coil spring. Jack must remain in place during ball joint
replacement to hold spring and lower control arm in position.
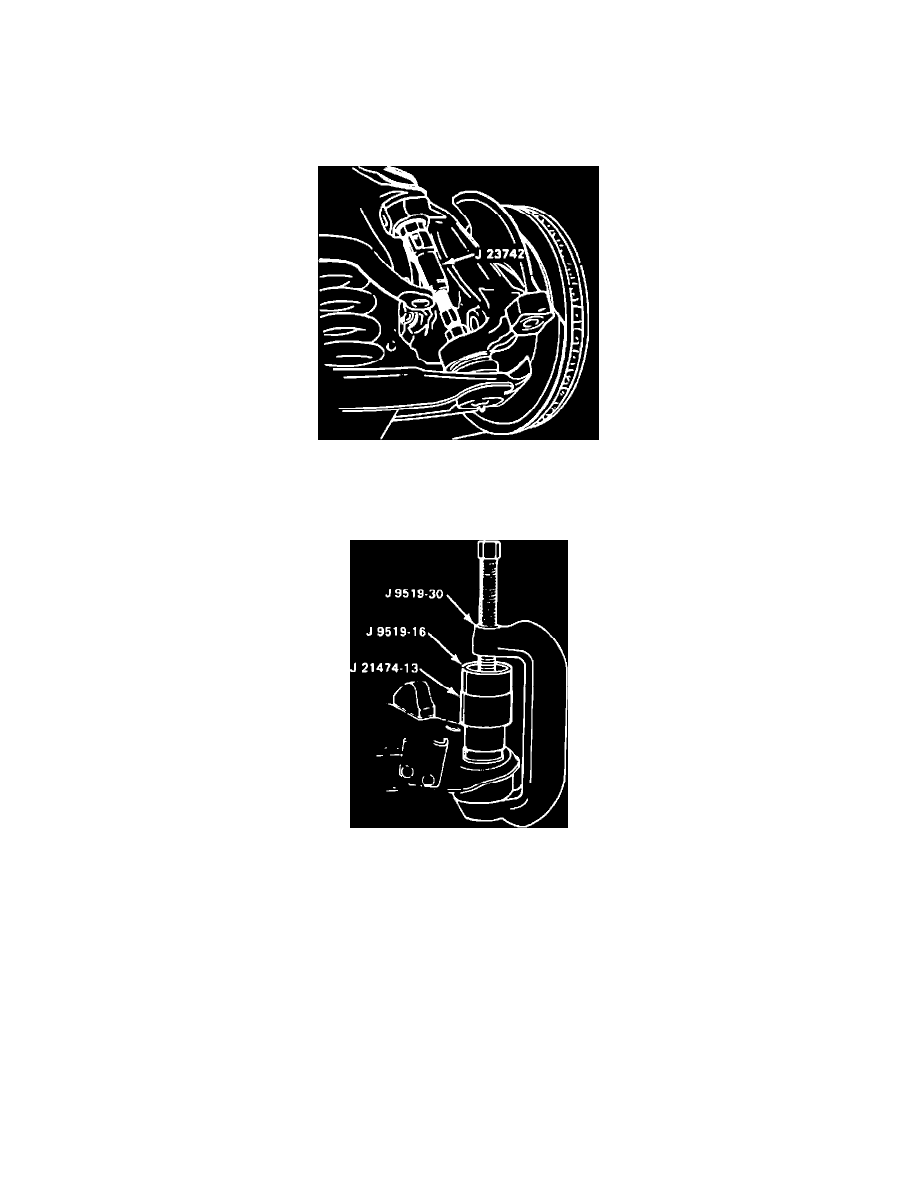
Fig. 9 Disconnecting Lower Ball Joint From Steering Knuckle
3.
Remove cotter pin and nut securing ball joint stud to steering knuckle, then disconnect joint from knuckle using a suitable tool, Fig. 9.
4.
Lift knuckle assembly from ball stud, guiding control arm out of splash shield, then support knuckle aside to allow clearance for joint removal.
Fig. 10 Pressing Lower Ball Joint From Lower Control Arm
5.
Remove grease fitting, then press ball joint assembly out of lower control arm using a suitable tool, Fig. 10.