
Caprice Wagon V8-350 5.7L (1994)
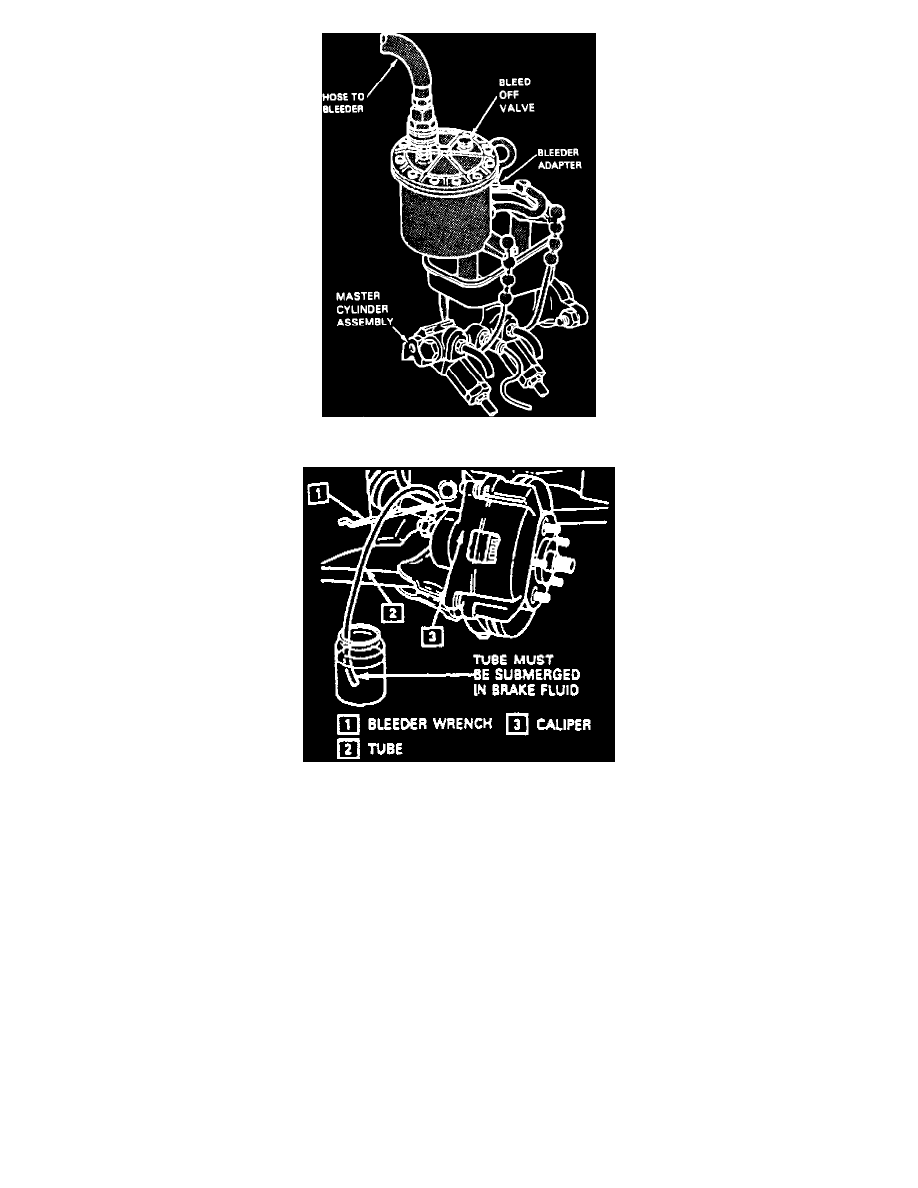
Fig. 21 Installing Pressure Bleeder Adapter
Fig. 210 Brake System Manual Bleed.
1. Loosen, then slightly retighten bleeder valves at all four wheels. Repair any broken, stripped or frozen valves at this time.
2. Using a diaphragm type pressure bleeder, install suitable bleeder adapter to master cylinder, Fig. 17.
3. Charge bleeder ball to 20-25 psi.
4. Connect pressure bleeder line to adapter.
5. Open line valve on pressure bleeder, then depress bleed-off valve on adapter until a small amount of brake fluid is released.
6. Raise and support vehicle.
7. Proceed to appropriate wheel first and follow set sequence according to Wheel Bleeding Sequence.
8. Place transparent tube over bleeder valve, then allow tube to hang down into transparent container, Fig. 16. Ensure end of tube is submerged in
clean brake fluid.
9. Open bleeder valve 1/2 to 3/4 turn and allow fluid to flow into container until all air is purged from line.
Front Disc Brakes
NOTE: Pressure bleeding is recommended for all hydraulic disc brake systems.
The disc brake hydraulic system can be bled manually or with pressure bleeding equipment. On vehicles with disc brakes the brake pedal will require
more pumping and frequent checking of fluid level in master cylinder during bleeding operation.
Never use brake fluid that has been drained from hydraulic system when bleeding the brakes. Be sure the disc brake pistons are returned to their
normal positions and that the shoe and lining assemblies are properly seated. Before driving the vehicle, check brake operation to be sure that a firm