
Caprice Wagon V8-350 5.7L (1994)
Brake Pad: Service and Repair
Rear Disc Brakes
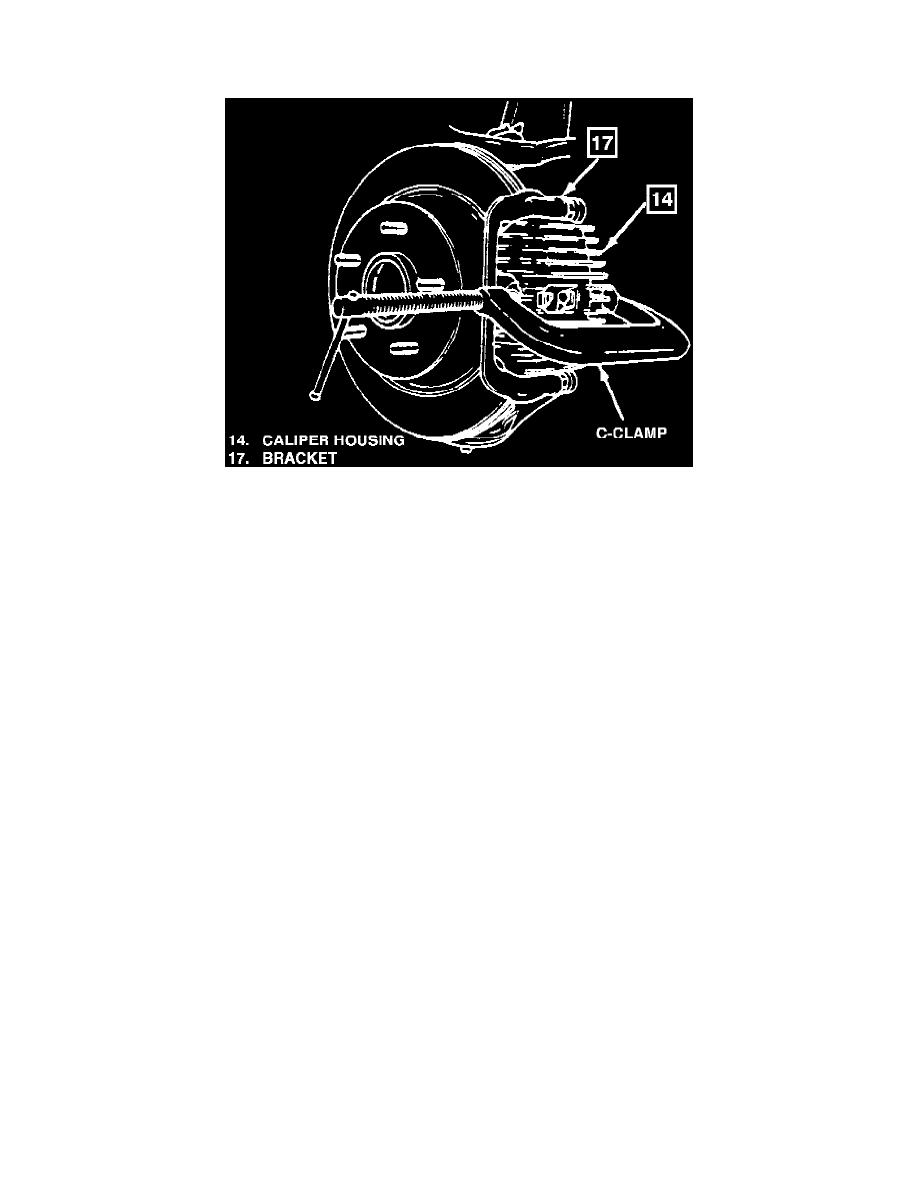
Fig. 2 Piston Compressing In Caliper Bore
REMOVAL
1. Remove 2/3 of the total brake fluid capacity from master cylinder reservoir.
2. Raise and support vehicle, then remove tire and wheel assembly.
3. Install two wheel retaining nuts to retain rotor in position.
4. Position one end of a suitable C-clamp against inlet fitting bolt, and the other end against outboard shoe and lining, then tighten clamp as shown,
Fig. 2, until piston fully bottoms in caliper bore.
5. Remove upper guide pin bolt and discard.
6. Loosen lower guide pin bolt, then pivot caliper downward on lower guide pin bolt to expose shoe & lining assemblies. Use care to avoid damaging
brake hose.
7. Remove shoes and linings from mounting bracket.
INSTALLATION
1. Install outboard shoe and lining onto mounting bracket, ensuring insulator on shoe is positioned toward caliper housing.
2. Install inboard shoe and lining. Ensure wear sensor is positioned nearest caliper piston. When properly installed, sensor should be in trailing
position when wheel is rotated in forward direction.
3. Pivot caliper into position over shoes and linings. Ensure springs on outboard shoe do not protrude through inspection hole in housing. If
protrusion is evident, lift caliper housing and readjust position of outboard shoe and lining.
4. Install new upper guide pin bolt and torque to 26 ft. lbs., then torque lower bolt to 16 ft. lbs.
5. Fill master cylinder to proper level, then pump brake pedal firmly and slowly three times to bring pads into contact with brake rotor.