
Caprice Wagon V8-350 5.7L (1994)
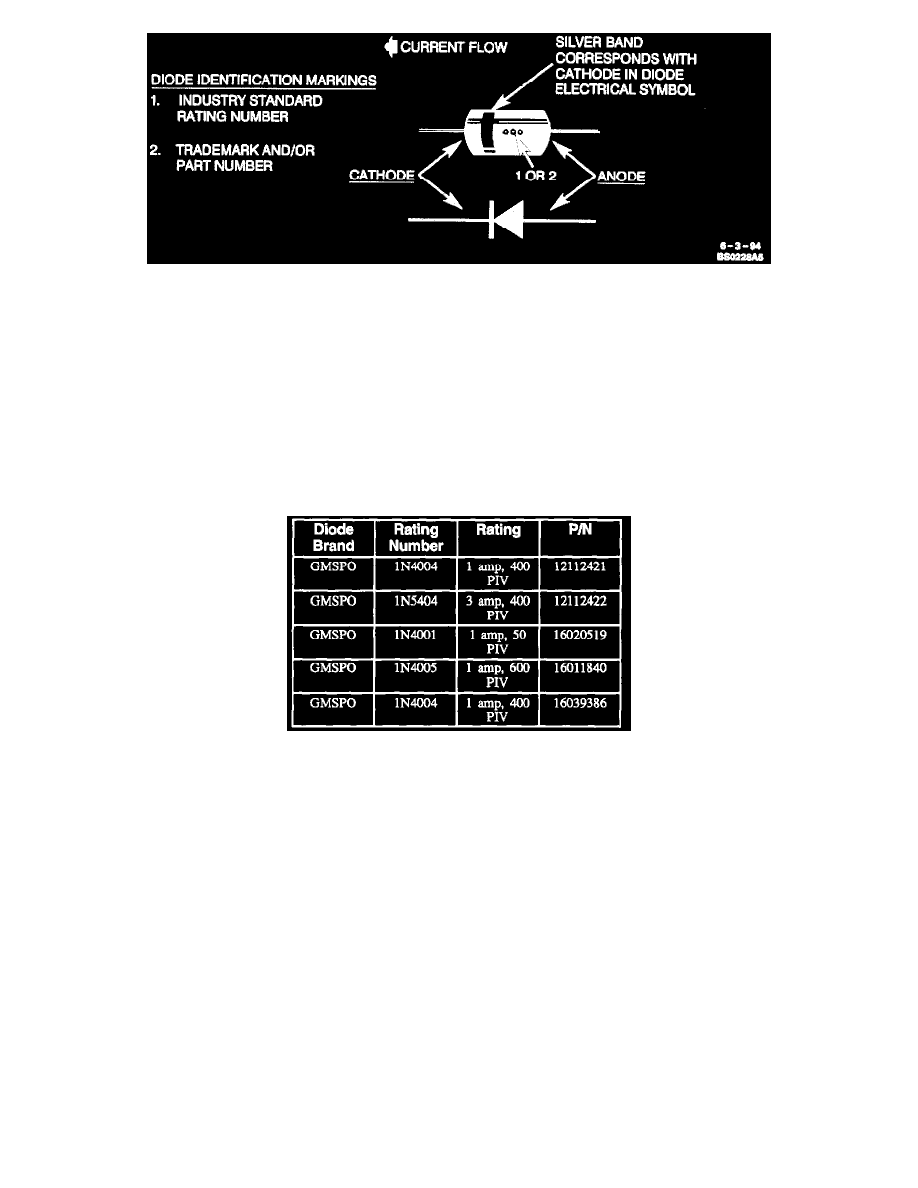
Diode Identification
Step 4: Install New Diode
Check current flow direction of the new diode, being sure to install the diode with correct bias. Refer the image for replacement diode symbols and
current flow explanations. Attach the new diode to the wire(s) using 60/40 rosin core solder. Use a beat sink (aluminum alligator clip) attached
across the diode wire ends to protect the diode from excess heat. Follow the manufacturer's instructions for the soldering equipment you are using.
Step 5: Install Terminal(s)
Install terminal(s) into the connector body if previously removed in Step 2.
Step 6: Tape Diode to Harness
Tape the diode to the harness or connector using electrical tape. To prevent shorts to ground and water intrusion, completely cover all exposed
wire and diode attachment points.
Acceptable Diode Replacements
In the event 1 amp, 50 PIV (Peak Inverse Rating) diodes are unavailable, a universal diode with a 1 amp, 400 PIV rating can be used for the
following applications:
^
A/C Compressor Clutch
^
ABS/4WAL (the ABS Diode on the Delco Moraine is hidden inside of an electrical connector under the carpet at the RH panel)
^
Wiper
^
Charging System (hidden in wire harness)
^
Parking Brake (vehicle with ABS)
^
Relays
^
Solenoids
^
Diesel Glow Plug Circuit
General Information
OPEN CIRCUIT
An open circuit is an incomplete circuit. Power cannot reach the load or reach ground. If a circuit is open, active components do not energize.
SHORT CIRCUIT
A short circuit is an unwanted connection between one part of the circuit and either ground or another part of the circuit. A short circuit causes a
fuse to blow or a circuit breaker to open.
Heated Oxygen Sensor (O2S) Repair