
Caprice Wagon V8-350 5.7L (1994)
Installing Clutch Coil Assembly
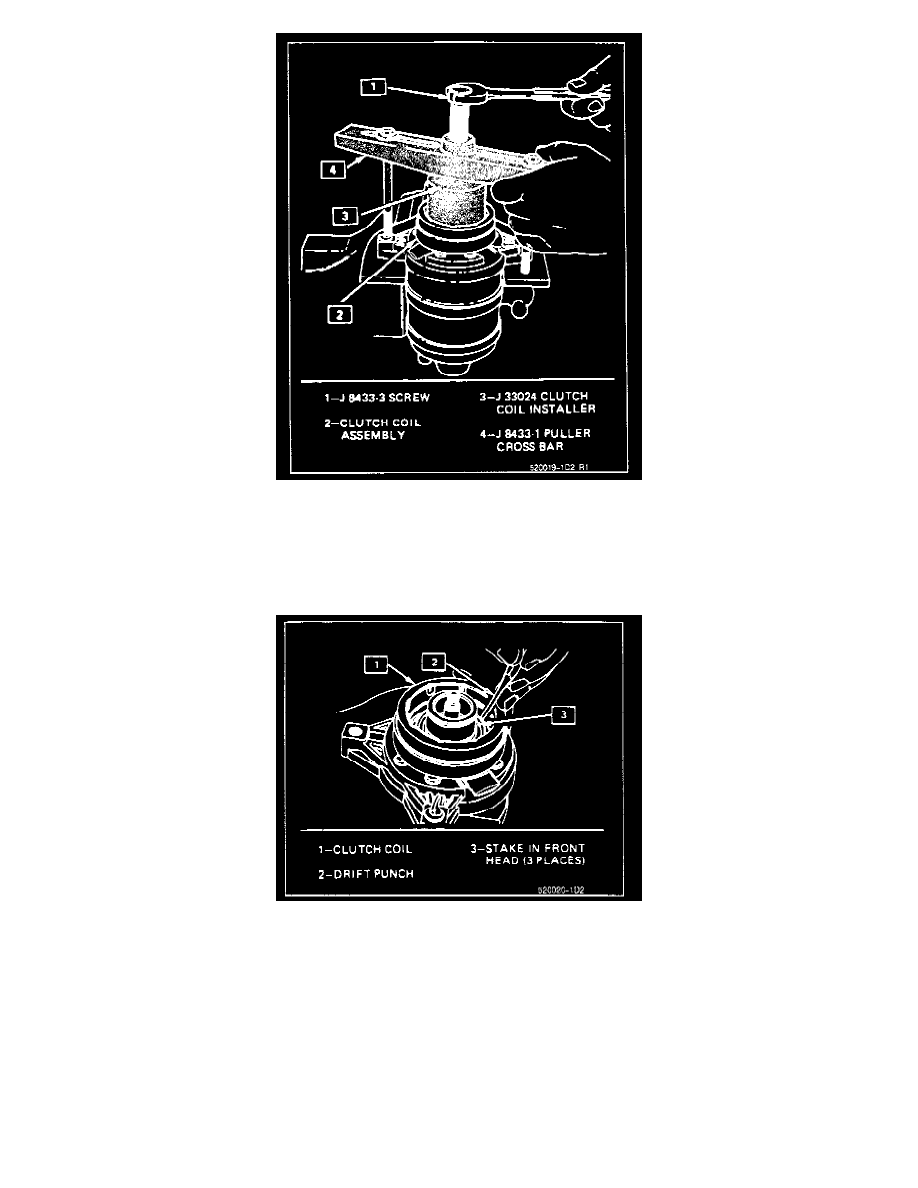
3. Center the J 8433-1 puller crossbar in the counter-sunk center hole of the J 33024 clutch coil installer. Install the J 33026-2 through bolts and
washers through the crossbar slots and thread them into the holding fixture J 33026 to full fixture thickness.
4. Turn the center forcing screw of the J 8433-1 puller crossbar to force the clutch coil onto the front head. Be sure clutch coil and J 33024 installer
stay in-line during installation.
Staking Clutch Coil To Front Head
5. When coil is fully seated on the front head, use a 1/8" diameter drift punch and stake the front head at three places 120° apart, to ensure clutch coil
remains in position.