
Caprice Wagon RWD V6-262 4.3L (1992)
9.
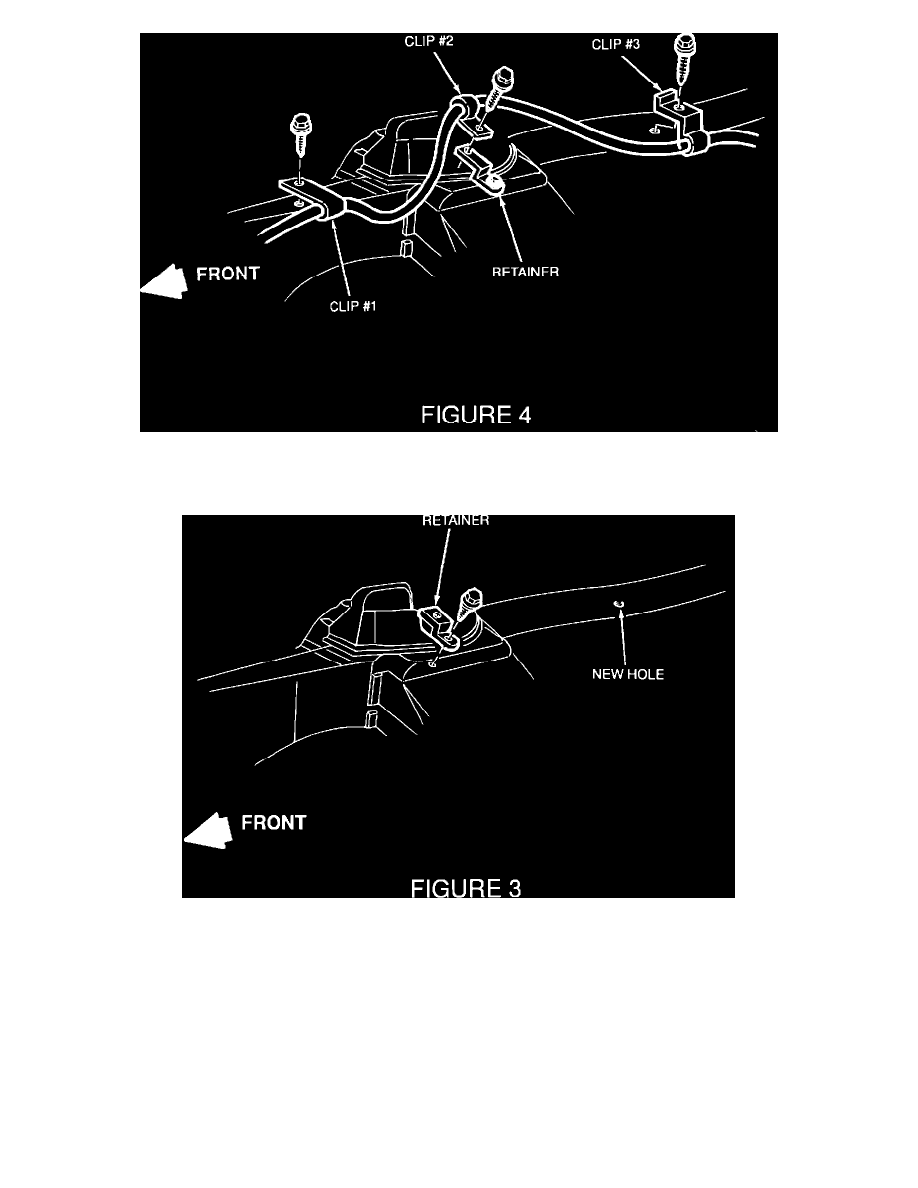
Referencing Figure 3. locate the two existing holes (one oblong and one round) in the area of frame rail where the "new hole" is to be drilled.
Using these two existing holes as locating points, install template and tape in place. Use a punch to mark hole location, then drill a 5.6 mm (7/32
inch) hole. This hole will be used for # 3 clip shown in Figures 2 and 4.
10.
Install new retainer in # 2 clip location as shown in Figure 3. Use new screw (P/N 11508995) to attach retainer to frame. Torque to 4.8 N-m (40
lb.in.).
11.
Route starter lead of cable as shown in Figure 4.
12.
Attach clips # 1 and # 3 using screws removed in step 3, above. Torque screws to 4.8 N-m (40 lb.in.).
13.
Attach clip # 2 to retainer installed in step 10 with new screw (P/N 11508154). Torque screw to 3.0 N-m (18 lb.in.).
Notice:
Make certain that any slack is removed from cable to insure cable is positioned as far away from exhaust manifold as possible.
14.
Connect new positive battery cable to battery and attach lead ends to alternator and junction block.