
Cavalier L4-2.2L VIN 4 (1998)
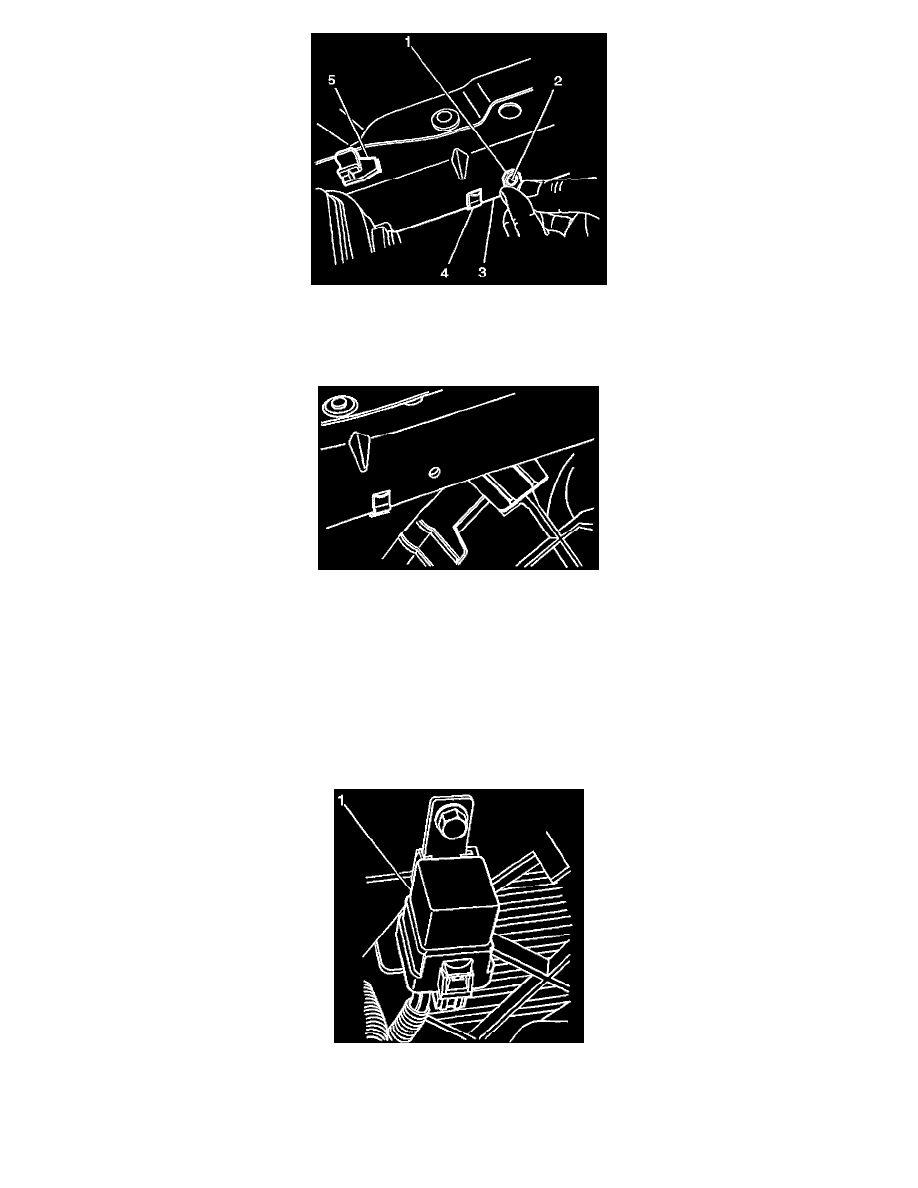
6.
Slide the J-nut (1) included in the harness kit on the bottom edge of the upper radiator support (3) so that it is located just to the right of the
existing clip (4). If there is no clip, use the prop rod holding clip (5) as a reference for determining the correct location for the J-nut.
7.
With the J-nut in position, use a pencil to mark the location (2) for a 6.35 mm hole (1/4 in) to be drilled.
8.
Remove the J-nut and using a 6.35 mm (1/4 in) drill bit, drill a hole in the radiator support at the lo~ation marked (2) in the previous step. The
above illustration shows the radiator support after the hole has been drilled.
9.
Touch up the drilled hole as necessary using an appropriate anti-corrosion material.
10.
On the HARNESS KIT, strip the insulation back about 6.35 mm (1/4 in) on the purple wire. The purple wire is the only wire on the harness kit that
does not have a terminal on it.
11.
Using an appropriate crimping took, install one end of the butt connector, included in the harness kit, on the purple wire.
12.
Slide the J-nut on the bottom edge of the radiator support and over the drilled hole.
13.
Using the 10 mm hex head bolt provided in the harness kit, attach the relay (1) to the radiator support using the previously drilled hole and J-nut.
Tighten
Tighten the bolt to 10 Nm (89 lb in).