
Cavalier L4-2.2L VIN 4 (1998)
Fuel Rail: Service and Repair
Description
REMOVAL PROCEDURE
1. Relieve the fuel system pressure.
2. Remove the negative battery cable.
3. Remove the air cleaner outlet resonator.
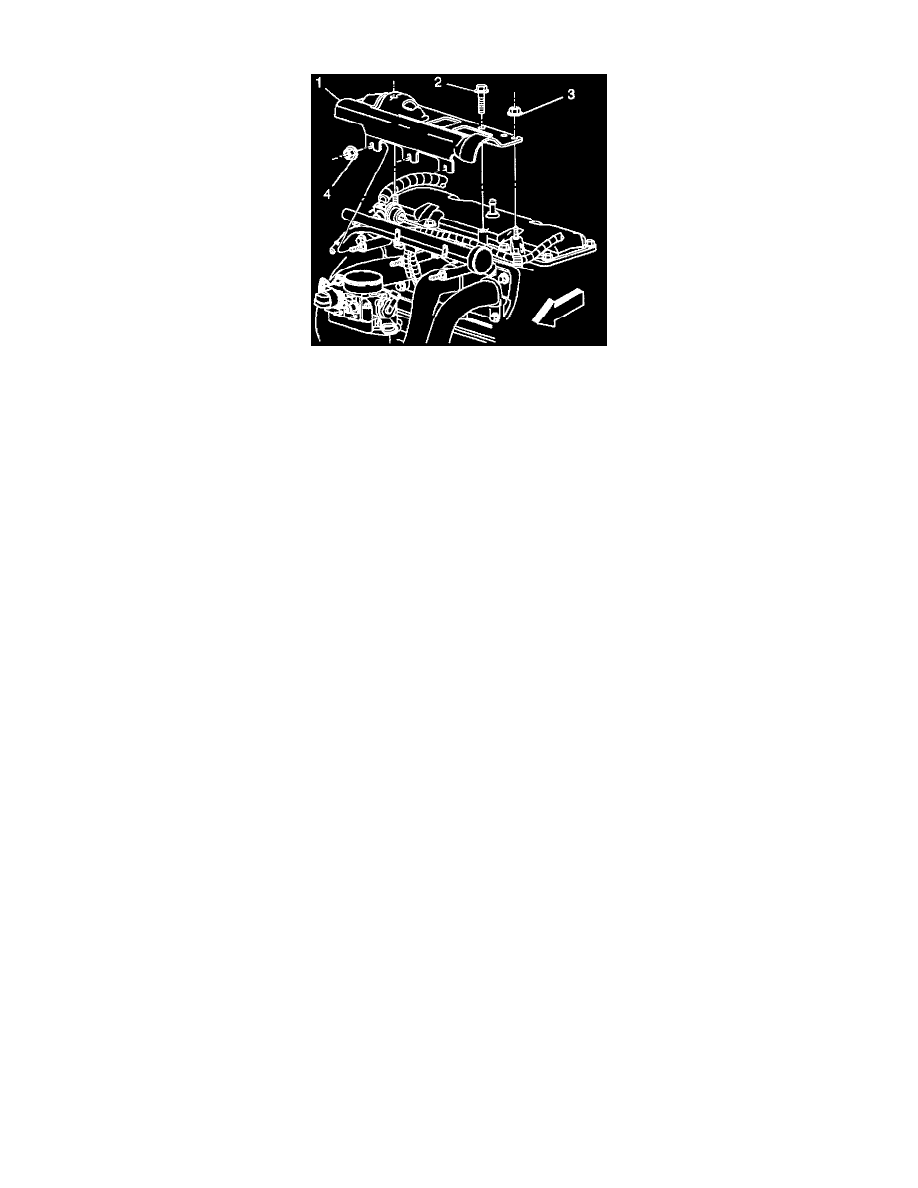
4. Remove the fuel rail bracket.
5. Remove the fuel injector electrical connectors by pushing in the wire connector clip and pulling the electrical connector away from the fuel
injector.
6. Remove the fuel feed inlet pipe quick connect.
7. Remove the fuel return pipe quick connect.
8. Remove the fuel rail attaching bolts.
9. Remove the fuel rail assembly from the cylinder head.
INSTALLATION PROCEDURE
1. Insert the fuel rail into the cylinder head.
2. Install the fuel rail attaching bolts. Tighten the fuel rail attaching bolts to 24 Nm (18 lbs ft).
3. Install the fuel feed inlet pipe quick connect.
4. Install the fuel return pipe quick connect.
5. Install the fuel injector electrical connectors.
6. Install the fuel rail bracket.
6.1. Tighten the fuel rail bracket nut (4) to 10 Nm (89 lbs in).
6.2. Tighten the fuel rail bracket nut (3) to 25 Nm (18 lbs ft).
6.3. Tighten the fuel rail bracket bolt (2) to 25 Nm (18 lbs ft).
7. Connect the negative battery cable.
8. Inspect for fuel leaks through the following steps:
8.1. Turn the ignition switch to the ON position for two seconds.
8.2. Turn the ignition switch to the OFF position for ten seconds.
8.3. Turn the ignition switch to the ON position.
8.4. Check for fuel leaks.