
Cavalier L4-2.2L VIN 4 (1998)
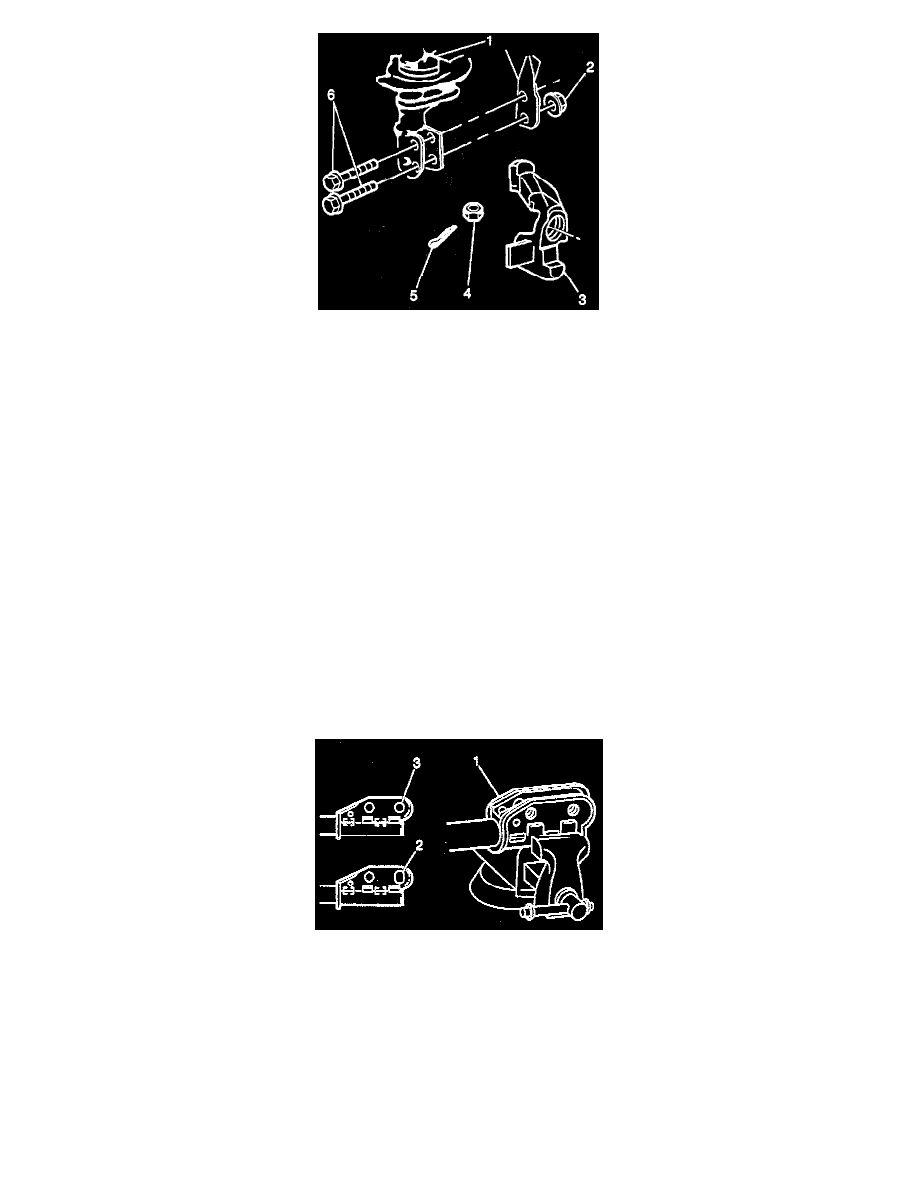
3. Align the steering knuckle (3) with a strut flange scribe mark and install the bolts (6) and nuts (2).
Tighten
Tighten the nuts to 130 Nm (133 ft. lbs.).
4. Tighten the nuts (1) attaching the top of the stout assembly to the body.
Tighten
Tighten to 25 Nm (18 ft. lbs.).
5. Tighten the bolt (2) attaching the top of the strut assembly to the body.
Tighten
Tighten to 25 Nm (18 ft. lbs.).
6. Install the brake line bracket.
7. If a suspension contact hoist is used:
7.1. Slightly raise the vehicle.
7.2. Remove the jackstand from under the crossmember.
8. Install the tire and wheel assembly. Refer to WHEEL INSTALLATION in TIRES AND WHEELS.
9. Check the front wheel alignment. Refer to WHEEL ALIGNMENT SPECIFICATIONS in WHEEL ALIGNMENT.
Strut Replacement (Strut Modification)
ADJUSTMENT PROCEDURE
Perform stout modification on or off the vehicle.
1. Elongate the lower strut to knuckle hole (2) on the strut (1) before adjusting the camber. This allows movement of the knuckle.
2. Paint the filed area after modification. Painting protects the are from corrosion. Use a rust preventative paint.
3. Disconnect the strut (1) from the knuckle if the strut is on the vehicle. Place the strut in a vise if the strut is off the vehicle.
4. File the lower hole (2) until the outer flange slot match the inner flange slot.
5. Reconnect the strut to the knuckle.
6. Check the wheel alignment. Refer to MEASURING WHEEL ALIGNMENT (FRONT ALIGNMENT ANGLES).
7. Adjust camber if necessary. Refer to FRONT CAMBER ADJUSTMENT.
Strut, Strut Component and/or Spring Replacement