Cavalier L4-2.2L VIN F (2004)

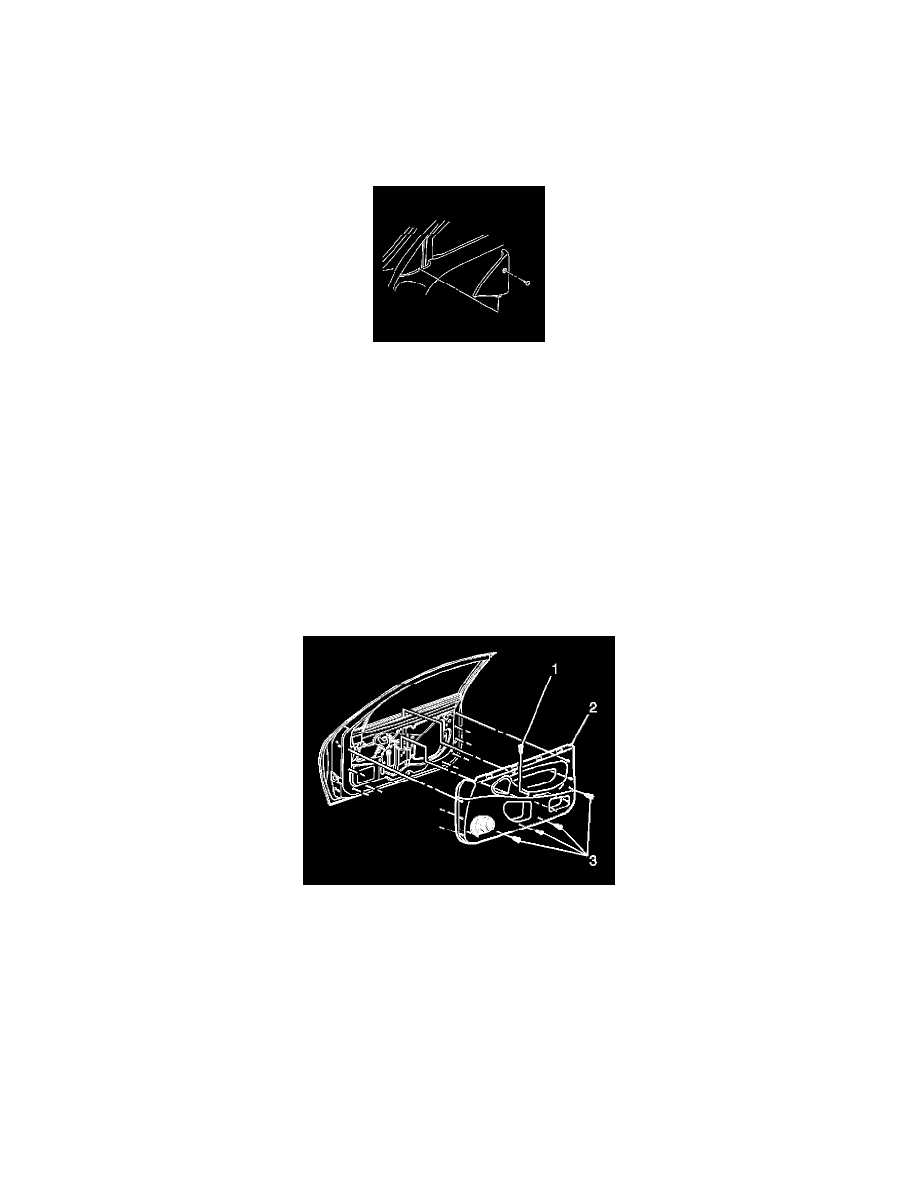
4. Install the door trim panel screws (3).
Tighten the screws to 1.5 N.m (13 lb in).
5. Install the door armrest screw (1).
Tighten the screw to 5.7 N.m (51 lb in).
6. Install the upper extension trim panel.
7. Install the upper extension trim panel screw.
Tighten the screw to 1.3 N.m (12 lb in).
8. Install the power door lock switch, if equipped.
9. Install the window regulator handle to the door, if equipped.
Trim Panel Replacement - Side Front Door
TRIM PANEL REPLACEMENT - SIDE FRONT DOOR
TOOLS REQUIRED
J 38778 Door Trim Pad and Garnish Clip Remover
REMOVAL PROCEDURE
1. Remove the manual window regulator handle, if equipped.
2. Remove the power door lock switch, if equipped.
3. Remove the upper trim finish panel screw.
4. Remove the upper trim finish panel.
5. Remove the screws (3) from the trim panel (2).
6. Remove the screw (1) from the armrest.
7. Using J 38778 and starting at the door bottom, disengage the door trim panel retainers.
8. Lift up on the door trim panel (2) to disengage the inner belt molding from the door flange.
9. Remove the door trim panel (2) from the door.
10. Disconnect the door speaker electrical connector.
INSTALLATION PROCEDURE
1. Position the trim panel (2) to the front door.
2. Connect the door speaker electrical connector.
