
Cavalier L4-2.2L VIN F (2004)
9.
Remove the side transmission mount bolts and transmission mount through bolt. Refer to the illustrations above. Remove the mount from the
vehicle.
Important:
The transmission mount is directional. It is designed to absorb powertrain vibrations in one direction only. Incorrect orientation of the
replacement bushing may noticeably increase engine/powertrain vibration in the passenger compartment.
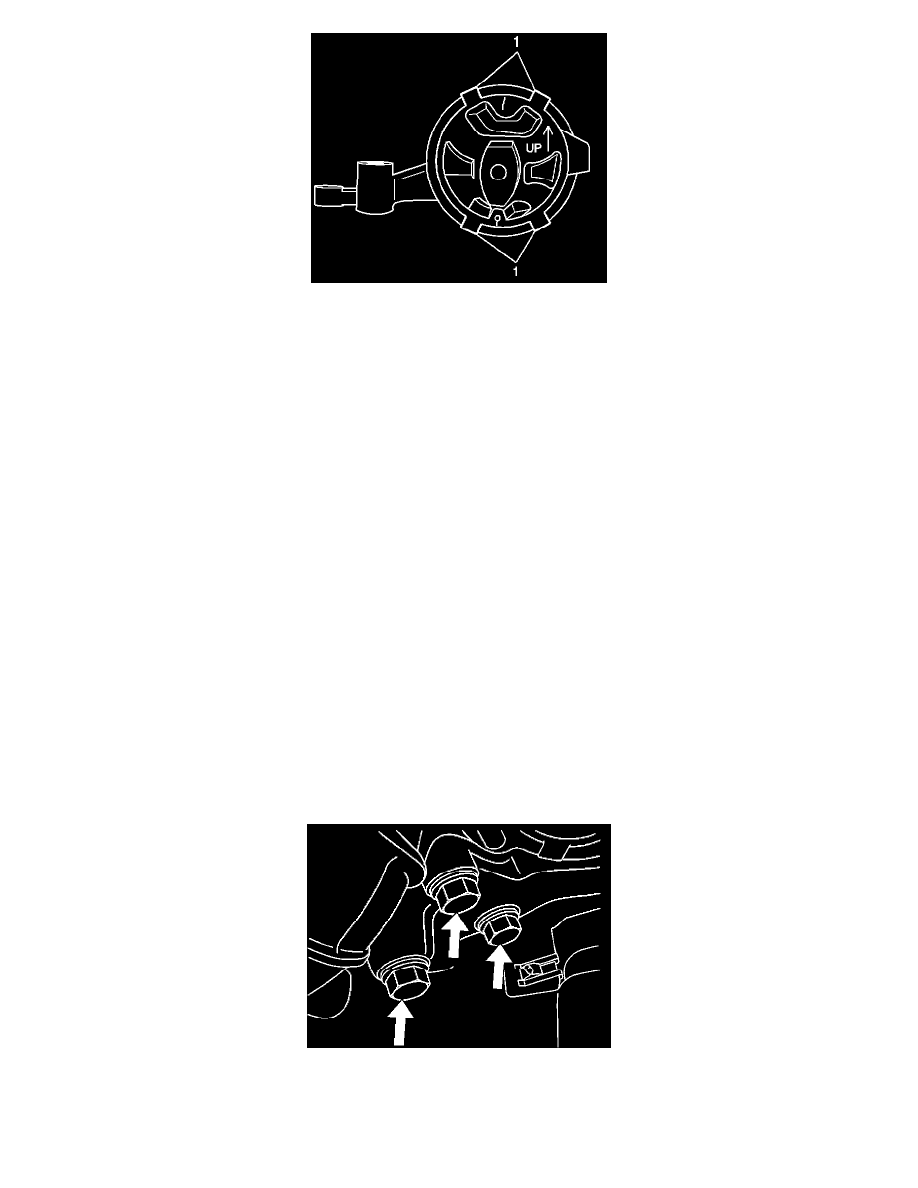
10.
Referring to the illustration above, observe the up arrow on the illustration along with the rubber molding dimples at the 12 and 6 o'clock
positions. Mark the metal portion of the mount using one or all of these indicators. You will use the marks as a guide when installing the new
transmission mount bushing.
11.
Locate the 4 metal tabs (1) in the illustration. You must bend all 4 tabs 90 degrees to facilitate the removal of the bushing.
12.
With the 4 tabs bent in, tap the opposite side of the bushing to slide it out of the mount. You may clamp the mount in a vise if required to
accomplish this task. Retention force on the bushing is low so this can be accomplished with little force.
13.
Repeat the same procedure with the replacement rear transmission mount. You will remove the bushing in the same manner but you will not need
to mark the metal mount body as it will be discarded.
Important:
The transmission mount is directional. It is designed to absorb powertrain vibrations in one direction only. Incorrect orientation of the
replacement bushing may noticeably increase engine/powertrain vibration in the passenger compartment.
14.
Transfer the rubber bushing from the new rear transmission mount and install it to the original side transmission mount. Use your alignment marks
to orient the new bushing in exactly the same way as the original. You must be certain that the bushing is installed in the same direction as the
original or you may increase the amount of engine vibration passed to the passenger compartment.
15.
Bend the 4 metal retaining tabs down 90 degrees until flat to the metal mount.
16.
Install the side transmission mount and secure the bolts.
17.
Tighten the side transmission mounting bolts.
Tighten
Tighten the mounting bolts to 75 N.m (60 lb ft).