
Cavalier/Z24 L4-134 2.2L (1991)
1. Install inboard shoe and lining (7) by snapping shoe retaining sprlng (14) into piston (5) inside diameter. Shoe must lay flat against piston.
2. Install outboard shoe and lining (8) with wear sensor (9) at leading edge of shoe. During forward wheel rotation, the back of the shoe must lay flat
against caliper.
3. Liberally coat inside diameter of bushings (2) with silicone grease.
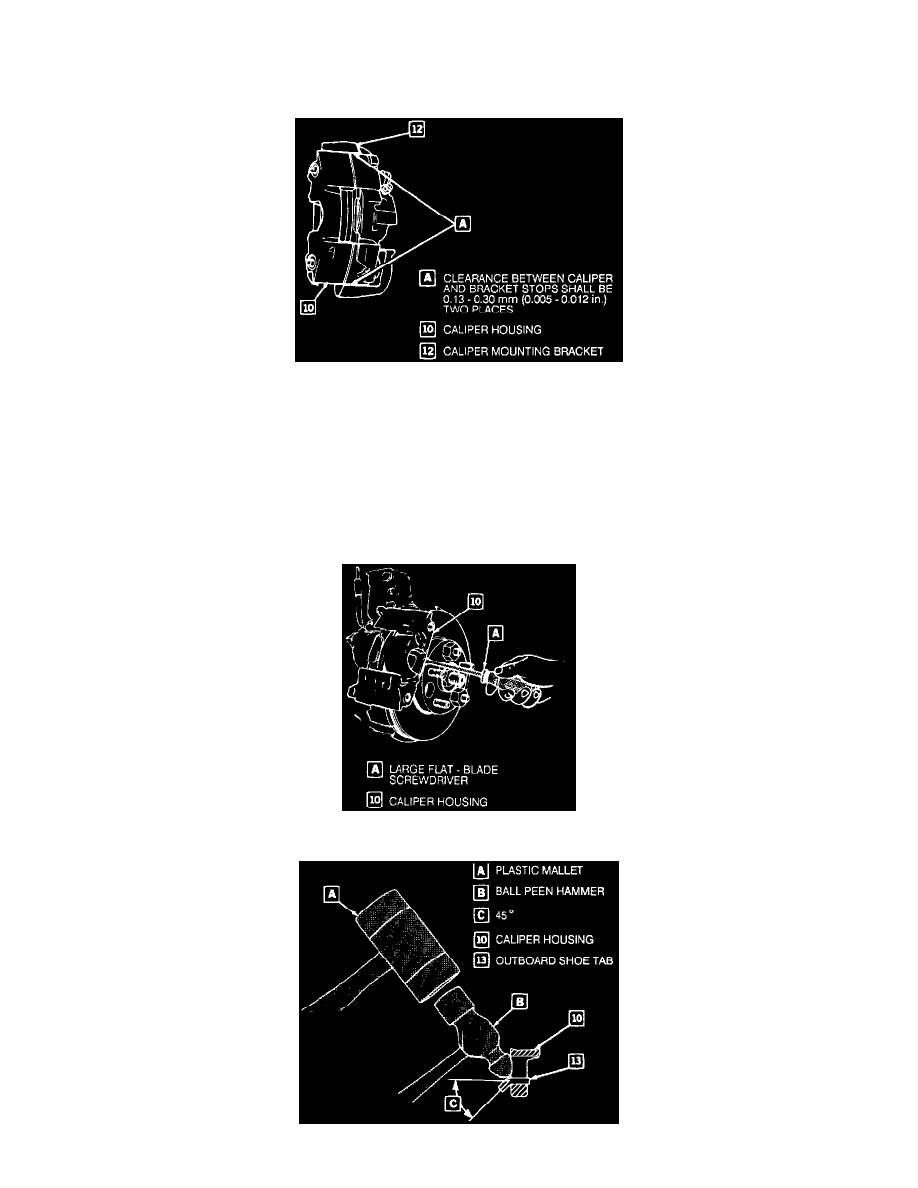
Caliper To Bracket Clearance
4. Position caliper assembly over disc and align mounting bolt holes (12). If brake hoses were not disconnected during removal, use care not to kink
hoses during installation.
5. Install mounting bolts and tighten to 51 Nm (38 lbs. ft.).
6. Check clearance between caliper (10) and stops on the bracket (12). Clearance should be 0.13 to 0.30 mm (0.005 to 0.012 inch).
If necessary, remove caliper and file ends of the stops on the bracket (12) to provide proper clearance.
7. Install inlet fitting, if removed and torque to 45 Nm (33 lbs. ft.).
8. Fill master cylinder. Bleed brake system if brake line was disconnected and recheck master cylinder fluid level.
9. Apply a firm force three times to brake pedal to seat linings.
Clinching Procedure (Step 1)