
Cavalier/Z24 L4-138 2.3L DOHC VIN D MFI (1995)
Water Pump: Service and Repair
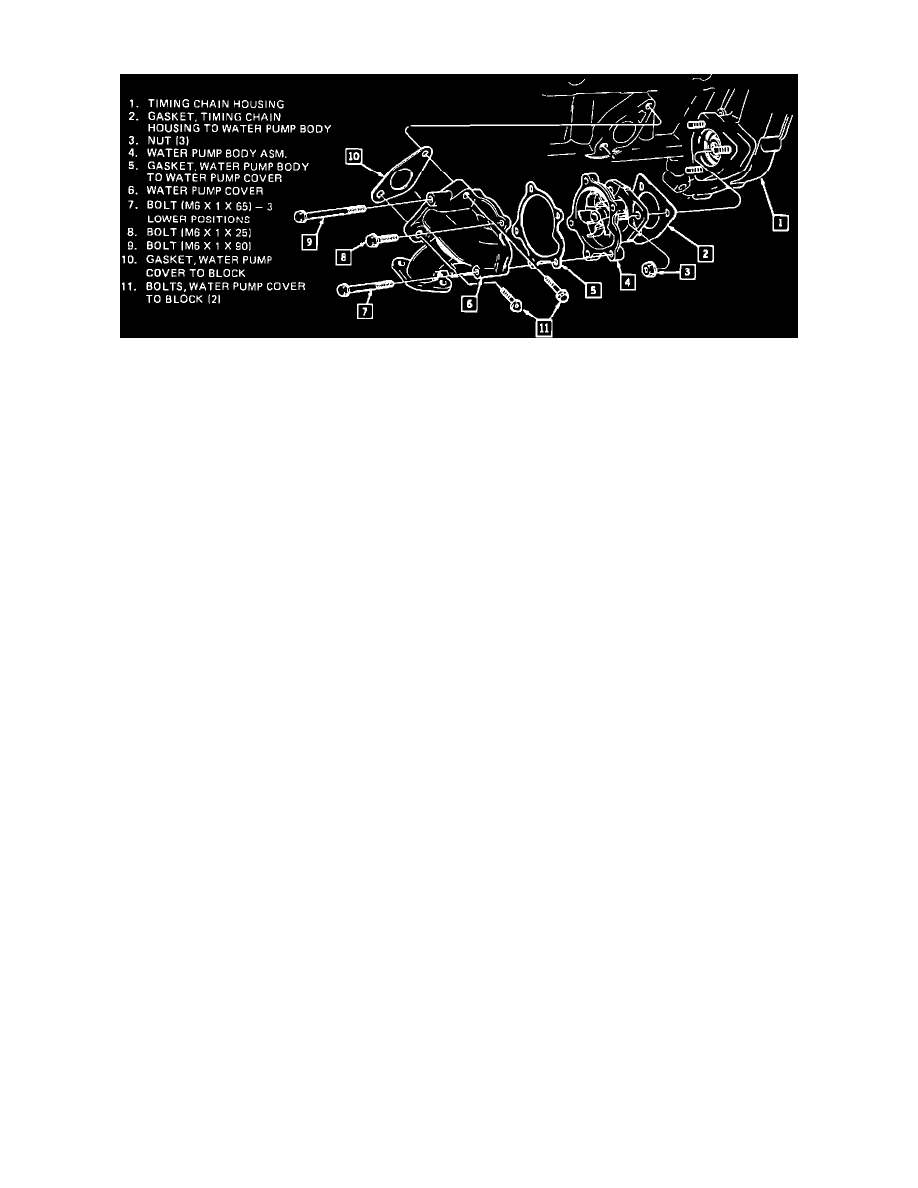
Water Pump And Cover
REMOVE OR DISCONNECT
1. Negative battery cable.
2. Drain and recover coolant.
3. Oxygen sensor connector.
4. Upper exhaust manifold heat shield.
5. Raise vehicle.
6. Exhaust manifold brace to manifold bolt.
7. Lower exhaust manifold heat shield.
8. Break loose the manifold to exhaust pipe spring loaded nuts.
9. Radiator outlet pipe asm. to coolant pump cover bolts.
10. Exhaust pipe from exhaust manifold.
11. Pull down and back on the exhaust pipe to disengage it from the exhaust manifold bolts.
12. Radiator outlet pipe from oil pan and transaxle. If equipped with manual transaxle the exhaust manifold brace will have to be removed. Leave the
lower radiator hose attached and pull down on the radiator outlet pipe to disengage it from the coolant pump. Leave the radiator outlet pipe hang.
13. Lower vehicle.
14. Exhaust manifold to cylinder head retaining nuts.
15. Exhaust manifold, seals and gaskets.
16. Coolant pump cover to cylinder block bolts.
17. Coolant pump assembly to timing chain housing nuts.
18. Coolant pump and cover assembly.
19. Coolant pump cover to coolant pump assembly bolts.
CLEAN
^
All sealing surfaces.
INSTALL OR CONNECT
NOTE: Prior to installing coolant pump read the entire procedure. Pay special attention to the tightening sequence to avoid part damage and to insure
proper sealing.
1. Coolant pump cover to coolant pump assembly and install bolts hand tight.
2. Lubricate splines of coolant pump drive with Chassis Grease GM P/N 1051344 or equivalent and install pump and cover assembly.
3. Cover to block bolts hand tight.
4. Pump to chain housing nuts hand tight.
5. Lube "0" ring on radiator outlet pipe with an anti-freeze solution and slide pipe into coolant pump cover install bolts hand tight.
6. With all gaps closed, torque in sequence as follows:
a. Pump assembly to chain housing nuts.
b. Pump cover to pump assembly.
c. Cover to block, bottom bolt first.
d. Radiator outlet pipe asm. to cover.
7. Exhaust manifold and new gaskets.
8. Exhaust manifold to cylinder head retaining nuts. Follow the tightening sequence and tighten to specification.
9. Raise vehicle.
10. Index exhaust manifold bolts into exhaust pipe flange.
11. Exhaust pipe to exhaust manifold.