
Cavalier/Z24 V6-191 3.1L VIN T MFI (1994)
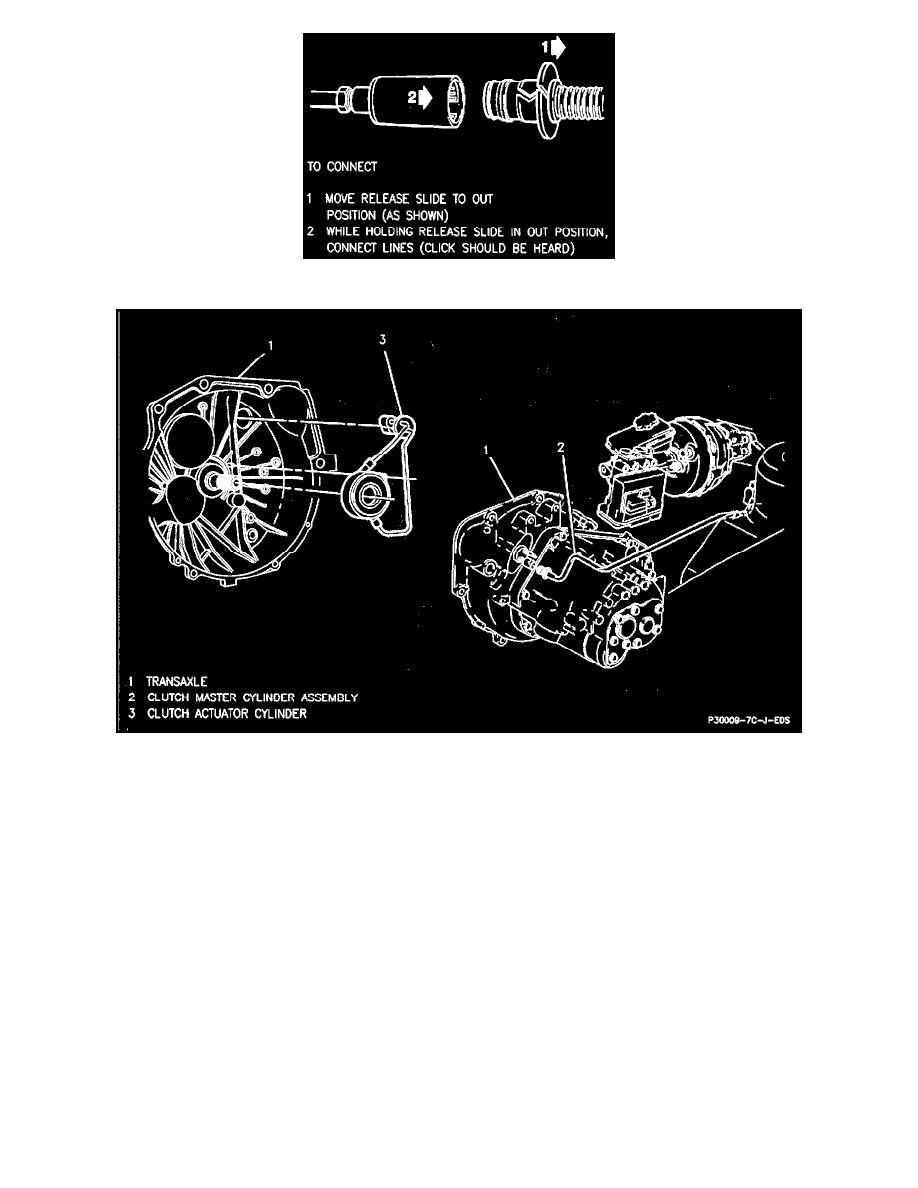
(Figure 3) Connecting Clutch Actuator Cylinder Line
(Figure 4) Clutch Actuator
REMOVE OR DISCONNECT
1. Air intake duct from air cleaner.
2. Negative and positive battery cables from battery.
3. Left fender brace and battery.
4. Intake Air Temperature (IAT) sensor lead at air cleaner.
5. Mass air flow sensor lead, then remove Positive Crankcase Ventilation (PCV) retaining clamp from air intake duct.
6. Clamp retaining air intake duct to throttle body.
7. Mass air flow mounting bolt and air cleaner bracket mounting bolts at battery tray.
8. Air cleaner, mass air flow sensor and air intake duct as an assembly.
9. Electrical lead at washer bottle, then remove attaching bolts and washer bottle.
10. Cruise control mounting bracket retaining nuts from strut tower, if equipped.
11. Sound insulator from inside of vehicle.
12. Clutch master cylinder pushrod from clutch pedal.
14. Actuator cylinder quick disconnect from master cylinder line, (figure 2).
15. Transaxle from vehicle, refer to Manual Transmission/Transaxle / Service and Repair.
16. Clutch actuator from transaxle, (figure 4).
INSTALL OR CONNECT
1. Actuator cylinder to transaxle.
2. Transaxle assembly.
3. Actuator cylinder quick connect to clutch master cylinder line, (figure 3).