
Celebrity L4-151 2.5L (1982)
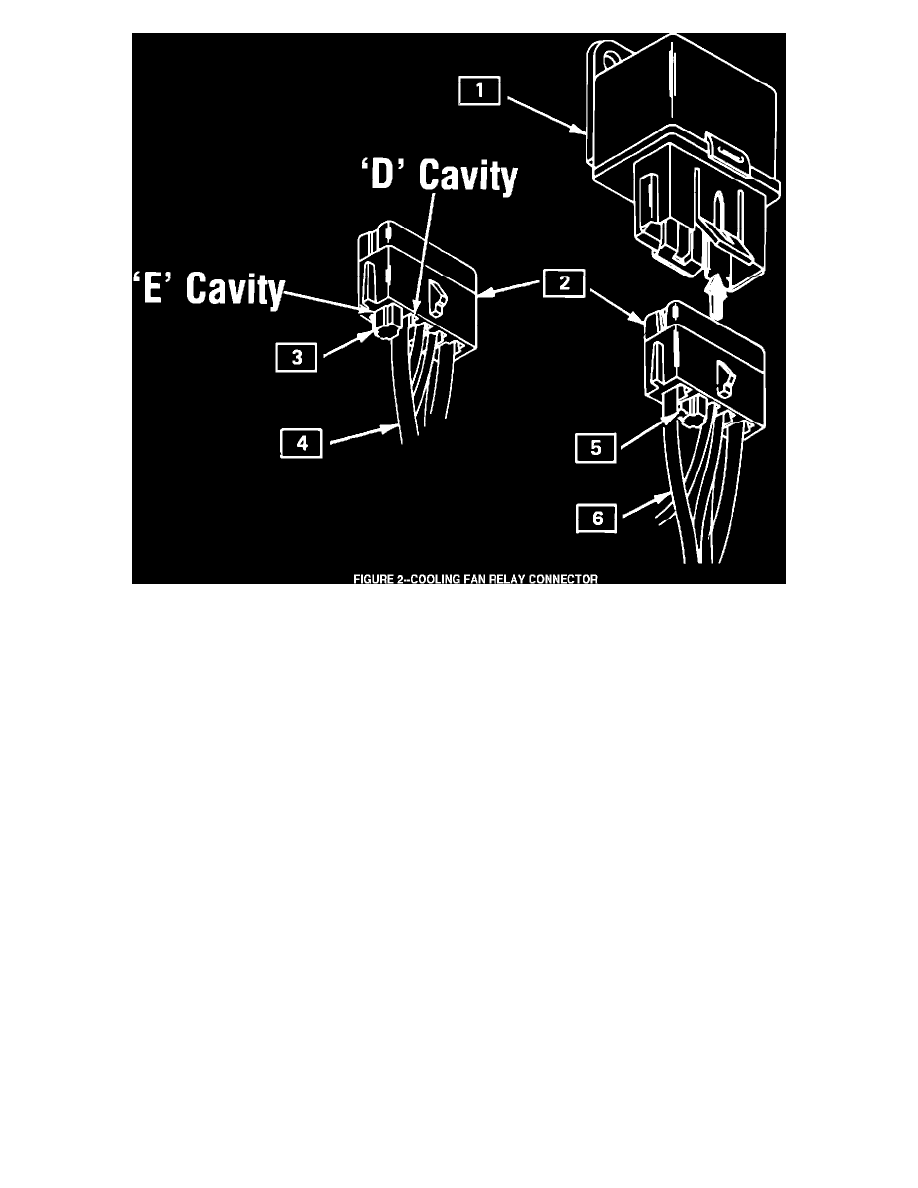
Figure 2 - Cooling Fan Relay Connector
1.
Sequentially change wire location in connector as shown in Figure 2.
2.
Be sure to insert plastic plug into cavity "D" as shown in Figure 2.
3.
Install new relay P/N 10033118 using the two retainers removed from old relay.
4.
Snap connector into relay. Be sure connector seats properly.
5.
Reconnect negative battery cable.
PART II - COOLING FAN OPERATION SHOULD BE CHECKED AFTER INSTALLATION OF THE NEW RELAY USING THE FOLLOWING
PROCEDURE
1.
Engine should be cool enough that cooling fan is not running. (Engine cooling fan will operate if the engine temperature switch senses coolant at
or above 23~F (110~C)).
2.
Ground under dash diagnostic connector by jumping TEST terminal B GROUND terminal A.
3.
Turn ignition switch to "ON" position only. DO NOT START ENGINE.
4.
Operate the air control level of the A/C control. Engine cooling fan should be operating when lever is in the A/C positions of MAX, NORM, or
BI-LEVEL. (The engine cooling fan will also operate in the DEFROST position on 1982-1983 Celebrity and Citation models that include an
additional relay, added for engine cooling fan operation).
5.
Remove ground specified in Step 2.
6.
If engine cooling fan does not operate as outlined in Step 4 above, re-check for proper installation of cooling fan relay wiring outlined in PART I -
REPLACEMENT OF COOLING FAN RELAY procedure.
7.
If relay wiring is correct and engine cooling fan still does not operate, review the normal diagnostic procedures for cooling fan operation in
appropriate service manual..