
Citation V6-173 2.8L VIN Z 2-bbl HP (1983)
16.
Connect the rod and retainer assembly to the manual valve.
17.
Install the control valve assembly, spacer plate and gaskets, placing the check balls in their proper locations. Torque all valve body to case cover
attaching bolts to 11 N-m. (8 ft.lbs.), and all valve body to case attaching bolts to 24 N-m (18 ft.lbs.).
18.
Connect the wire assembly to the electrical connector.
19.
Install the throttle lever and bracket assembly.
20.
Install the valve body cover and gasket (or RTV sealant). Torque all bolts to 16 N-m (12 ft.lbs.).
Technical Service Bulletin # 83T22
Date: 830201
Front Converter Seal - Oil Leak
Number:
83-T-22
Section:
VIIc
Date:
Feb., 1983
Subject:
FRONT CONVERTER SEAL OIL LEAK - 1982-83 CELEBRITY, CAVALIER AND CITATION
FIGURE 1
TO:
ALL CHEVROLET DEALERS
Some THM 125C transmissions may experience a front oil leak condition which is due to the front converter seal coming out of its seat in
the case bore. This condition results from an oil pressure backup behind the converter seal, which causes the converter seal to lose its seat
in the case bore.
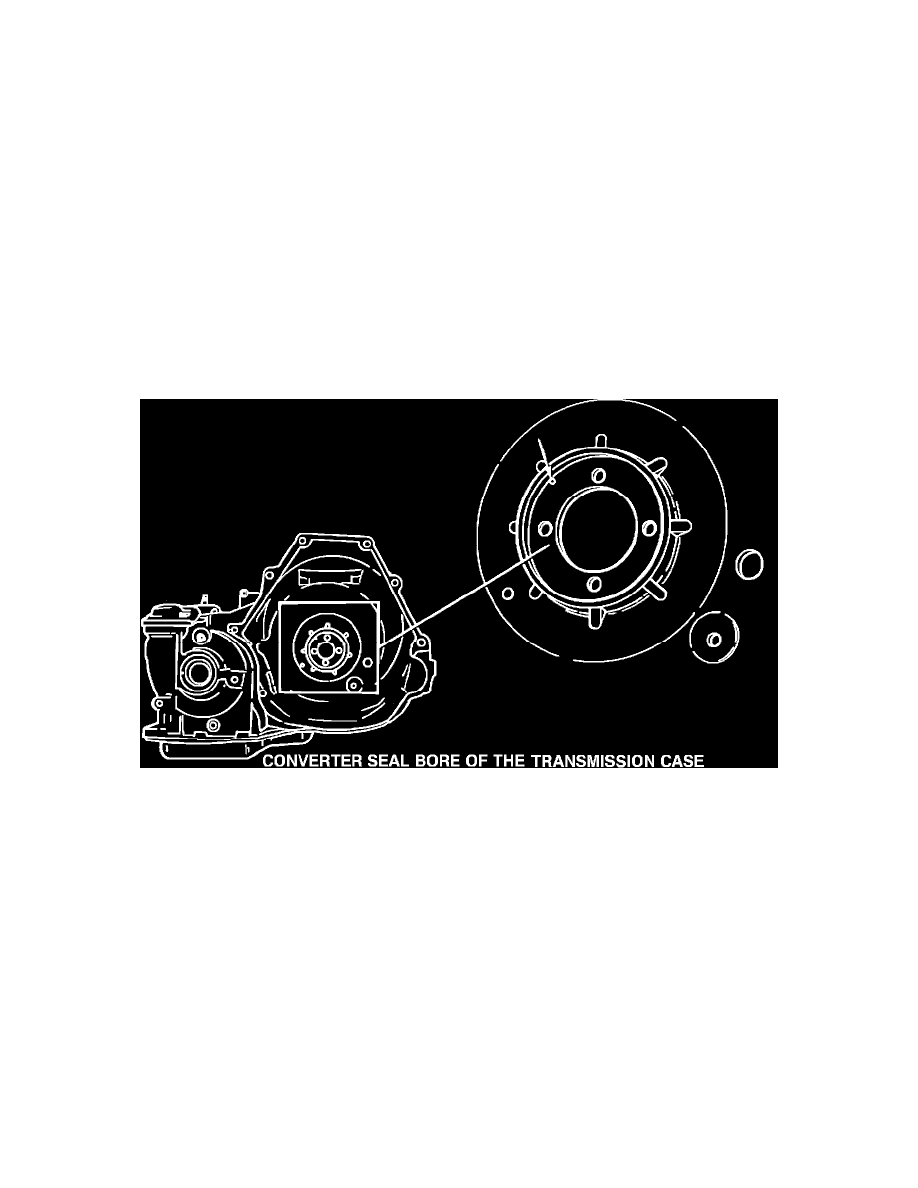
In servicing any THM 125C transmission for this condition, it is recommended that an oil drainback hole be drilled into the converter seal
bore of the transmission case (Figure 1).
Proper location is important in drilling the hole. Refer to the following service procedure:
SERVICE PROCEDURE
Always refer to the service manual for the proper removal and installation procedures of component parts.
1.
With the converter removed and the transmission in its holding fixture, (Tool #J-28664), remove the valve body cover and gasket (or RTV
sealant).
2.
Remove the throttle lever and bracket assembly.