
Cobalt L4-2.0L SC VIN P (2005)
Fluid - A/T: Service and Repair
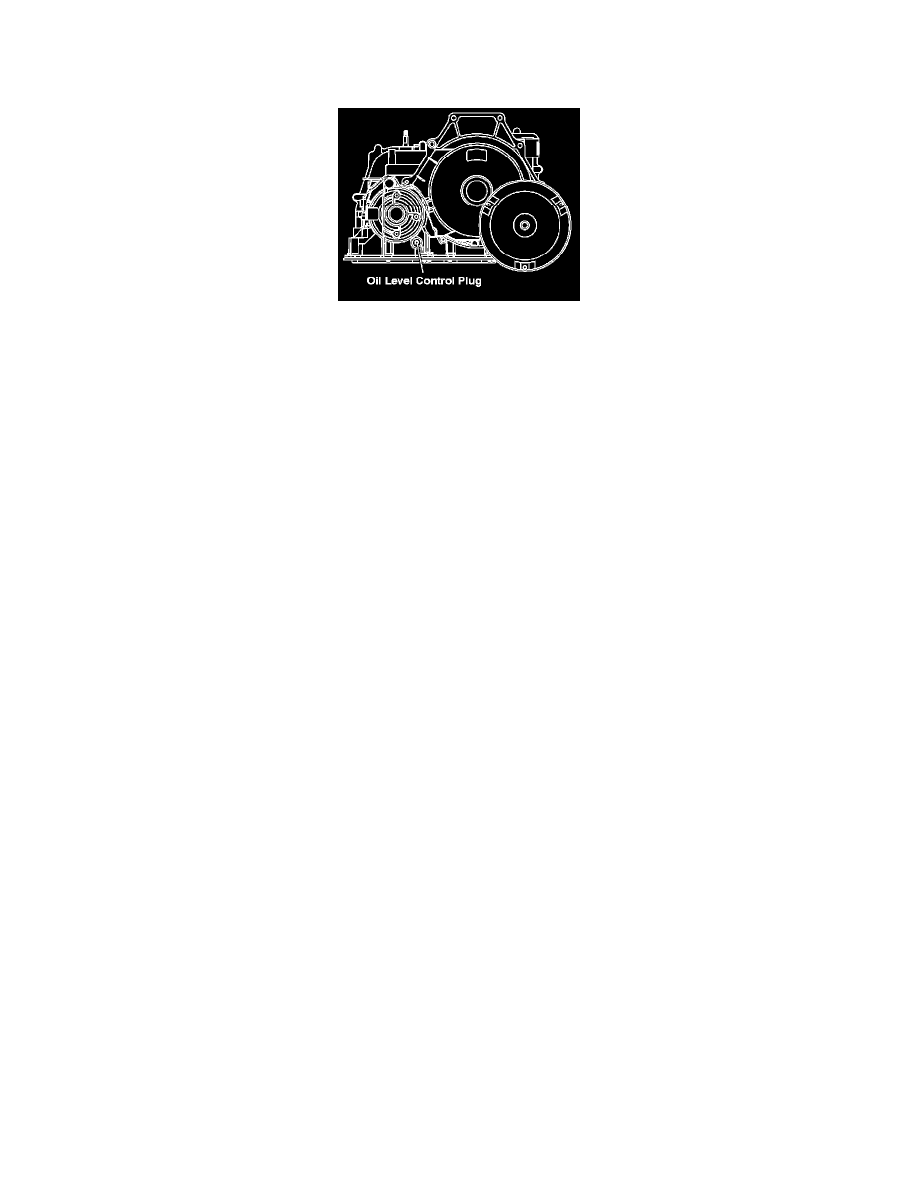
TRANSAXLE FLUID CHECKING PROCEDURE
NOTE: It is not necessary to check the transmission fluid level. A transmission fluid leak is the only reason for fluid loss. If a leak occurs have it
repaired as soon as possible.
The fluid level screw is intended to be used for diagnosing a transaxle fluid leak or resetting the transaxle fluid level after service that involves a loss
of fluid.
Inspect
The fluid level should be checked when the transaxle is near Room temperature or at 40°C (104°F).
CAUTION: Removal of the fluid level screw when the transaxle fluid is hot may cause injury. Use care to avoid contact of transaxle fluid to
exhaust pipe.
The engine must be running when the transaxle fluid level screw is removed, or excessive fluid loss will occur. Since the actual fluid level is unknown,
stand clear when removing the fluid level screw. Have a container ready to capture any lost fluid.
WARNING: Do not turn the engine off with the fluid level screw removed as you can be injured by hot transaxle fluid being expelled out of
the fluid check hole.
1. Let vehicle idle for three to five minutes with accessories off.
2. Apply brake
3. Move shift lever through all gear ranges, pausing three seconds in each range.
4. Place shift lever in Park.
Important: Vehicle must be kept level on the hoist.
5. Raise vehicle on hoist.
6. Place oil container under fluid level screw.
7. Remove the fluid level screw with the engine running at idle.
8. Fluid level should be at the bottom of the fluid check hole. Because the transaxle operates correctly over a range of fluid levels, fluid may or may
not drain out of the fluid check hole when the fluid level screw is removed. If fluid drains through the fluid check hole, this transaxle may have
been overfilled. When fluid stops draining, the fluid level is correct and the fluid level screw may be installed. If fluid does not drain through the
fluid check hole, the transaxle fluid level may be low. Proceed to ADDING TRANSAXLE FLUID.
9. Install fluid level screw.
Tighten 12 Nm (106 lb. in.)
10. Lower vehicle.
11. Shut off engine.
Adding Transaxle Fluid:
With the engine running, add fluid at the vent cap location in half liter (1 pint) increments until fluid drains through the fluid check hole. Allow the
fluid to finish draining through the fluid check hole.
1. Install fluid level screw.
Tighten 12 Nm (106 lb. in.)
2. Lower vehicle.