
Cobalt L4-2.2L (2008)
1. Raise and support the vehicle. Refer to Lifting and Jacking the Vehicle .
2. Remove the tire and wheel assembly. Refer to Tire and Wheel Removal and Installation (See: Service and Repair) .
3. Without disconnecting the hydraulic brake flex hose, remove and support the brake caliper and bracket as an assembly, and remove the brake
rotor. Refer to Front Brake Rotor Replacement (Without RPO LNF) Front Brake Rotor Replacement (With RPO LNF) .
4. Rotate the bearing hub to a position where the least amount of interference between the stud and the steering knuckle exists.
5. Using the J 43631 , release the wheel stud from the bearing hub and discard the stud.
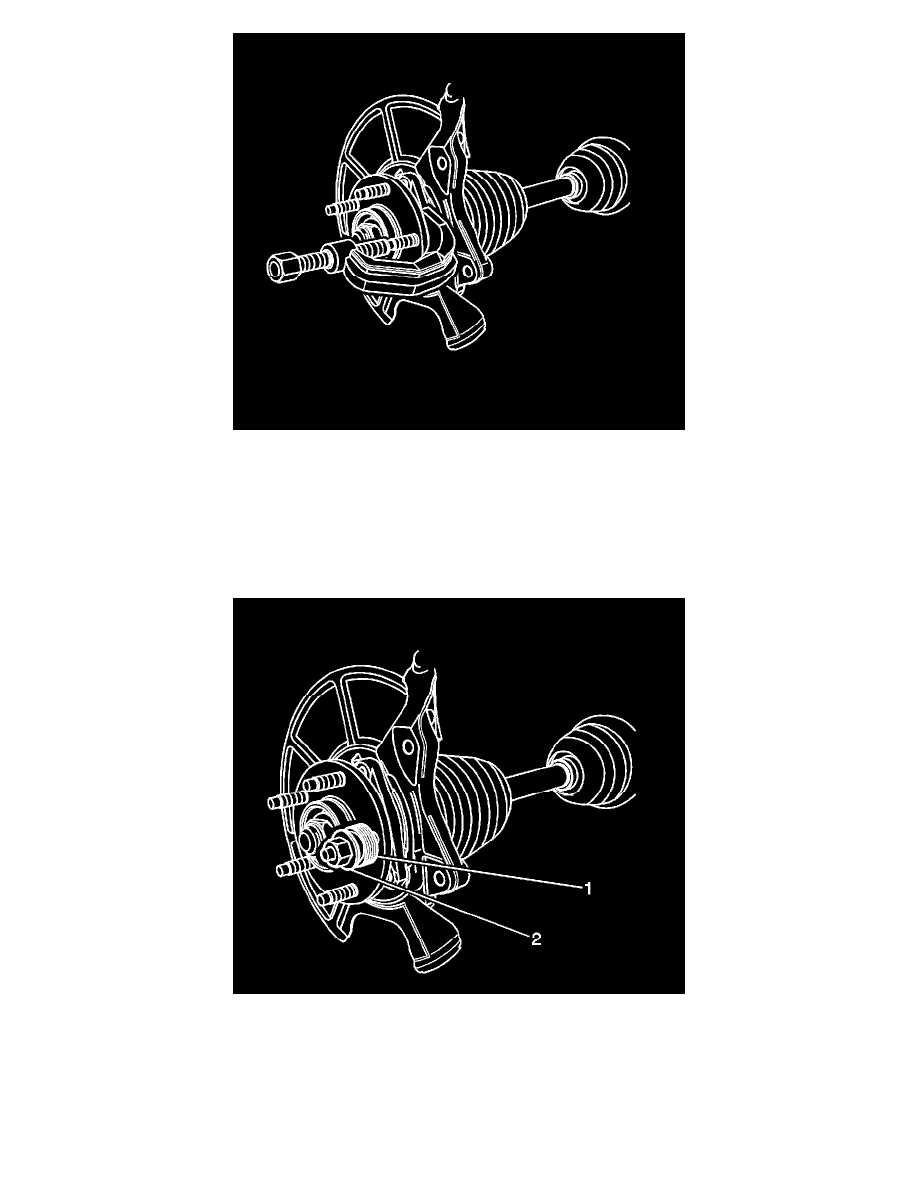
Installation Procedure
1. With the bearing hub still in position, install the NEW stud into the bearing/hub assembly.
2. Add enough washers (1) in order to draw the stud into the hub.
3. Install the wheel nut (2) with the flat side against the washers.
4. Tighten the wheel nut until the head of the wheel stud is fully seated against the back of the bearing hub flange.
5. Remove the wheel nut and the washers.
6. Install the brake rotor, and install the brake caliper and bracket as an assembly. Refer to Front Brake Rotor Replacement (Without RPO LNF)
Front Brake Rotor Replacement (With RPO LNF) .
7. Install the tire and wheel assembly. Refer to Tire and Wheel Removal and Installation (See: Service and Repair) .