
Colorado 2WD L4-2.8L VIN 8 (2004)
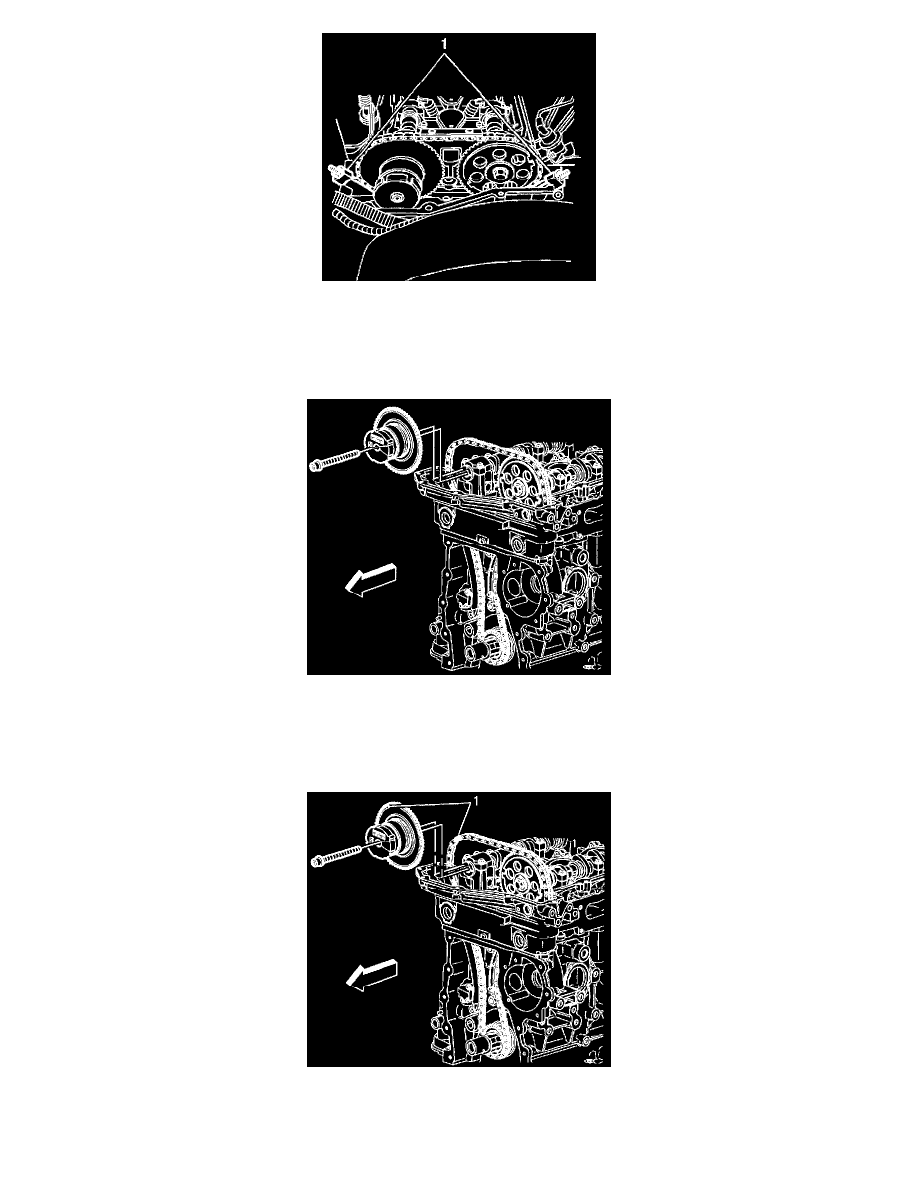
7. Complete the following in order to install the 442 17 (1) and EN-442 17-45 (1).
7.1.
Install the hook portion of the timing chain retention tools into one of the timing chain links near the timing chain shoe on both sides of the
engine.
7.2.
Tighten the wing-nuts.
7.3.
Ensure the hooks are still in one of the links and the gage blocks of the tool are firmly in place on the edge of the head.
8. Remove the exhaust camshaft position actuator bolt. Discard the bolt.
9. Remove the exhaust camshaft position actuator.
10. Clean and inspect the sprocket.
Installation Procedure
1. Ensure the camshaft actuator is fully advanced prior to installation.
2. Install the exhaust camshaft actuator into the timing chain. Aligning the marked link (1) on the timing chain with the timing mark (1) on the
exhaust camshaft position actuator sprocket.