
Colorado 2WD L4-2.8L VIN 8 (2004)
9. Locate and drill out all factory welds. Note the number and location of the welds for installations of the service part.
10. Remove the damaged windshield pillar section.
Installation Procedure
1. Cut the replacement windshield pillar section in corresponding locations to fit the original panel. The sectioning joint should be trimmed to allow 1
1/2 times the metal thickness at the sectioning joint.
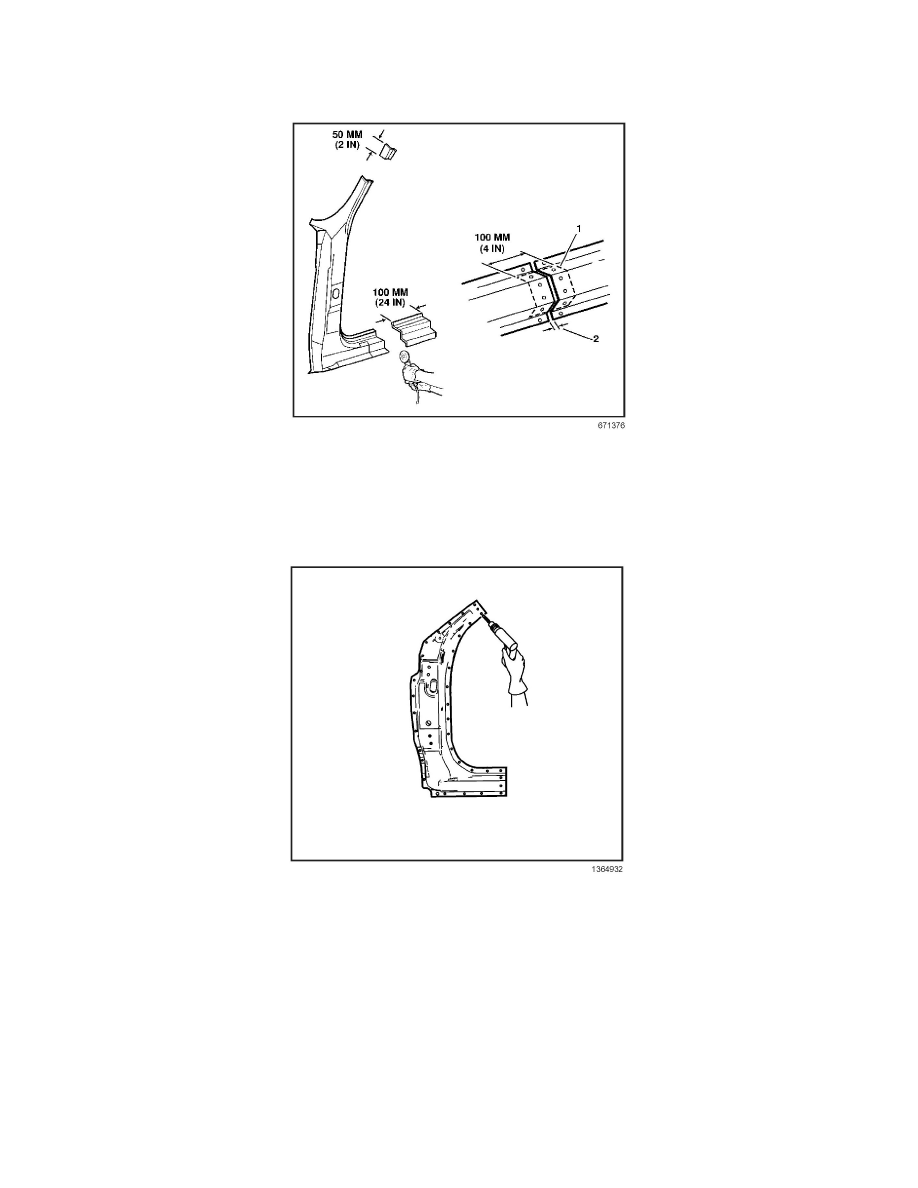
2. Create a 50 mm (2 in) backing plate (1) from the unused portion of the service part. Trim the backing plate as necessary to fit behind the
sectioning joint where there is no reinforcement.
3. Drill 8 mm (5/16 in) plug weld holes along the sectioning cut on the remaining original part. Locate these holes 13 mm (1/2 in) from the edge (A)
and spaced 40 mm (1 1/2 in) apart.
IMPORTANT: In any area damaged beyond recognition, or if structural Weld-Thru adhesive is present, space the plug weld holes 40 mm (11/2
in) apart.
4. Drill 8 mm (5/16 in) plug weld holes in the service part as necessary in the locations noted from the original panel and along the sectioning cut.
5. Prepare all attachment surfaces as necessary.
6. Apply 3M(r) Weld-Thru coating P/N 05916 or equivalent, to all mating surfaces.