
Colorado 2WD L5-3.5L VIN 6 (2005)
Front Door Weatherstrip: Service and Repair
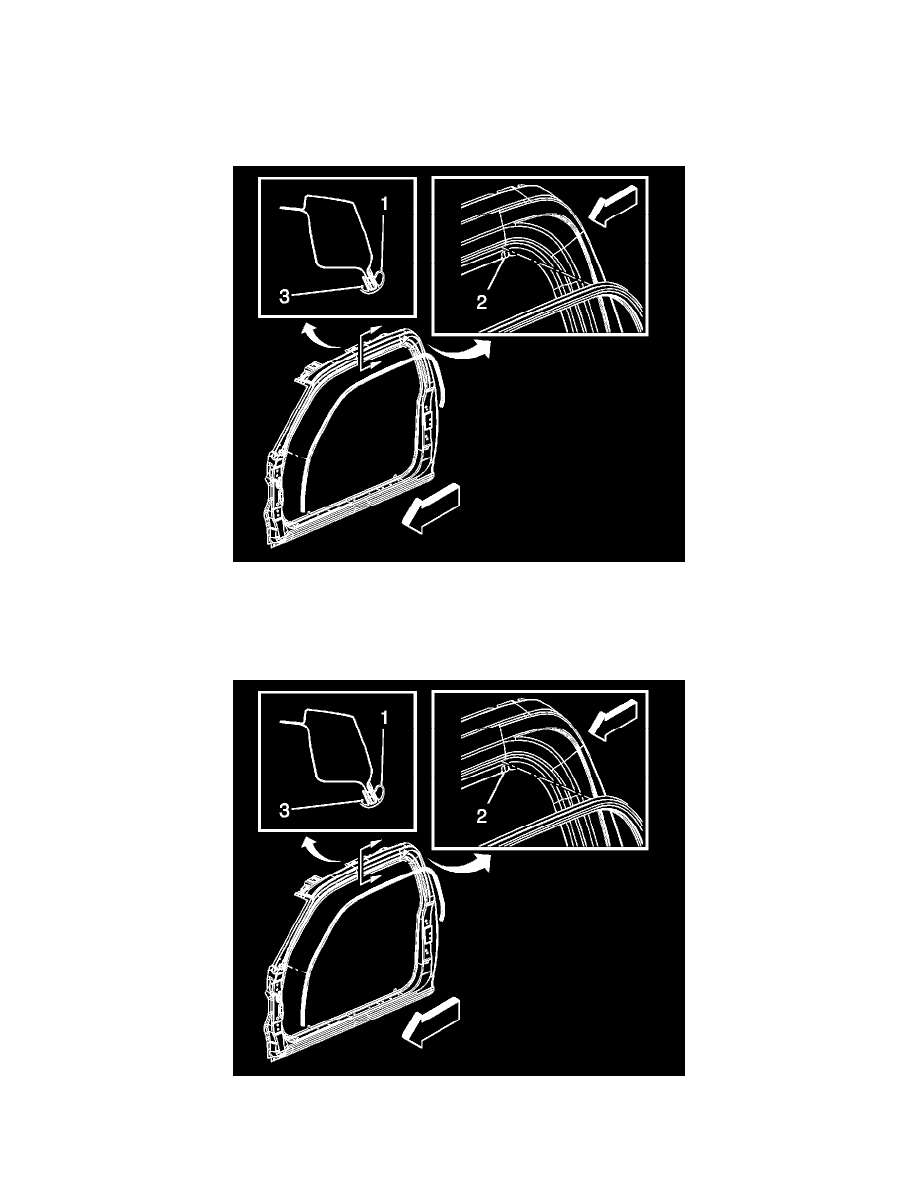
Weatherstrip Replacement - Front Door Opening (Extended)
Weatherstrip Replacement - Front Door Opening (Extended)
Removal Procedure
1. Open the front and rear door.
2. Remove the front door opening weatherstrip (1) from the opening pinchweld flange.
3. Remove the front door opening weatherstrip from the vehicle.
Installation Procedure
1. Align the paint dot on the front door weatherstrip to the notch (2) in the upper rear corner of the pitchweld flange.
2. Starting at the notch (2) in the upper rear corner, press the front door opening weatherstrip (1) onto the pinchweld flange until it is fully seated.
3. Pull the cord (3) on the front door opening weatherstrip, ensuring the weatherstrip lip overlaps the interior trim panels and headliner.