
Colorado 2WD L5-3.5L VIN 6 (2005)
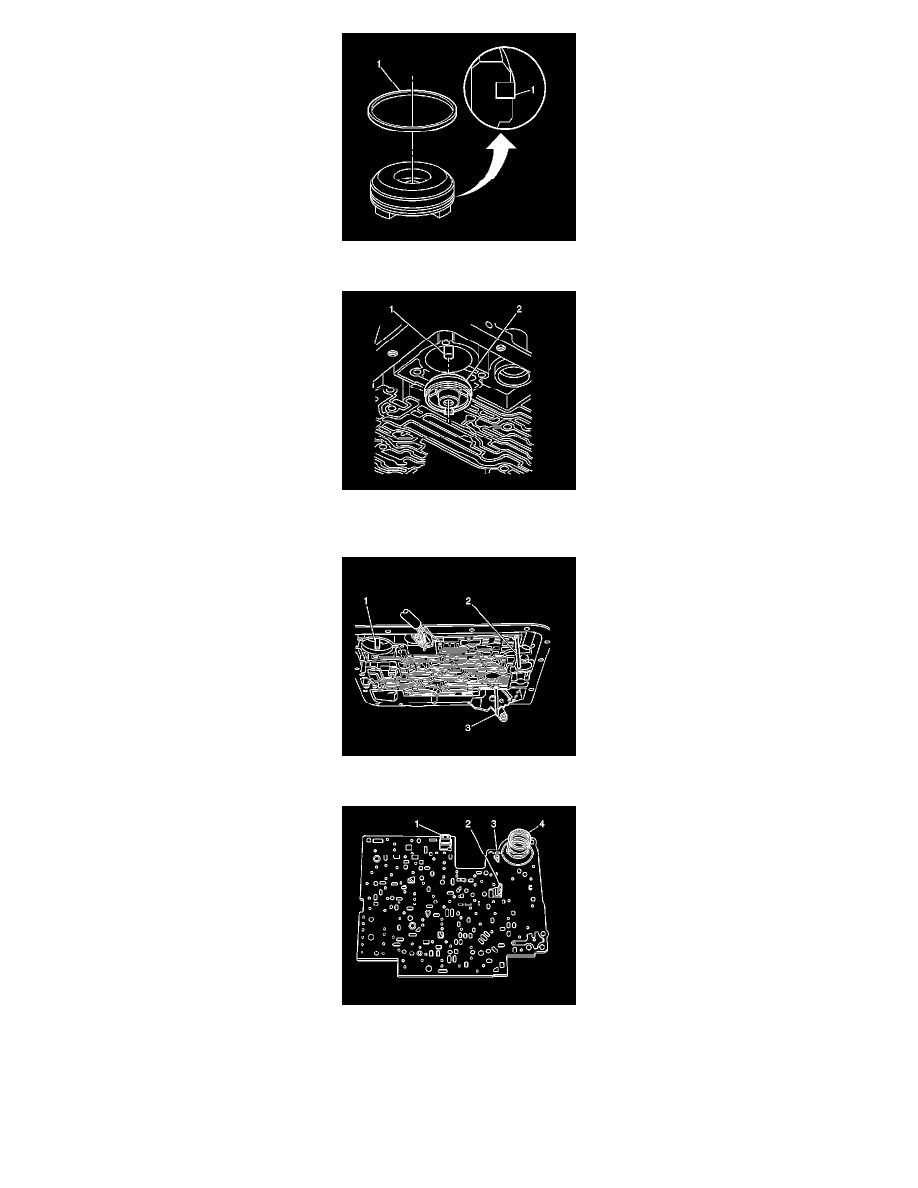
1. Install a new 3-4 accumulator piston seal (1) to the 3-4 accumulator piston.
2. Install the 3-4 accumulator piston (2) onto the pin (1) in the transmission case. Ensure that the 3-4 accumulator piston legs face away from the
transmission case.
3. Install the J 25025-B (2, 3) to the transmission case.
4. Install the spacer plate to transmission case gasket and the spacer plate to valve body gasket to the spacer plate; use J 36850 in order to retain the
gaskets to the spacer plate.
^
The case gasket is identified by a C. Be sure to place the case gasket on the transmission case side of the spacer plate.
^
The valve body gasket is identified by a V. Be sure to place the valve body gasket on the valve body side of the spacer plate.
5. Ensure that the solenoid screens (1, 2) are in place on the spacer plate.
6. Use a small amount of J 36850 in order to retain the checkball (3) on the spacer plate in the location shown.
7. Place the 3-4 accumulator spring (4) on the spacer plate.