
Colorado 2WD L5-3.7L (2007)
Front Bumper Cover / Fascia: Service and Repair
Front Bumper Fascia Replacement (XTREME)
Front Bumper Fascia Replacement (XTREME)
Tools Required
J 25070 Heat Gun (500-750°F )
Removal Procedure
Notice: Use a plastic, flat-bladed tool to prevent paint damage when removing an emblem/name plate.
1. Apply making tape to protect the painted surfaces.
2. Remove the front upper grille.
3. Raise and support the vehicle. Refer to Vehicle Lifting.
4. Remove the center air deflector.
5. Remove the push-pins in the center of the fascia, located in the center the of lower grille.
6. Disconnect the fog lamp electrical connectors.
7. Remove the push-pins from the left and right sides edges.
8. Lower the vehicle.
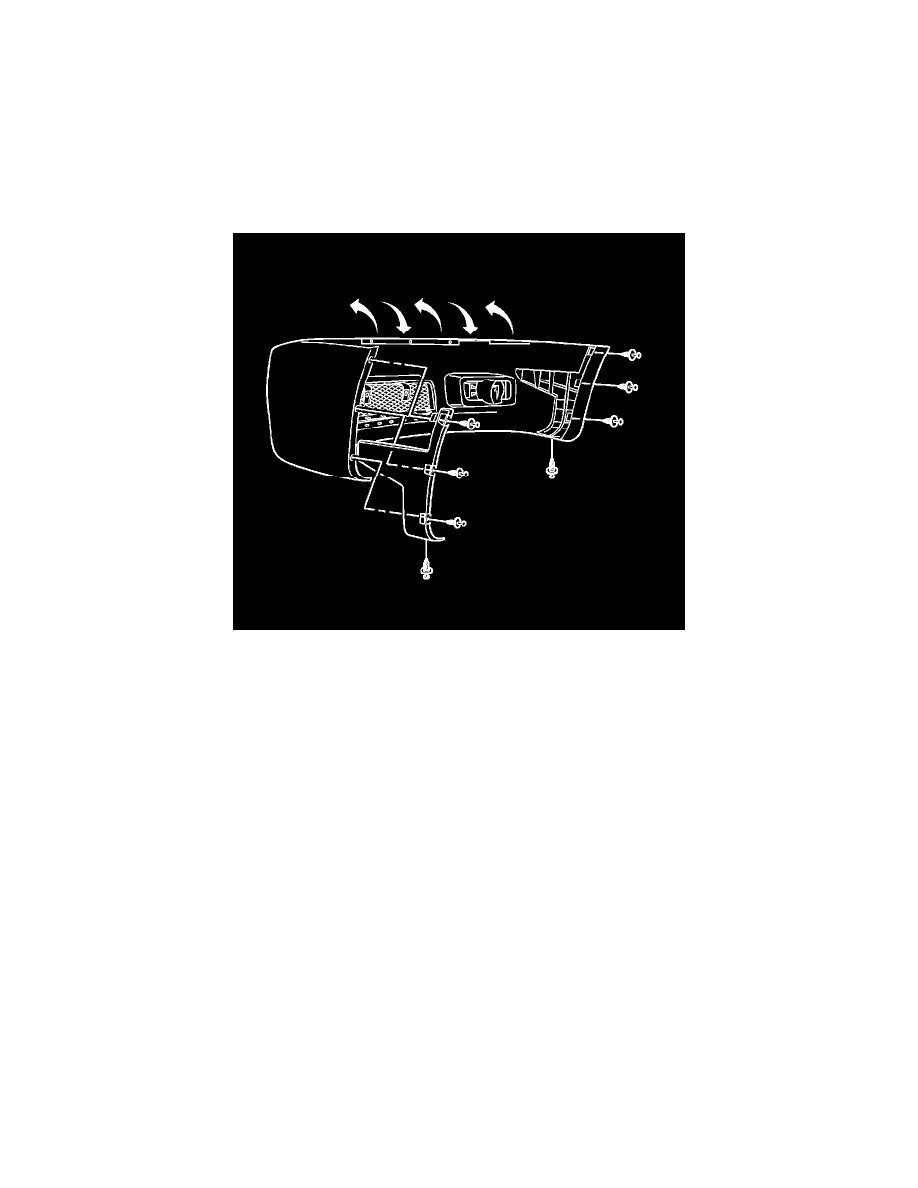
9. Remove the front fascia.
Important: The top center of the fascia is retained by an adhesive strip tape.
1. Heat the center of the fascia using a J 25070. Hold the heat gun approximately 152 mm (6 in) from surface.
2. Apply heat using a circular motion for about 30 seconds.
3. Using a flat-bladed tool, roll the center edge of the fascia surface upward to release it from the bumper.
10. Pull the fascia straight forward to remove.
11. Remove all adhesive from the back of the fascia using a 3M(TM) Scotch Brite molding adhesive remover disk 3M(TM) P/N 07501 or equivalent.
12. If replacing the fascia, the following parts will have to be transferred:
*
Remove the fog lamp grilles.
*
Remove the lower grille.
*
Remove the fog lamps.
13. Clean the surface of the fascia and bumper using Varnish Makers and Painters (VMP) naptha.
Installation Procedure