
Colorado 2WD V8-5.3L (2009)
Headliner: Service and Repair
Headlining Trim Panel Replacement (Crew Cab)
Headlining Trim Panel Replacement (Crew Cab)
Warning
Do not attempt to repair or alter the head impact energy-absorbing material glued to the headliner or to the garnish trims. If the material is damaged,
replace the headliner and/or the garnish trim. Failure to do so could result in personal injury.
Caution: Use care when working around the head curtain inflator module. Sharp tools may puncture the curtain airbag. If the head curtain inflator
module is damaged in any way, it must be replaced.
Caution: If a vehicle is equipped with a head curtain inflator module ensure that the inflator module and tether are undamaged. If tether or curtain
airbag are damaged in any way, they must be replaced.
Removal Procedure
1. Remove the right front door. Refer to Front Side Door Replacement (See: Doors, Hood and Trunk/Doors/Front Door/Service and Repair).
2. Remove the front seats. Refer to Split Bench Seat Replacement (See: Seats/Service and Repair/Split Bench Seat Replacement) or Front Seat
Replacement - Bucket (See: Seats/Service and Repair/Front Seat Replacement - Bucket).
3. Remove the rear seat. Refer to Rear Bench Seat Replacement (See: Seats/Service and Repair/Rear Bench Seat Replacement).
4. Remove the windshield garnish moldings. Refer to Windshield Pillar Garnish Molding Replacement (See: Trim Panel/Service and Repair).
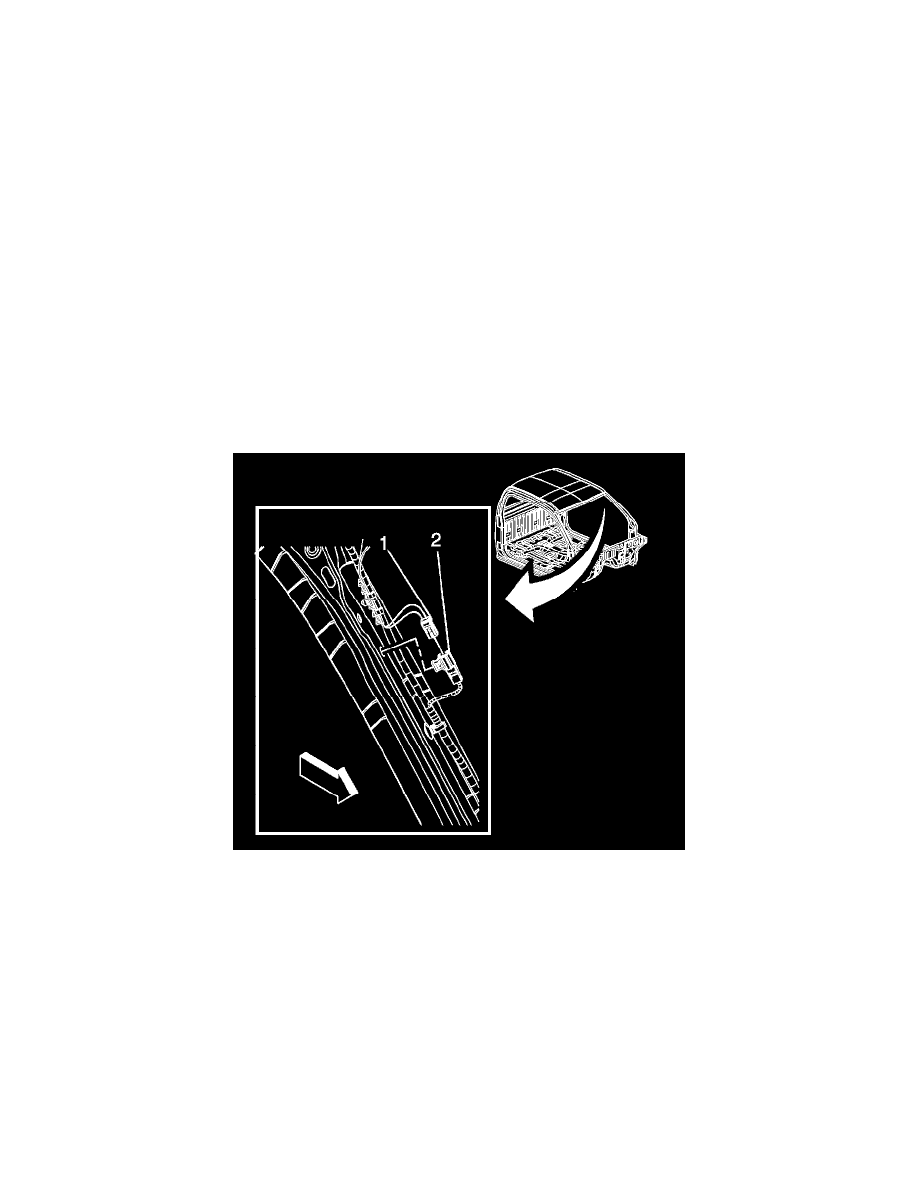
5. Disconnect the headliner harness (1) from the body harness (2).
6. Remove the lower center pillar trim panel. Refer to Center Pillar Lower Trim Panel Replacement (See: Trim Panel/Service and Repair).
7. Remove the upper center pillar trim panel. Refer to Center Pillar Upper Trim Panel Replacement (See: Trim Panel/Service and Repair).
8. Remove the lower body rear corner trim panels. Refer to Body Side Rear Lower Trim Panel Replacement (Regular Cab) (See: Trim
Panel/Service and Repair)Body Side Rear Lower Trim Panel Replacement (Crew Cab) (See: Trim Panel/Service and Repair)Body Side Rear
Lower Trim Panel Replacement (Extended Cab) (See: Trim Panel/Service and Repair).
9. Remove the upper body rear corner trim panels. Refer to Body Side Upper Trim Panel Replacement (Regular Cab, Extended Cab) (See: Trim
Panel/Service and Repair)Body Side Upper Trim Panel Replacement (Crew Cab) (See: Trim Panel/Service and Repair).
10. Remove the dome lamp. Refer to Dome Lamp Replacement (See: Lighting and Horns/Dome Lamp/Service and Repair).
11. Remove the sunshades. Refer to Sunshade Replacement (See: Sun Visor/Service and Repair).
12. Remove the assist handles and the driver assist handle or assist handle blank. Refer to Assist Handle Replacement (See: Passenger Assist
Handle/Service and Repair).
13. Remove the coat hooks. Refer to Coat Hook Replacement (See: Service and Repair).