
Colorado 4WD L4-2.9L (2008)
Fluid - Transfer Case: Service and Repair
Transfer Case Fluid Replacement
Removal Procedure
1. Raise and support the vehicle. Refer to Lifting and Jacking the Vehicle (See: Maintenance/Vehicle Lifting/Service and Repair) .
2. Clean away all dirt and debris from the transfer case fluid fill and drain plug areas.
3. Position an appropriate container under the transfer case assembly.
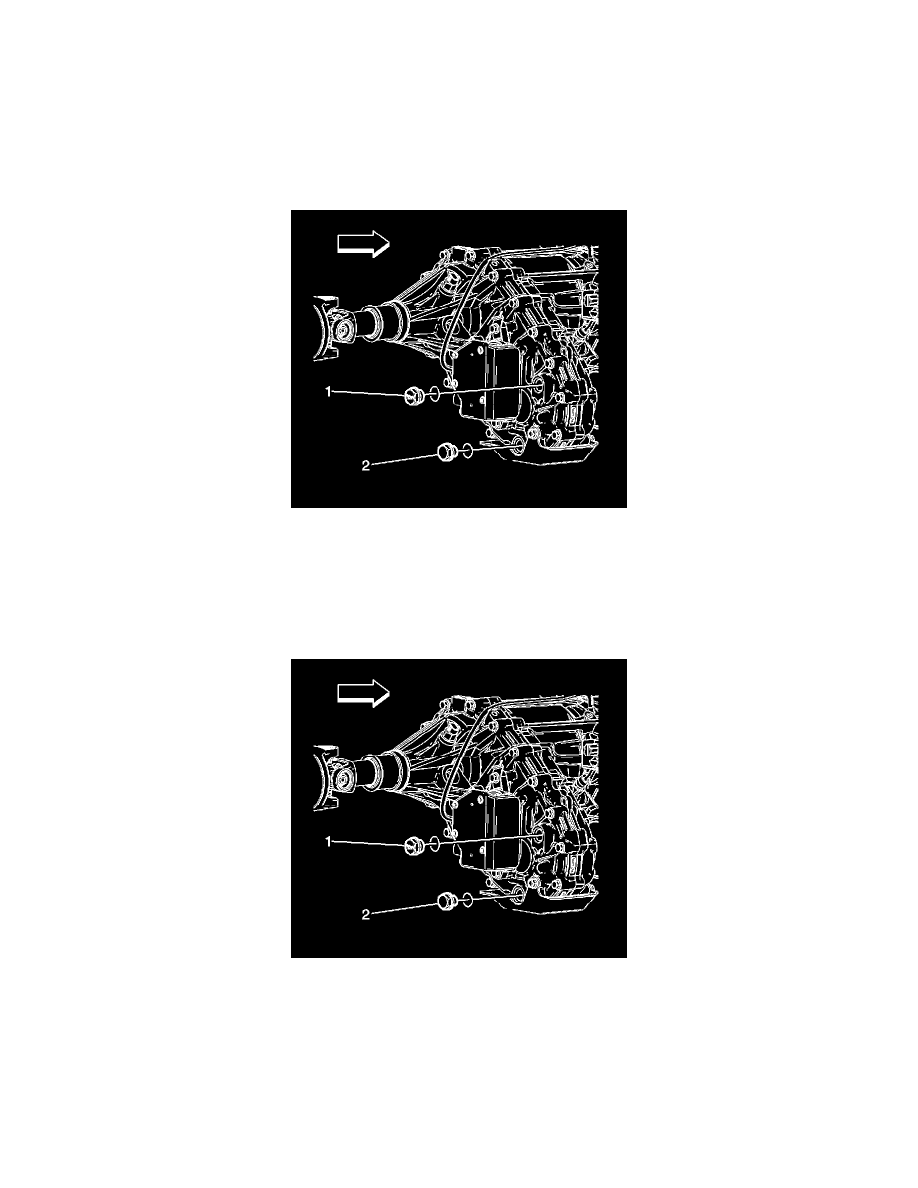
4. Remove the transfer case fluid fill plug (1) and O-ring gasket.
5. Remove the transfer case fluid drain plug (2) and O-ring gasket.
Allow the transfer case fluid to drain into the container.
6. Inspect the O-ring gaskets for wear.
Replace if necessary.
Installation Procedure
Notice: Refer to Component Fastener Tightening Notice (See: Service Precautions/Vehicle Damage Warnings/Component Fastener Tightening
Notice) .
1. Install the transfer case fluid drain plug (2) and O-ring gasket.
Tighten the drain plug to 39 N.m (29 lb ft).
2. Fill the transfer case to just below the bottom of the fill plug hole with the recommended fluid. Refer to Approximate Fluid Capacities () .
3. Install the transfer case fluid fill plug (1) and O-ring gasket.