
Colorado 4WD L5-3.7L (2007)
Rear Door Latch: Service and Repair
Rear Side Door Upper Latch Replacement
REAR SIDE DOOR UPPER LATCH REPLACEMENT
REMOVAL PROCEDURE
1. Open the rear side access door.
2. Remove the rear side access door trim panel.
3. Disconnect the upper latch rod from the latch by releasing the retaining clip.
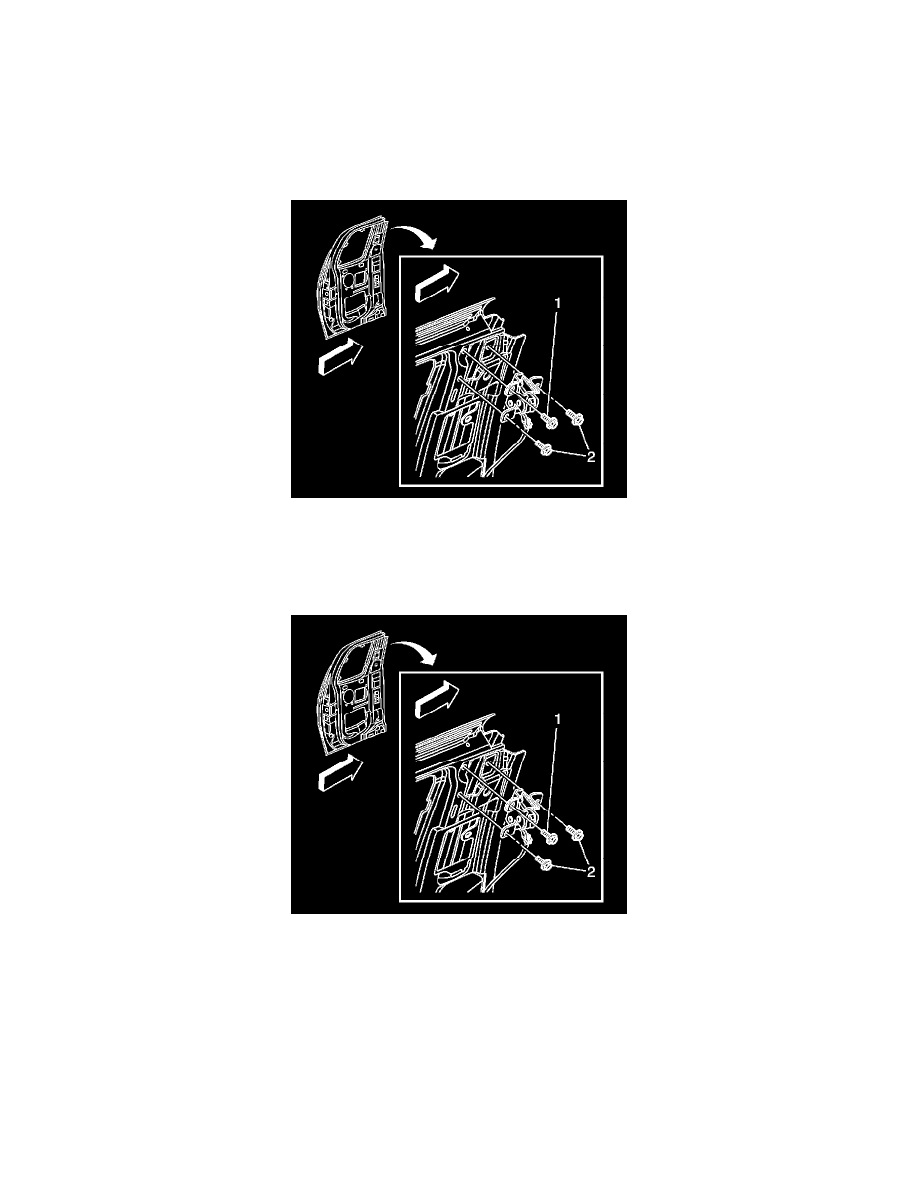
4. Remove the bolts (1, 2) retaining the upper latch to the rear side access door.
5. Remove the upper latch from the rear side access door.
INSTALLATION PROCEDURE
1. Install the upper latch to the rear side access door.
2. NOTE: Refer to Fastener Notice.
Loosely install the lower bolts (2) retaining the upper latch to the rear side access door.
Tighten the lower rear side access door upper latch bolts (2) until the latch bracket is flush to the door panel.
3. Connect the upper latch rod to the latch using the retaining clips.
4. Close the rear side access door to self align the upper latch.
5. Finish tightening the lower rear side access door upper latch bolts.
Tighten the upper latch bolts to 9 N.m (80 lb in).