
Colorado 4WD L5-3.7L (2007)
Accumulator: Service and Repair
Accumulator Assembly, Spacer Plate, and Gaskets
Tools Required
^
J 25025-B Pump and Valve Body Alignment Pin Set
^
J 36850 Transjel Lubricant
Removal Procedure
1. Remove the transmission oil pan and filter. Refer to Automatic Transmission Fluid and Filter Replacement.
Important: The 1-2 accumulator can be removed without removing the control valve assembly.
2. Remove the control valve body. Refer to Valve Body and Pressure Switch Replacement.
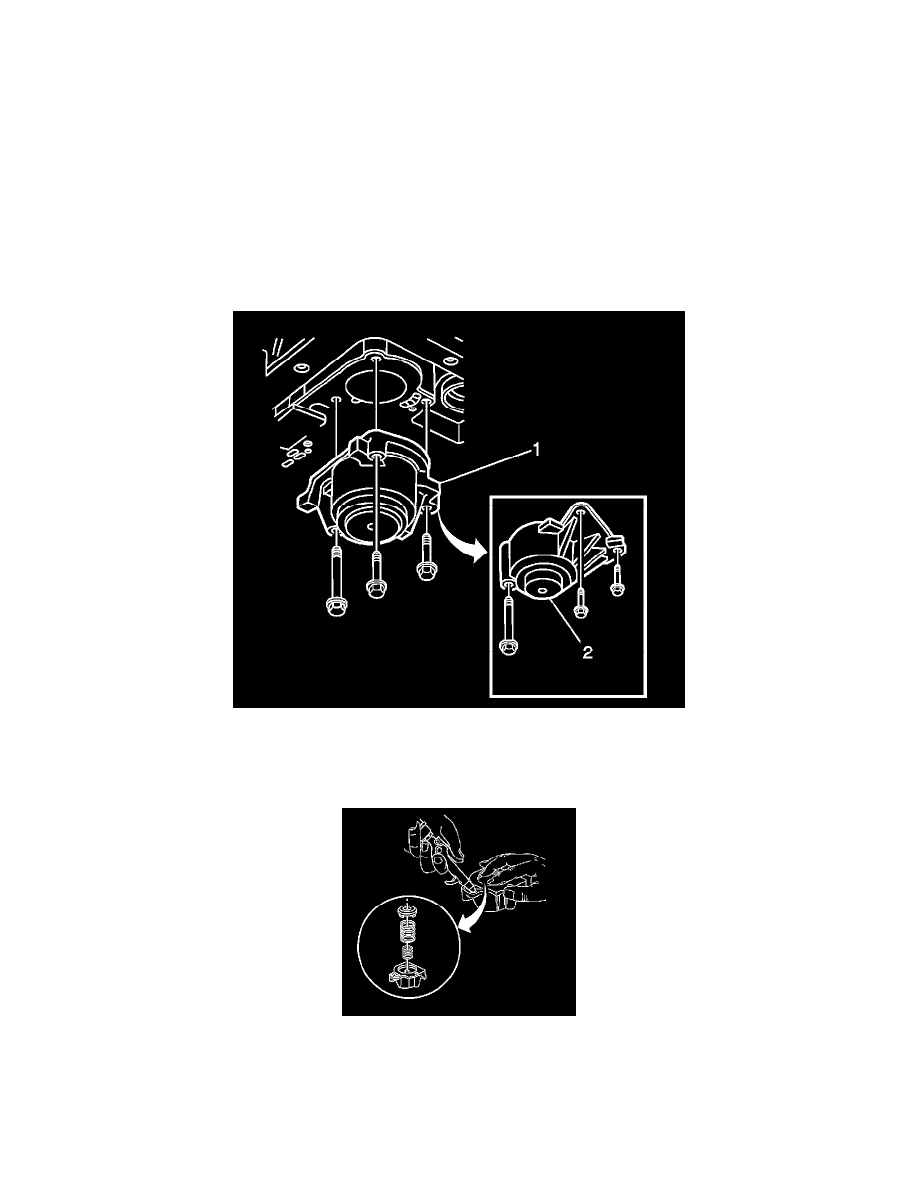
3. Remove the accumulator cover retaining bolts.
4. Remove the 1-2 accumulator cover assembly.
-
RWD (1)
-
4WD (2)
5. Disassemble the 1-2 accumulator.
1. Blow compressed air into the 1-2 accumulator cover, as shown, to remove the 1-2 accumulator piston.
2. Remove the 1-2 accumulator inner and outer springs.
6. Inspect the 1-2 accumulator inner and outer springs for cracks.