
Corsica L4-134 2.2L (1991)
-
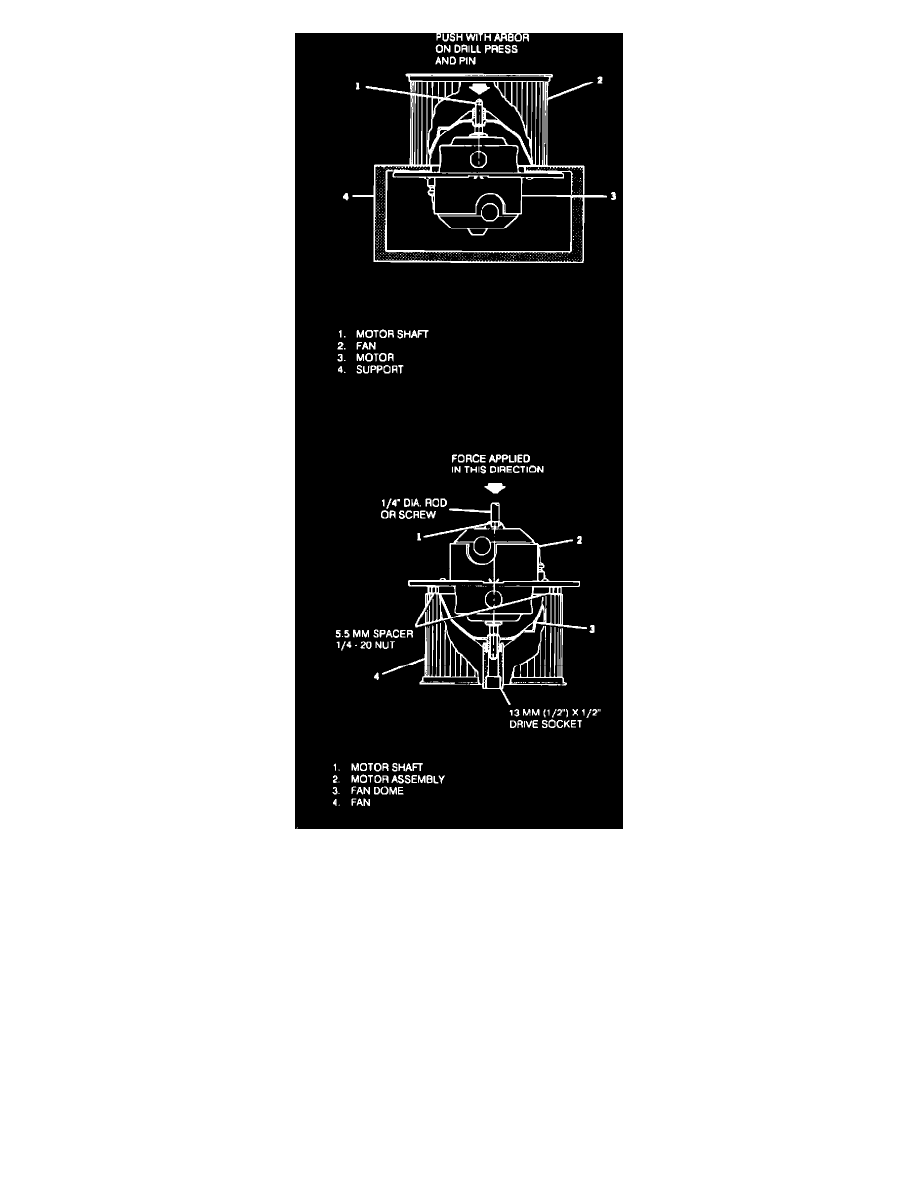
Use drill press or small arbor press.
^
Remove tip of fan, if necessary, at end of motor shaft using soldering iron or end cutting pliers, vise grip pliers or Channelock(R) pliers.
^
Support fan as shown, with blocks, angle iron, etc., while allowing the motor to be suspended as shown.
^
Place steady pressure on tip of motor shaft as shown, with a drill press or small arbor press and pin arrangement. Motor should fall
freely from the fan after moving motor shaft about 1/2 inch.
NOTICE:
DO NOT HAMMER MOTOR OR PLACE HEAVY "SIDE WAY" IMPACT ON FAN OR MOTOR DAMAGE MAY OCCUR.
II. Fan Installation
-
Insert fan on motor shaft.
^
Grasp fan by dome and by applying hand pressure to fan dome insert fan on motor shaft until fan is lightly seated on motor shaft.
^
Place fan and motor on a 13 mm (1/2") x 1/2" drive socket as shown in Figure 2.
^
While steadying the fan and motor, apply steady force to the rear of the motor shaft, using a drill press or small arbor press and pin
arrangement, until the clearance between the motor mounting plate and the fan hub is 5.5 mm +/- 0.5 mm.
^
A 1/4" - 20 nut is approximately 5.5 mm.