
Corsica L4-134 2.2L (1991)
Headlamp Dimmer Switch: Service and Repair
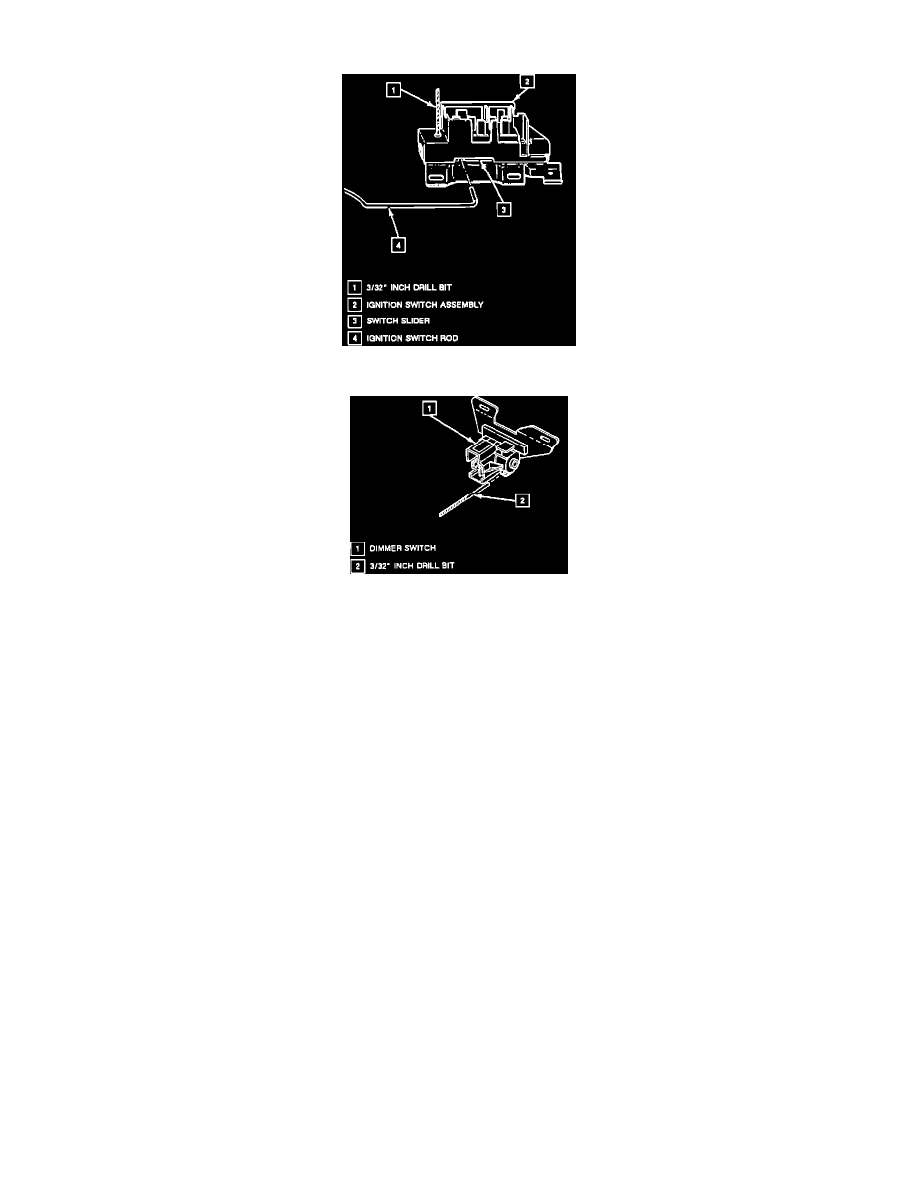
Fig. 3 Adjusting Ignition Switch. 1991-92 Models
Fig. 4 Adjusting Dimmer Switch. 1991-92 Models
1.
Disarm airbag as outlined in MAINTENANCE PROCEDURES/AIRBAG DEACTIVATION. Failure to do so may result in accidental
deployment of airbag, possibly causing personal injury.
2.
Place ignition switch in the ``Off-Lock'' position.
3.
Remove steering column support bracket bolts, then flexible coupling bolts.
4.
Remove upper and lower steering column bolts, then lower steering column.
5.
Remove electrical connectors from ignition and dimmer switch.
6.
Remove hex nut from stud, dimmer switch actuator rod, then dimmer switch.
7.
Remove ignition switch stud, then actuator rod.
8.
Remove park lock cable from ignition switch, then ignition switch.
9.
Reverse position to install noting the following:
a. When installing ignition switch place slider in far left position and move back one detent to the right. Insert a 3/32 drill bit in adjustment hole
Fig. 3 to hold switch slider in proper position when installing ignition switch.
b. When installing dimmer switch place and 3/32 drill bit into hole on switch to limit travel Fig. 4, then position switch onto column and push
against dimmer switch rod to remove lash. Tighten down switch.
c. After all work has been completed, rearm airbag as outlined in MAINTENANCE PROCEDURES/AIRBAG ACTIVATION.