
Corsica V6-191 3.1L (1990)
Crankshaft Main Bearing Seal: Service and Repair
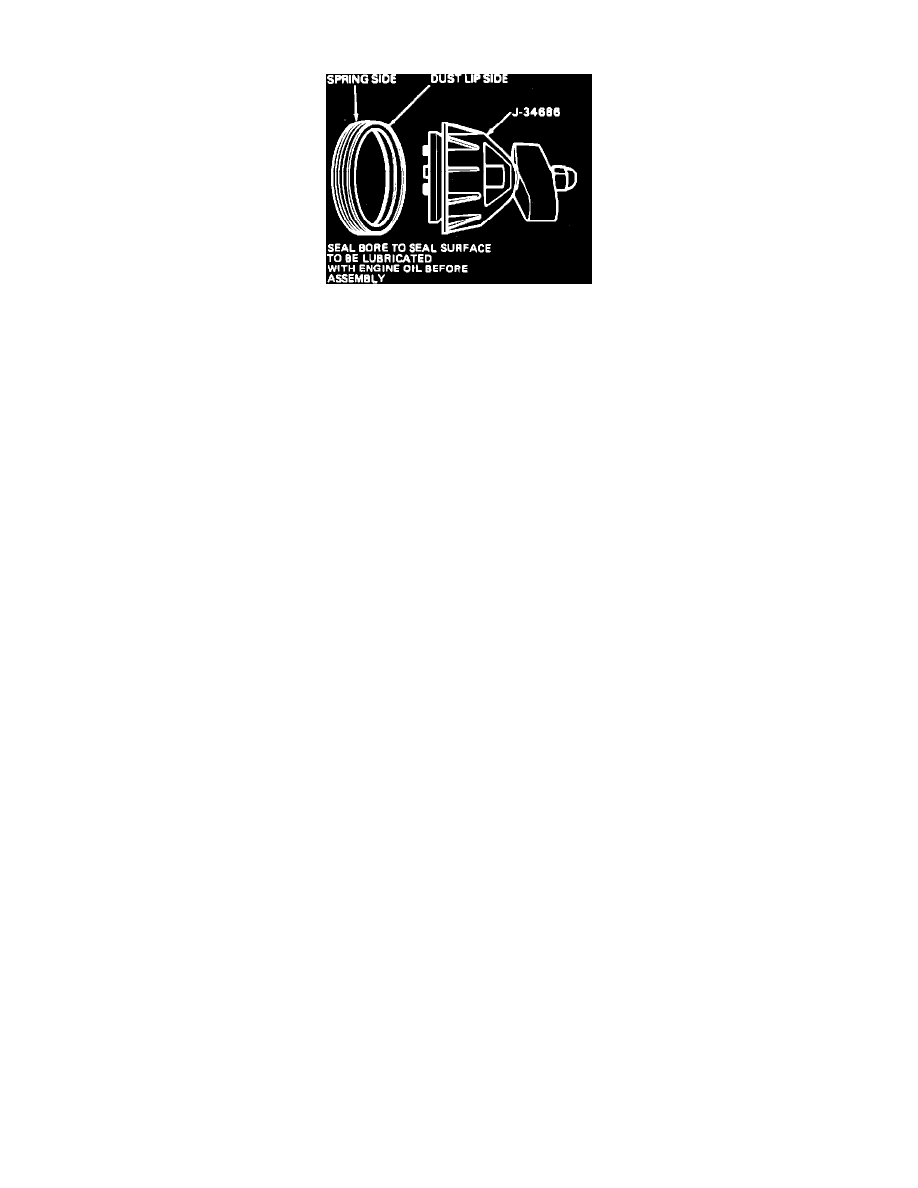
Fig. 8 Rear Main Oil Seal Installation
1.
Support engine and remove transaxle.
2.
Remove flywheel.
3.
Remove seal by carefully inserting screwdriver in through dust lip and prying towards end of crankshaft. Repeat as necessary around
circumference of seal until seal is removed, taking care not to damage crankshaft circumference.
4.
Check inside of seal bore for nicks or burrs and correct as necessary. Inspect crankshaft for burrs or nicks on seal contact surface. Repair or
replace crankshaft as necessary.
5.
Install new seal using rear main seal installer tool No. J-34686 or equivalent.
6.
Place seal on mandrel, making sure that dust lip on seal bottoms squarely against collar of tool, Fig. 8.
7.
After aligning dowel pin with dowel pin hole in crankshaft, attach tool to crankshaft and torque screws to 2-5 ft. lbs.
8.
Turn T-handle of tool until collar is tight against engine block to ensure that seal is seated properly in block.
9.
Loosen T-handle of tool until it comes to a stop. Remove attaching screws.
10.
Check that seal is seated squarely in bore.
11.
Install flywheel and transaxle.
12.
Start engine and check for leaks.