
Corsica V6-191 3.1L (1990)
Fuel Tank Replacement
WARNING: To help avoid personal injury when a vehicle is on a hoist, provide additional support for the vehicle on the opposite end from
which components are being removed. This will reduce the possibility of the vehicle falling off the hoist.
Tools required: J 37088-A tool set, fuel line quick-connect fittings.
REMOVAL:
1.
Relieve the fuel system pressure, refer to MAINTENANCE PROCEDURES/FUEL SYSTEM PRESSURE RELIEF.
2.
Drain the fuel tank, refer to MAINTENANCE PROCEDURES/DRAINING FUEL TANK.
3.
Raise the vehicle on a hoist.
4.
Remove the exhaust pipe hangers.
5.
Remove the muffler hanger attaching bolts.
6.
Remove the heat shield attaching screws and heat shield.
7.
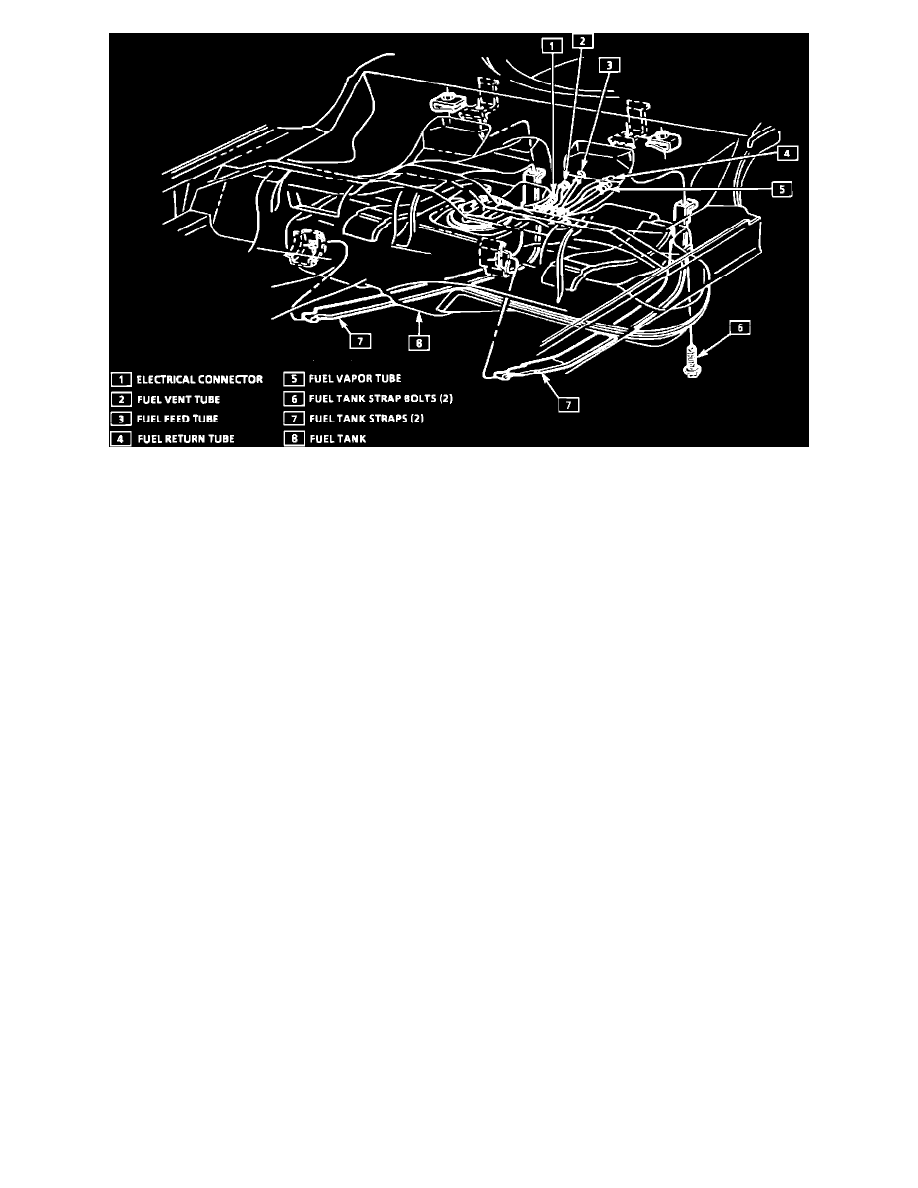
Disconnect the filler tube and clamp at the fuel tank.
8.
Disconnect the fuel tank vent tube and clamp at the fuel tank vent hose.
9.
Disconnect the electrical connector.
10.
Disconnect the vapor connecting hose from the fuel level meter.
CAUTION: If the nylon fuel feed or return connecting lines become kinked, and cannot be straightened, they must be replaced.
11.
Grasp the fuel level meter fuel feed tube and nylon fuel feed connecting line quick-connect fitting. Twist the quick-connect fitting 1/4 turn in each
direction to loosen any dirt within the quick-connect fitting. Repeat for the nylon fuel return connecting line quick-connect fitting.
WARNING: Safety glasses must be worn when using compressed air, as flying dirt particles may cause eye injury.
^ Using compressed air, blow the dirt out from the quick-connect fittings.
12.
To disconnect the fuel return quick-connect fittings:
^ Squeeze the plastic tabs of the male end connector and pull the connection apart.
13.
To disconnect the fuel feed line quick-connect fittings:
a.
Choose the correct tool from the J 37088-A tool set for the size of the fitting.
b.
Insert the tool into the female connector, then push inward to release the male connector.
14.
Plug the nylon fuel feed and return lines.
CAUTION: DO NOT bend the fuel tank retaining straps, as this may damage the straps.
15.
With the aid of an assistant, support the fuel tank and remove the fuel tank retaining strap attaching bolts, fuel tank, and both fuel tank retaining
straps.
^ Place the fuel tank in a suitable work area.