
Corsica V6-191 3.1L (1990)
Clutch Master Cylinder: Service and Repair
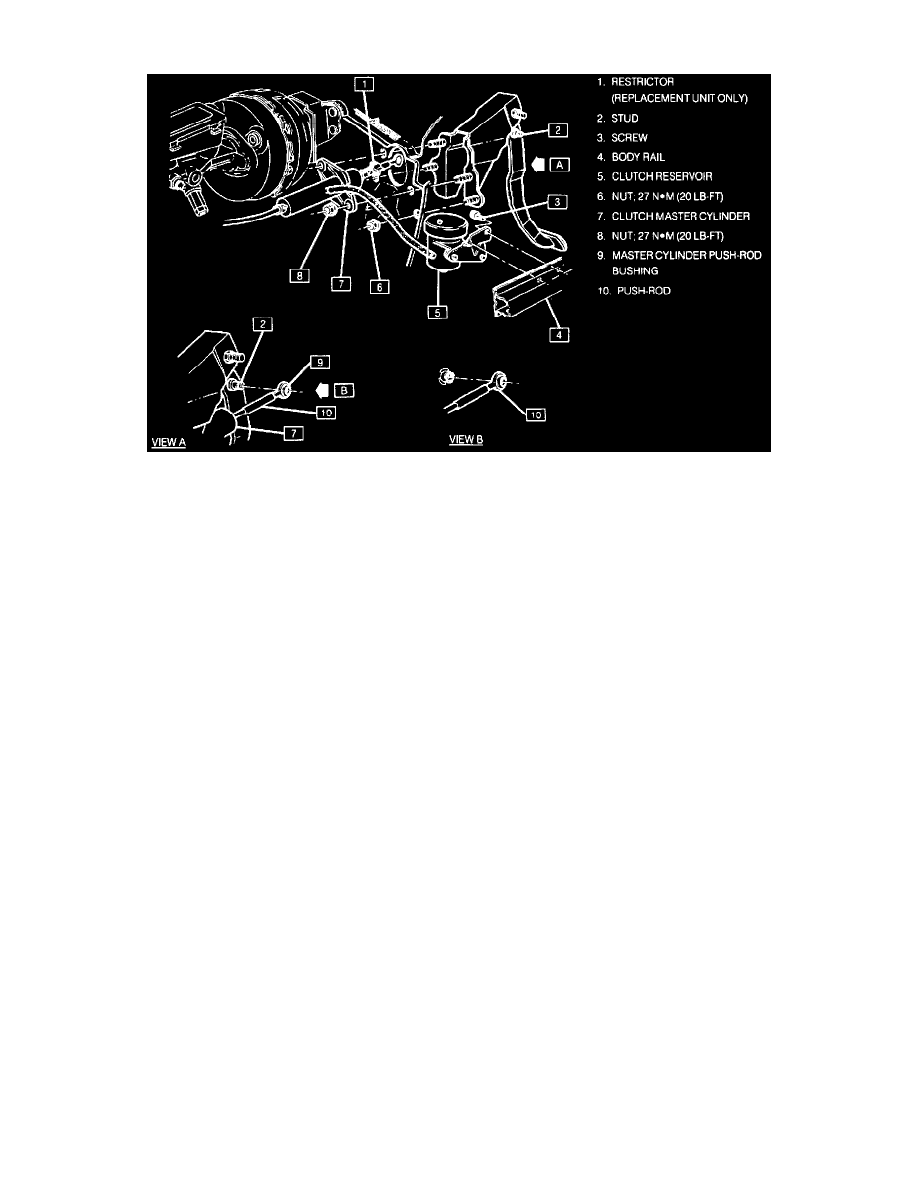
Master Cylinder Assembly
SPECIAL TOOL REQUIRED
^
J-36221, Hydraulic line separating tool.
REMOVE OR DISCONNECT
1. Negative battery cable.
2. Sound insulator (hush panel) from inside the vehicle.
3. Master cylinder pushrod from the clutch pedal.
4. Trim cover from front of dash.
5. Air cleaner assembly.
5. Clutch master cylinder retaining nuts at front of dash and the remote reservoir mounting screws.
6. Hydraulic line quick connect fitting using J-36221.
7. Master cylinder assembly from vehicle.
INSTALL OR CONNECT
1. Hydraulic line quick connect fitting.
2. Clutch master cylinder to the front of dash and tighten retaining nuts evenly to 27 Nm (20 lbs ft).
3. Remote reservoir mounting screws.
4. Air cleaner assembly.
5. Trim cover from front of dash.
6. Remove the pedal restrictor from the pushrod. Lubricate pushrod bushing on clutch pedal. Connect pushrod to the clutch pedal and install the
retaining clip.
CAUTION: If equipped with cruise control, check switch adjustment at clutch pedal bracket. When adjusting cruise control switch, do not exert
an upward force on the clutch pedal pad of more than 89 N (20 lbs.) or damage to master cylinder pushrod retaining ring may result.
7. Sound insulator (hush panel).
8. Bleed hydraulic system, refer to System Bleeding.
9. Negative battery cable.