Corsica V6-3100 3.1L VIN M SFI (1996)

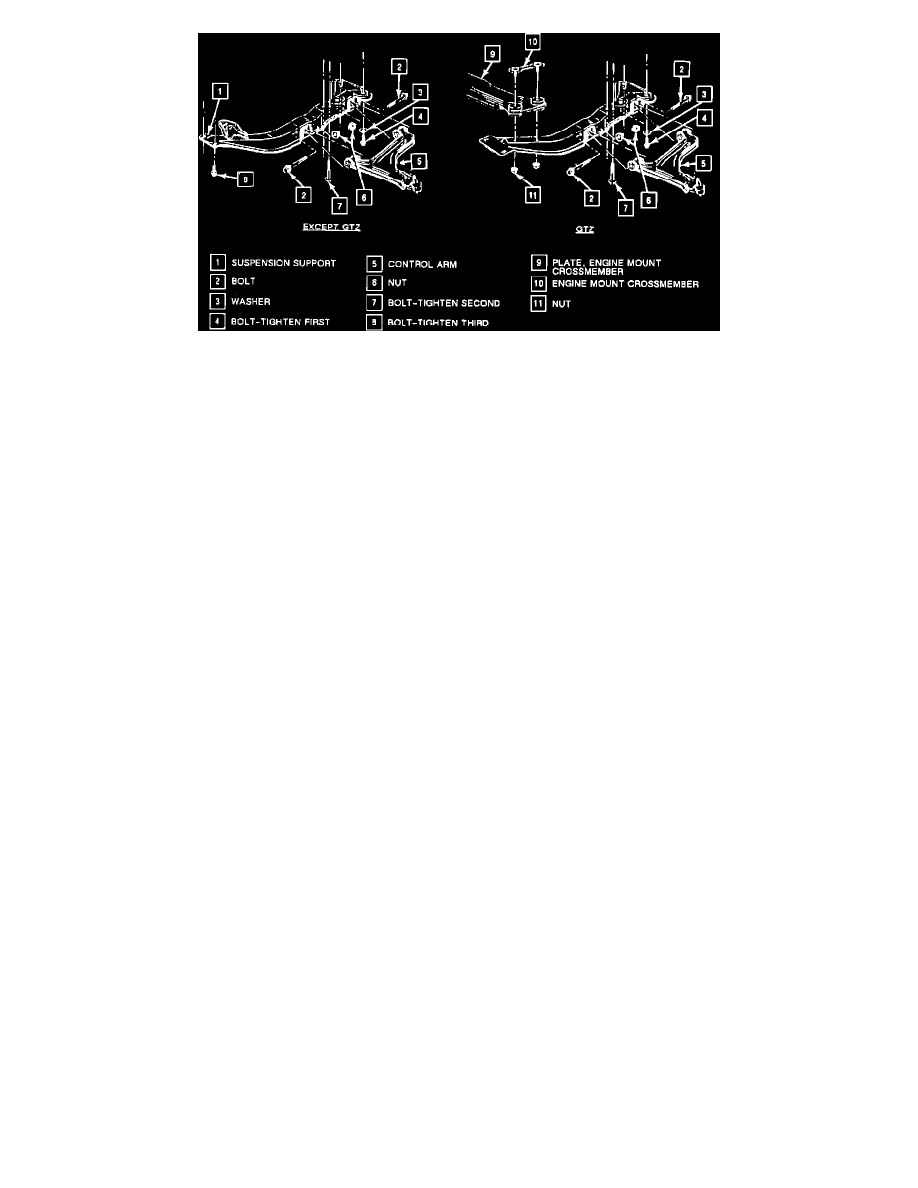
Fig. 9 Replacing Lower Control Arm
Install or Connect
1. Control arm into position and loosely install bolts attaching control arm to suspension support.
2. Suspension support into position, guiding ball joint into steering knuckle, and loosely install bolts.
3. Nuts attaching stabilizer shaft clamp to suspension support.
Tighten Nuts to 30 N.m (22 lbs. ft.)
4. Nut attaching ball joint to steering knuckle. Torque to specifications, then install cotter pin.
Tighten Nut to 75 N.m (55 lbs. ft.) plus 60° rotation.
5. Nut attaching stabilizer link to stabilizer shaft.
Tighten Nut to 30 N.m (22 lbs. ft.)
6. If suspension contact hoist is used: Slightly raise vehicle.
-
Remove jack stands from under suspension supports.
7. Tire and wheel assembly.
8. With vehicle at curb height, torque suspension
support attaching bolts in sequence as follows:
-
Center bolts first to 120 N.m (89 lbs. ft.)
-
Front bolts second to 120 N.m (89 lbs. ft.)
-
Rear bolts third to 120 N.m (89 lbs. ft.)
9. With vehicle at curb height, torque control arm attaching bolts to specifications.
Tighten Bolts to 83 N.m (61 lbs. ft.)
10. Check front wheel alignment.
