
Corvette V8-5.7L VIN G (1997)
7. The rear impact bar is also bonded to the rear compartment panel, see Fig.3.73. If necessary, apply heat, then pry apart to separate impact bar from
rear panel. (Refer to Rear Compartment Panel Service Procedures.)
With the rear bumper impact bar removed, repair any cracks in the SMC from outside the vehicle.(Refer to SMC Repair Procedures.)
IMPORTANT: Do not install the 'windows' in rear compartment yet; welding access is necessary for installing the replacement impact bar.
INSTALL OR CONNECT
1. Straighten and deburr the rail ends as necessary to allow the service bumper impact bar to fit the rail ends properly. Remove any adhesive which is
cracked or broken loose from the rails or the rear compartment panel.
2. Temporarily position the impact bar and scribe lines into the primer indicating where the welds will be made. Remove the primer from the areas to
be MIG welded by sanding with 80-grit paper on a 'Dual-Action' sander (DA). Do Not use a grinder to remove the primer.
3. Prepare all bare metal surfaces and apply weld-through primer as necessary. Be sure to apply primer to the inside of the 'fishmouth' area also.
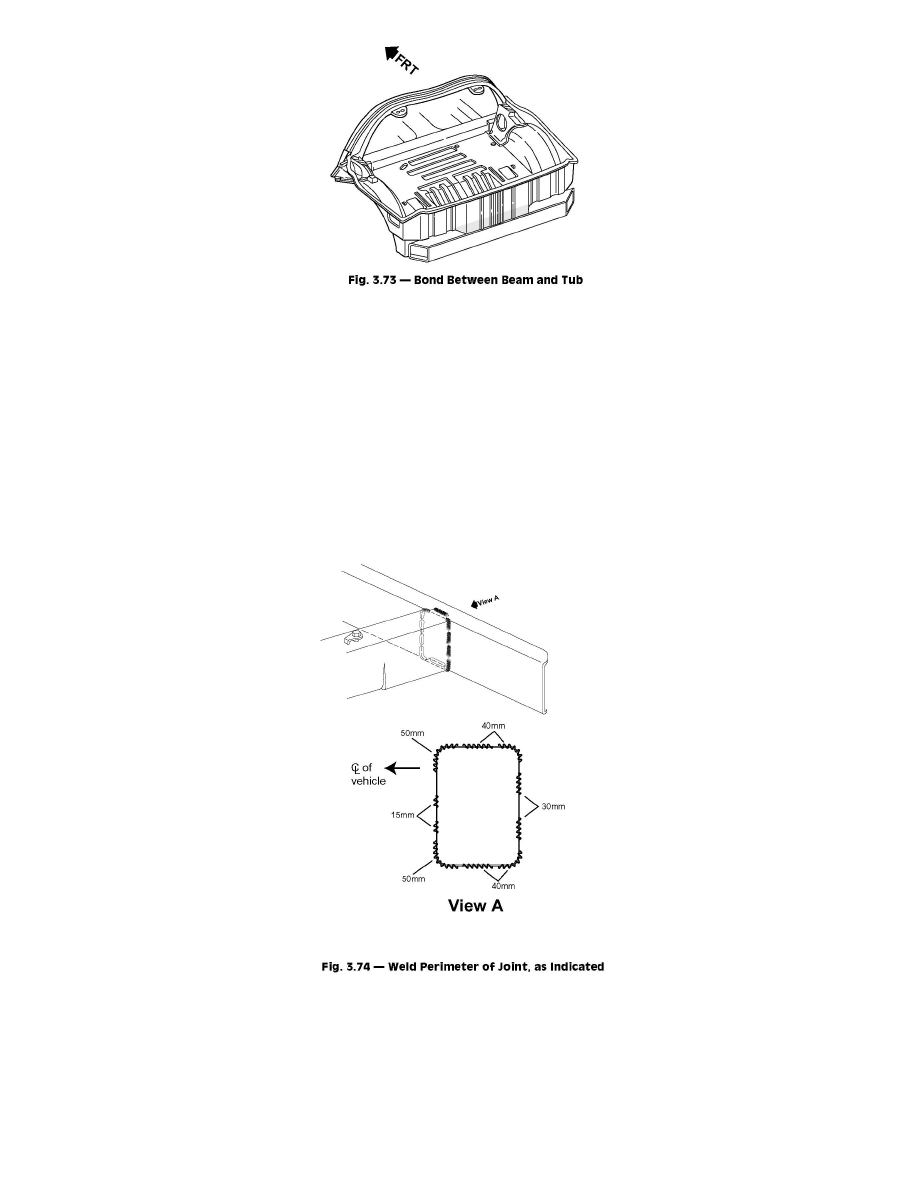
4. Position the bumper impact bar using three-dimensional measuring equipment and install per the original weld locations. Stitch weld around the
'fishmouth' joint. If not trace of the original welds are present, use Fig.3.74 as a guide for welding the side rails to the impact bar. This weld pattern
will create a solid weld joint with minimal heat distortion.