
Corvette V8-5.7L VIN G (1997)
4. Use the piston pin remover/installer in order to press the piston pin into the connecting rod.
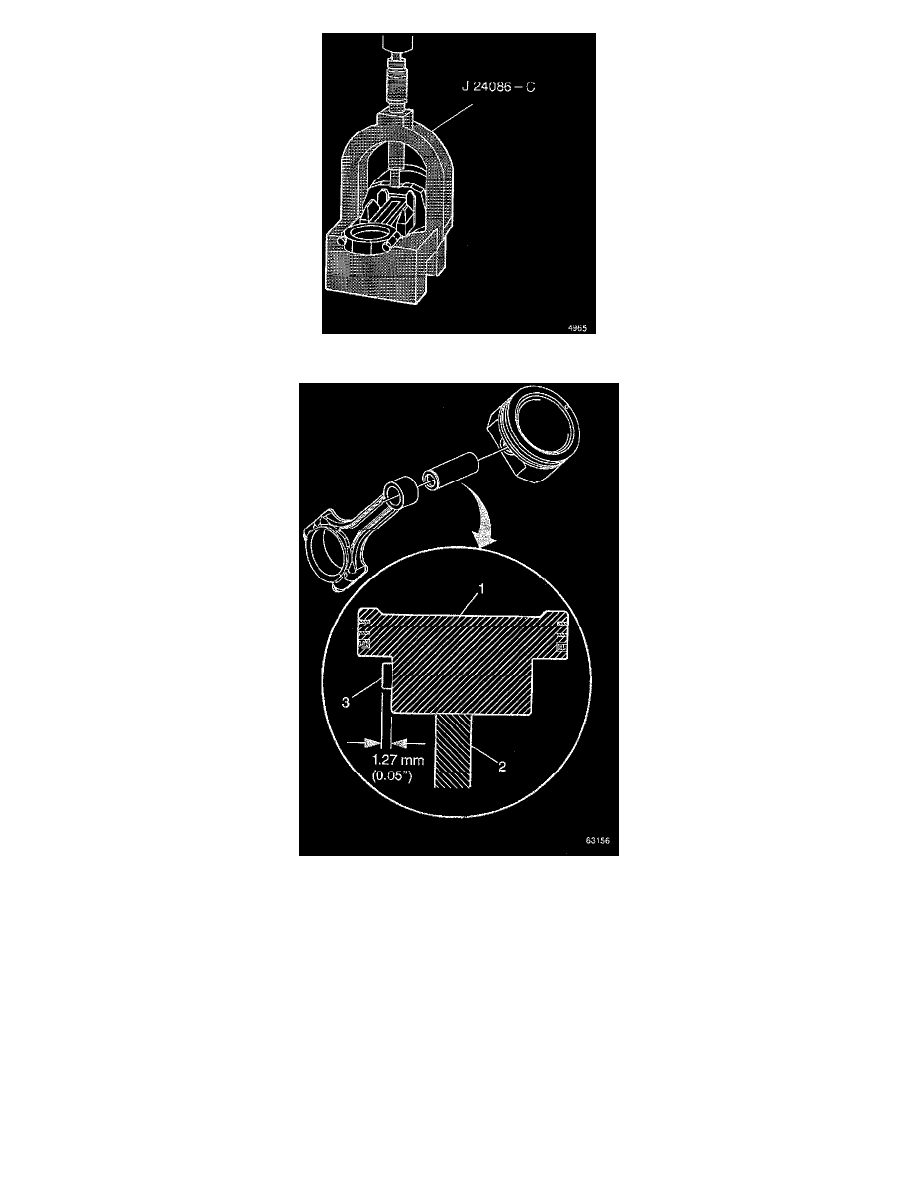
5. Measure the piston (1), pin (3), and connecting rod (2) for proper assembly.
a. Place the piston and connecting rod assembly onto a table or other flat surface. Lay the flat top of the piston (1) onto the table surface.
b. Slide the connecting rod (2) and pin (3) to one side and hold firmly against the inside of the piston (1).
c. Measure the pin (3) for proper installation. A properly installed piston pin (3) should protrude 1.27 mm (0.05 inch) from the side of the piston.