
Corvette V8-5.7L VIN G (1997)
INSTALLATION PROCEDURE
Tools Required
-
J 33013-B Hub and Drive Plate Installer
-
J 33017 Pulley and Bearing Assembly Installer
1. Position the clutch rotor and bearing assembly (2) onto the compressor.
2. Position the J 33017 and bearing (1) from the J 33013-B directly over the inner race of the bearing.
3. Place the washer (3) from the J 42126 tool kit onto the body of J 33013-B.
4. Remove the center screw from the body of the hub and drive plate installer.
5. Install the center screw into the opposite end of the hub and drive plate installer.
6. Back the body of the hub and drive plate installer tool off enough to allow the center screw to be threaded onto the end of the compressor shaft.
7. Thread the center screw several turns onto the end of the compressor shaft.
-
Do not tighten the center screw on the compressor shaft.
8. Hold the center screw with a wrench.
9. Tighten the hex portion of the hub and drive plate installer body several turns.
10. Remove the J 33013-B from the clutch rotor and bearing assembly.
11. Make sure that the clutch rotor and bearing (2) is pressed onto the nose of the compressor far enough to clear the groove for the retaining ring.
-
If the clutch rotor and bearing does not clear the groove, repeat steps 7, 8 and 9.
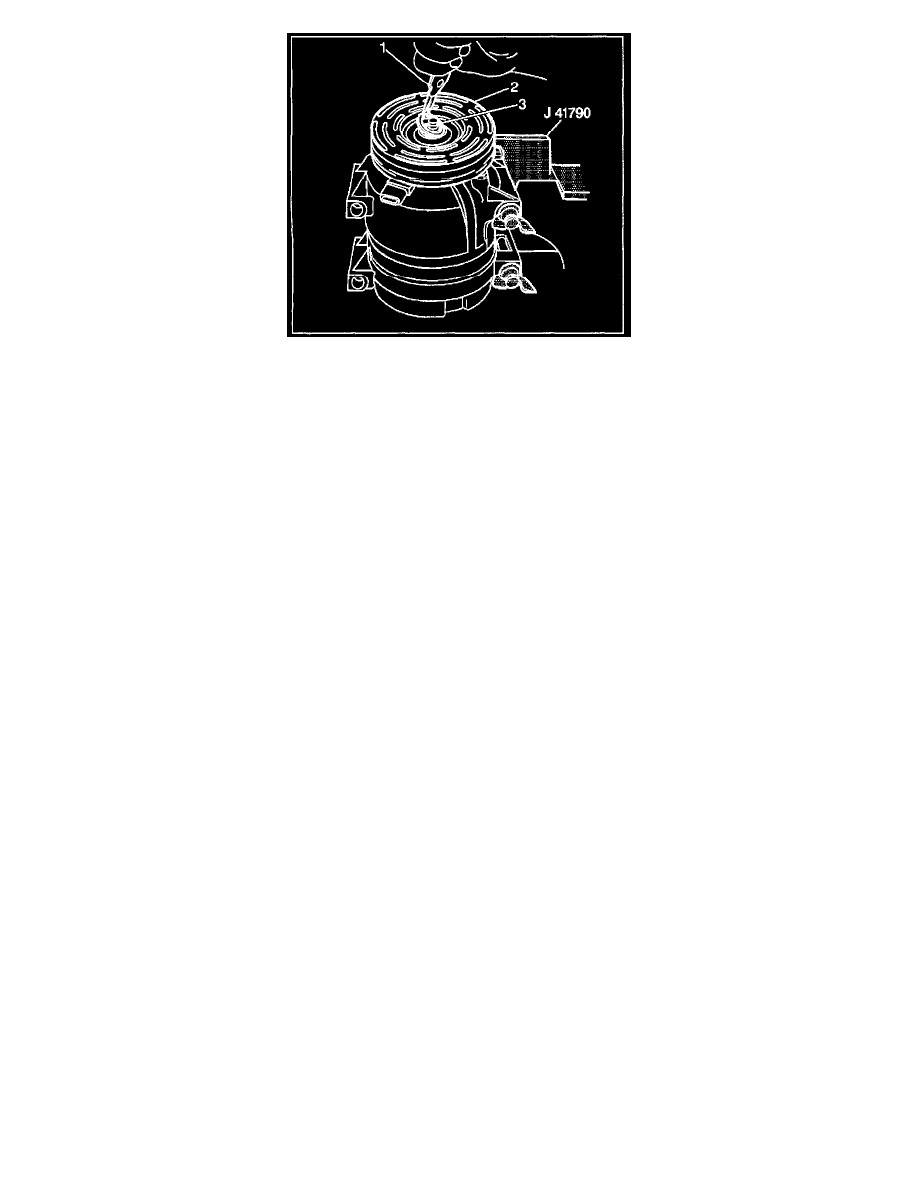
12. Install the clutch rotor and bearing retaining ring (3) using external snap ring pliers (1).
-
Make sure that the camphor side of the retaining ring is facing up when the retaining ring is being installed.
13. Install the clutch plate and hub assembly. Refer to Compressor Clutch Plate and Hub Assembly Removal.
14. Remove the compressor form the compressor J 41790.
15. Install the compressor into the vehicle. Refer to Compressor (Replacement).