Corvette V8-5.7L VIN G (1997)

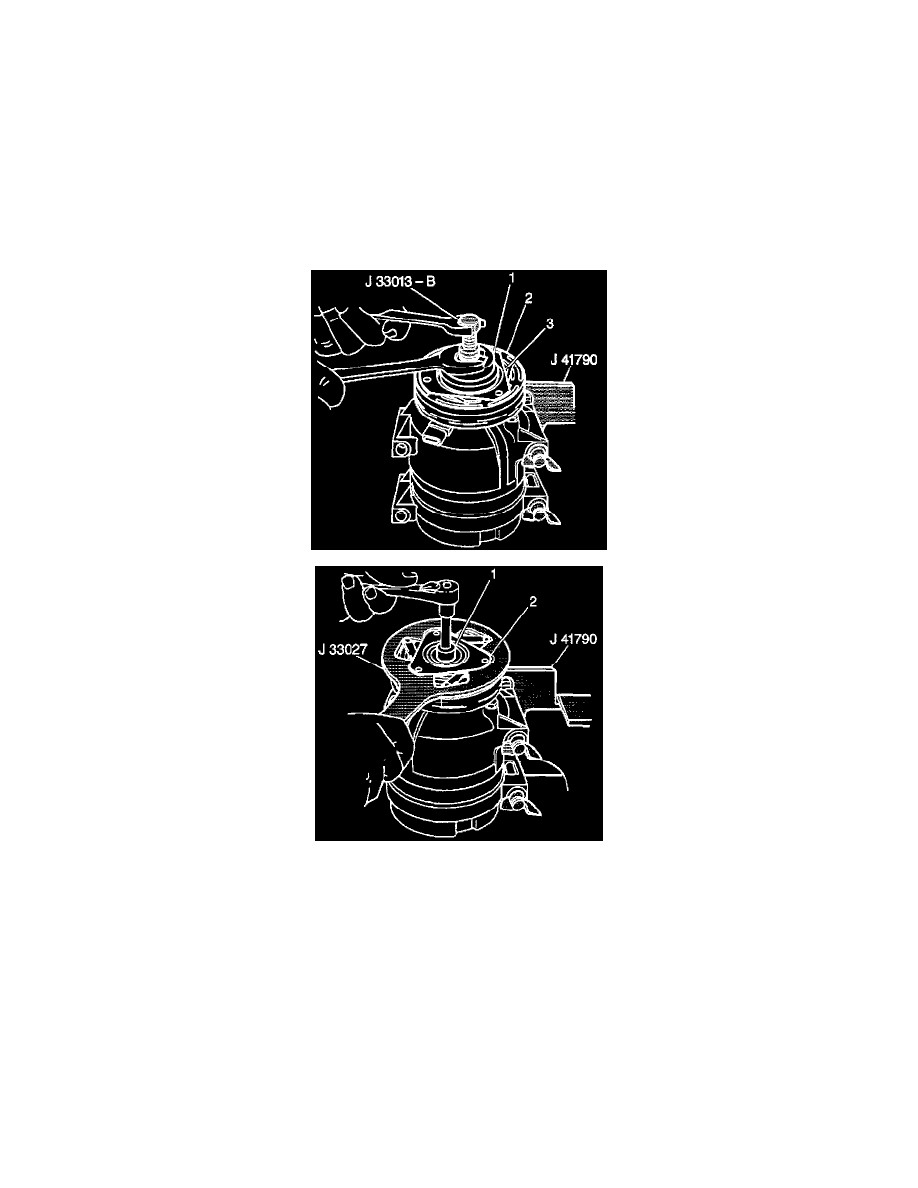
2. Clamp the J 41790 in a vise and attach the compressor to the holding fixture.
3. Hold the clutch hub and drive plate assembly (2) in place using the J 33027-A.
4. Remove the compressor shaft nut with a 13 mm socket (1).
5. Thread the clutch plate and hub remover and installer tool hub and drive plate installer into the hub.
6. Remove the hub and drive plate assembly (1) by turning the center screw into the body of the hub and drive plate installer and against the
compressor shaft.
7. Remove the shaft key and retain for reassembly.
INSTALLATION PROCEDURE
Tools Required
-
J 33013-B Hub and Drive Plate Installer
-
J 33027-A Clutch Hub Holding Tool
-
J 33017 Pulley and Bearing Assembly Installer
1. Install the shaft key into the hub key groove (4) approximately 3.2 mm (1/8 in) out of the keyway.
The shaft key is curved slightly to provide an interference fit in the hub key groove.
2. Clean the surfaces of the clutch plate (1) and the clutch rotor (2) before installing the clutch plate and hub assembly.
3. Align the shaft key with the shaft keyway in the clutch plate and the hub assembly and place onto the compressor shaft (3).
