Corvette V8-5.7L VIN G (1997)

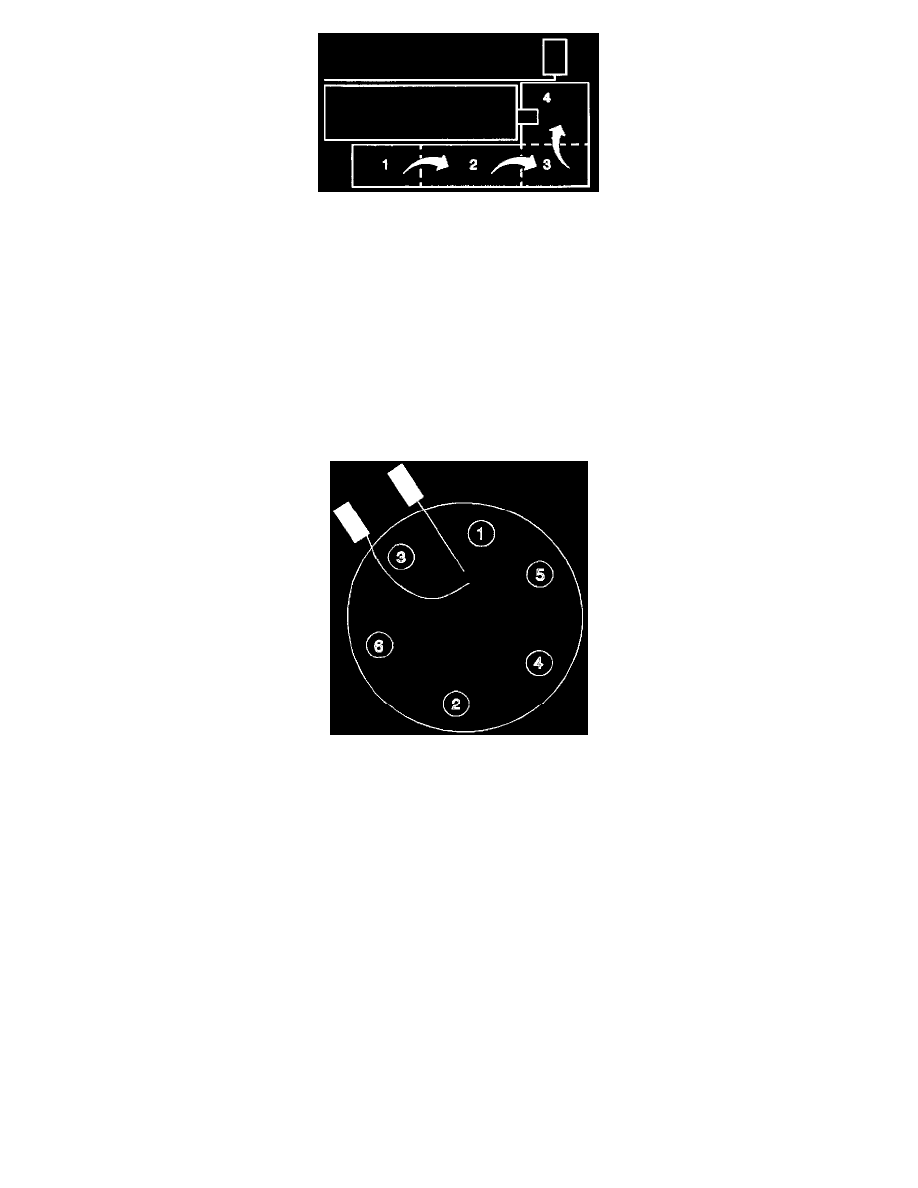
3. Fold the strainer three times so that the amount of space occupied by the strainer is about equivalent to the diameter of the fuel sender reservoir.
3.1. Fold the long side of the strainer over (1 over 2).
3.2. Fold 3 over 4 and hold the strainer in the folded position.
4. Insert the fuel sender through the fuel tank opening.
5. Release the strainer once the strainer is in the fuel tank. The strainer will spring back to its full position.
6. Continue inserting the fuel sender through the fuel tank opening. It may be necessary to rotate the fuel sender in order to facilitate the installation.
6.1. Look through the fuel tank opening to ensure that the long side of the strainer is visible. The strainer should be approximately one inch from
the tank opening.
6.2. If the strainer is not visible, rotate the fuel sender clockwise and counterclockwise about 90 degrees. Rotating the fuel sender will free up the
strainer. The strainer should become visible at the tank opening.
IMPORTANT: Do not bend or twist the float arm.
7. Install the float arm and the float arm retaining clip.
Description
8. Install the fuel sender assembly attaching bolts.
CAUTION: Do not over tighten the fuel sender assembly attaching bolts. Use a torque wrench in order to obtain the proper torque. The diameter
of the threaded portion of the bolt is much smaller than the bolt head. Over tightening the bolt may cause the bolt to break. Tighten the fuel sender
assembly attaching bolts in sequence to 3 Nm (27 lb. in.).
