
Corvette V8-5.7L VIN G (1997)
Important:
The upper hex head portion of the fuel sender attaching bolts is designed to shear off of the lower section of the bolt when the proper torque is
reached. Do not tighten the bolts after the bolt heads have sheared off. A torque wrench or other special tool(s) are not required. Do not use thread
locking or other types of sealers or lubricants when installing these bolts and gasket.
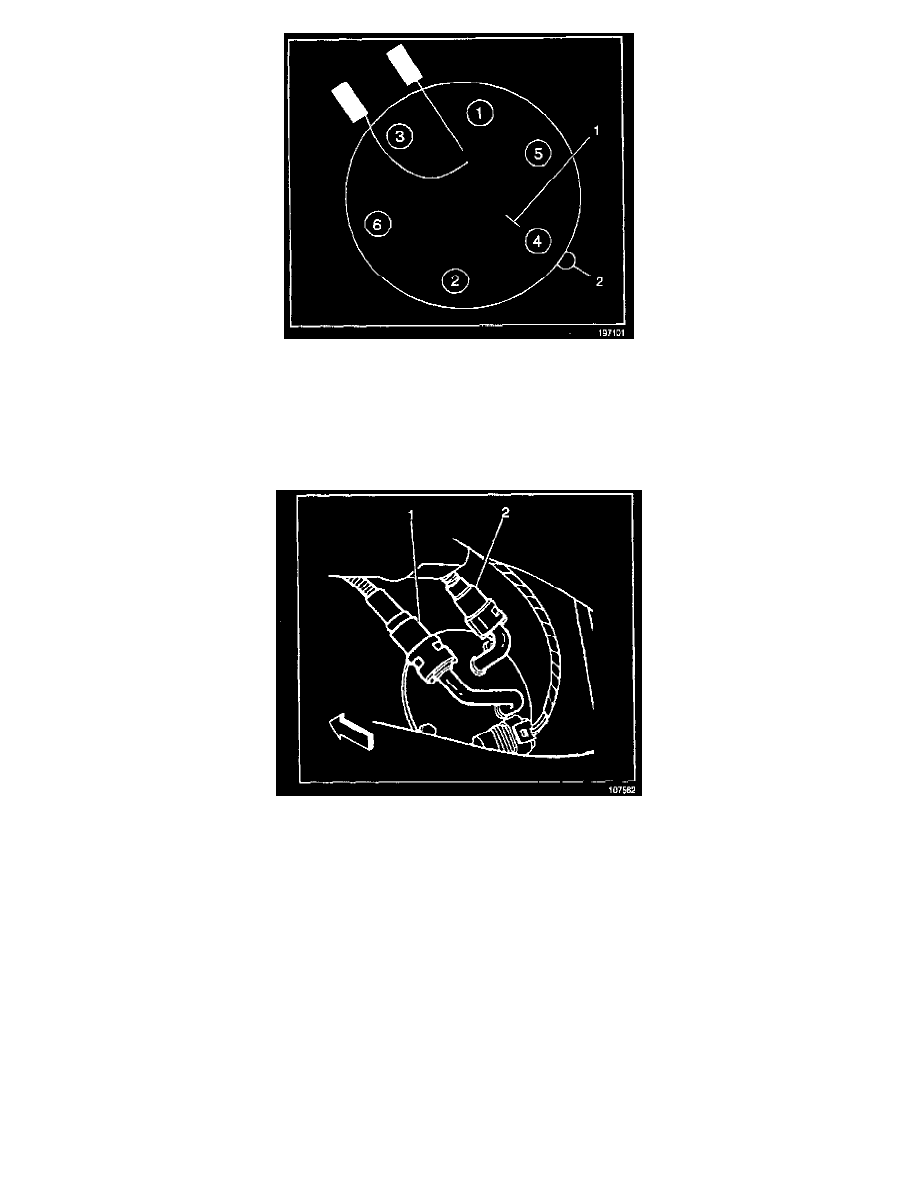
10.
Tighten the new "break-away head" fuel sender assembly attaching bolts in sequence until the upper hex head portion of the bolts shear off of the
lower section.
11.
Connect the fuel sender fuel feed pipe (1) (jet pump to left tank) and the fuel feed rear crossover pipe (2) (left tank to jet pump). Refer to Servicing
Quick Connect Fittings (Metal Collar) or Servicing Quick Connect Fittings (Plastic Collar).
12.
Connect the fuel sender electrical connector.