
Corvette V8-6.0L VIN U (2005)
35.
Install the old balancer bolt and tighten.
Tighten
Tighten the old balancer bolt to 330 Nm (240 ft. lb).
Important:
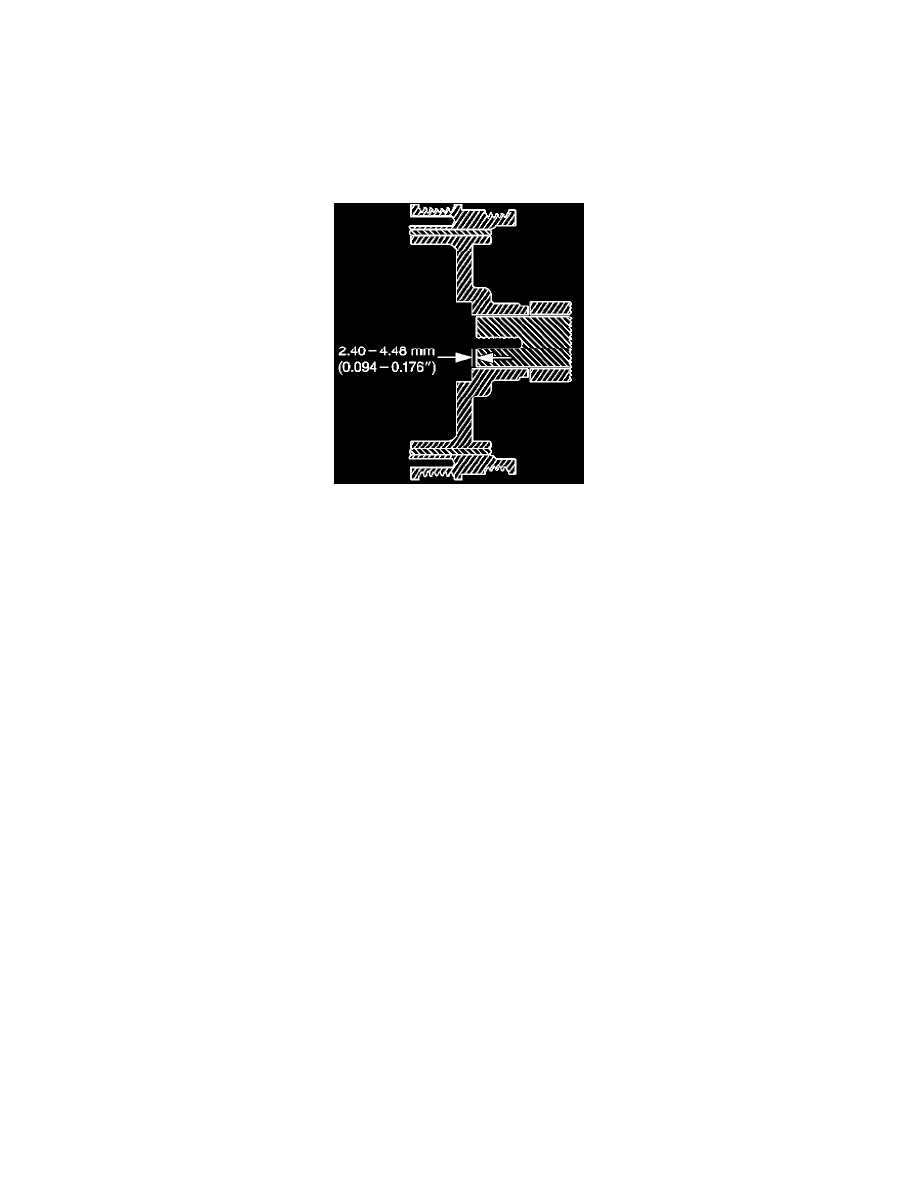
The nose of the crankshaft should be recessed 2.4-4.48 mm (0.094-0.176 in) into the balancer bore.
36.
Remove the old bolt and measure the hub to crankshaft distance.
37.
Coat the three to five threads of the new bolt with thread locker (LOCKTITE(TM) 272) P/N 12345493 (in Canada, 10953488) before installation.
Note:
Be sure to follow the torque procedure for installing the new crankshaft bolt. Use of impact tools, or not using torque and angle method will
result in joint failure.
38.
Install and tighten the new crankshaft bolt.
^
Tighten the crankshaft balancer bolt a first pass.
Tighten
Tighten the crankshaft balancer bolt a first pass to 50 N.m (37 lb ft).
Put a paint stripe on the bolt running from the 12 o'clock to the 6 o'clock position in order to verify the correct torque requested in the next step.
Important:
When tightening for the second pass, a minimum torque of 320 N.m (236 lb ft) should be observed. If this torque is not achieved, the bolt
should be replaced.
^
Tighten the crankshaft balancer bolt a second pass.
Tighten
Tighten the crankshaft balancer bolt a second pass to 140 degrees using the J 45059.
Important:
Recheck the position of the previously painted stripe to assure 140 degree rotation. Achieving the correct torque angle is critical to the success
of this repair. Over-torquing or under-torquing the joint will result in an unsatisfactory repair.
39.
Remove the J 42386-A Flywheel Holding Tool.
40.
Install the starter and bolts.
Tighten the starter bolts.