Corvette V8-6.0L VIN U (2005)

5. Use the J41665 in order to install the balancer.
1. Assemble the threaded rod, nut, washer and installer. Insert the smaller end of the installer into the front of the balancer.
2. Use a wrench and hold the hex end of the threaded rod.
3. Use a second wrench and rotate the installation tool nut clockwise until the balancer is started onto the crankshaft.
4. Remove the tool and reverse the installation tool. Position the larger end of the installer against the front of the balancer.
5. Use a wrench and hold the hex end of the threaded rod.
6. Use a second wrench and rotate the installation tool nut clockwise until the balancer is installed onto the crankshaft.
7. Remove the balancer installation tool.
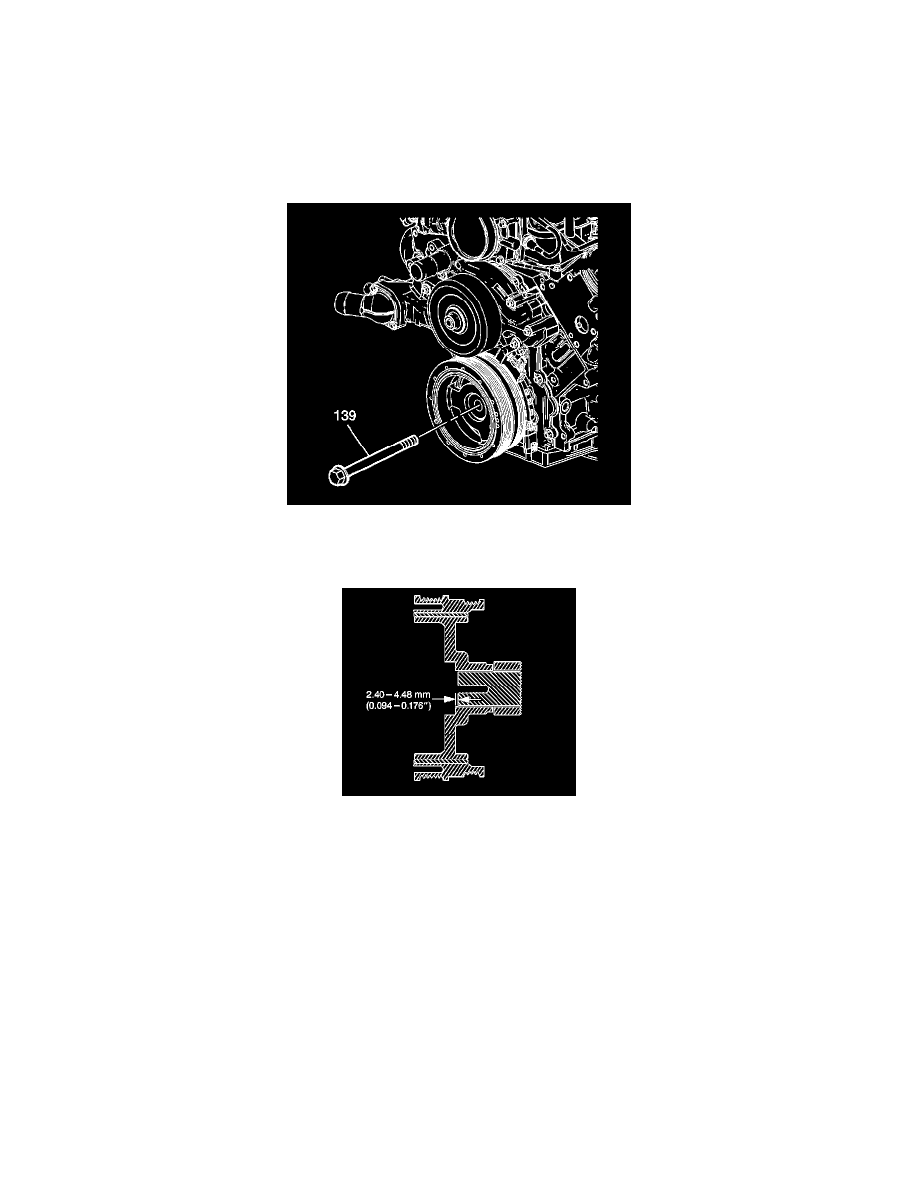
6. Install the used crankshaft balancer bolt (139).
Tighten the crankshaft balancer bolt to 330 Nm (240 ft. lbs.).
7. Remove the used crankshaft balancer bolt.
8. Important: The nose of the crankshaft should be recessed 2.4 - 4.48 mm (0.094 - 0.176 inch) into the balancer bore.
Measure for a correctly installed balancer. If the balancer is not installed to the proper dimensions, install the J41665 and repeat the installation
procedure.
