
Corvette V8-6.0L VIN U (2005)
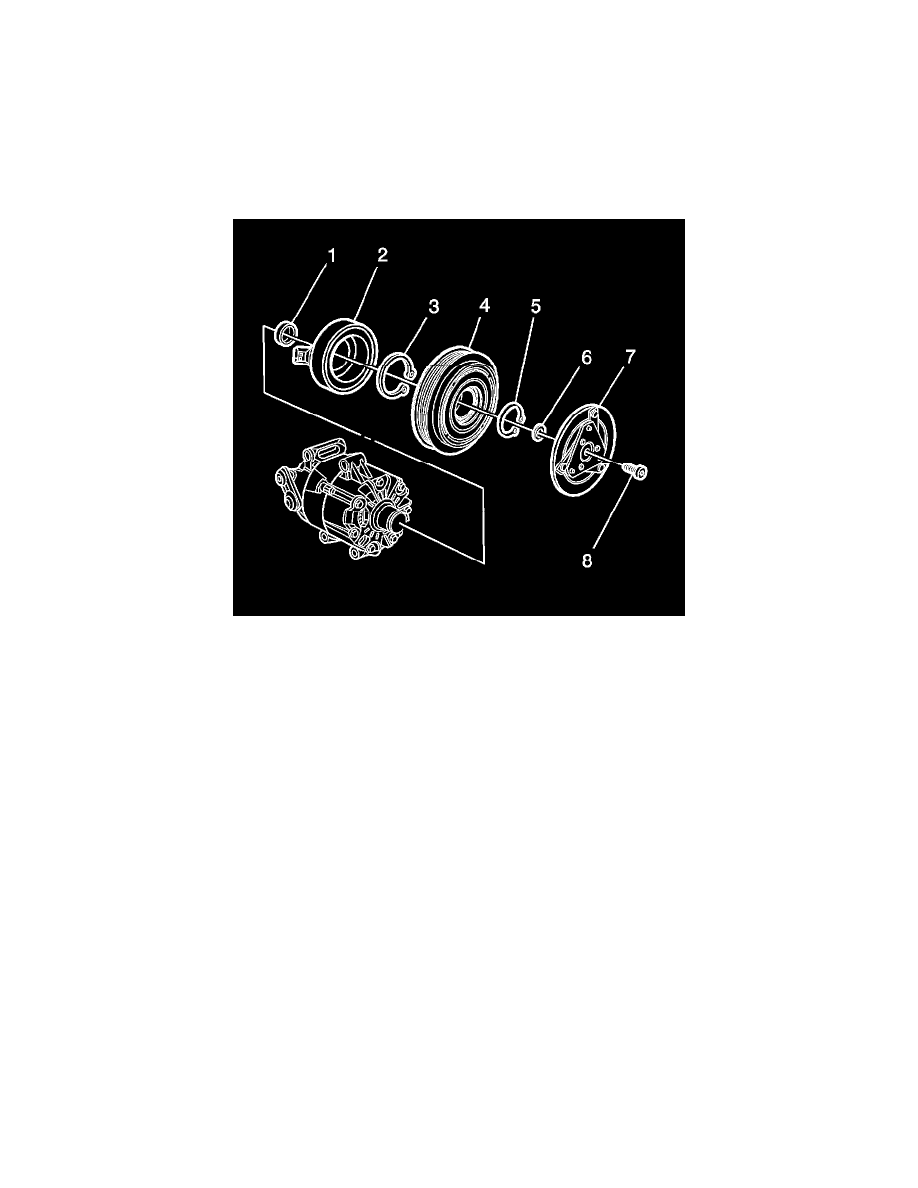
IMPORTANT: There a shims between the clutch and the housing.
5. Remove and discard the pulley and bearing assembly retainer (5).
6. Remove the pulley and bearing assembly (4) from the air compressor.
7. Remove and discard the coil assembly retainer (3).
8. Remove the coil assembly (2) from the air compressor.
9. Remove and discard the air conditioner compressor felt (1).
INSTALLATION PROCEDURE
1. Install a new felt (1) to the air conditioner compressor.
2. Install the coil assembly (2) to the air compressor.
3. Install a new coil assembly retainer (3).
4. Install the pulley and bearing assembly (4) to the air compressor.
5. Install a new pulley and bearing assembly retainer (5).
6. Install the clutch (7) to the splined shaft.
IMPORTANT: Using shims (6), ensure a 0.3-0.6 mm (0.011-0.024 in) air gap is between the clutch and pulley.
7. Using J 37872, install the air conditioning clutch screw (8).
NOTE: Refer to Fastener Notice in Service Precautions.
Tighten the screw to 4 N.m (35 lb in).