
Corvette V8-6.2L (2008)
Front Bumper Bracket: Service and Repair
Front Bumper Impact Bar Replacement (Z06)
Front Bumper Impact Bar Replacement (Z06)
Tools Required
J 42058 Frame Adapter Clamp
Removal Procedure
Caution: Refer to Approved Equipment for Collision Repair Caution (See: Service Precautions/Technician Safety Information/Approved
Equipment for Collision Repair Caution) .
1. Disable the SIR system. Refer to SIR Disabling and Enabling (See: Interior Moulding / Trim/Dashboard / Instrument Panel/Air Bag(s) Arming
and Disarming/Service and Repair) .
2. Disconnect the negative battery cable. Refer to Battery Negative Cable Disconnection and Connection (6.0L) (See: Starting and
Charging/Battery/Battery Cable/Service and Repair)Battery Negative Cable Disconnection and Connection (7.0L) (See: Starting and
Charging/Battery/Battery Cable/Service and Repair) .
3. Remove all related panels and components.
4. Repair as much of the damage as possible to the factory specifications.
5. Use J 42058 to secure the vehicle if pulling and straightening are required.
6. Note the location and remove the sealers and anti-corrosion materials from the repair area. Refer to Anti-Corrosion Treatment and Repair () .
Important:
*
Hand tools, saw blades and abrasives used for aluminum repairs should be dedicated for aluminum only to prevent contamination.
*
When removing welds, favor the bumper bar side of the weld joint.
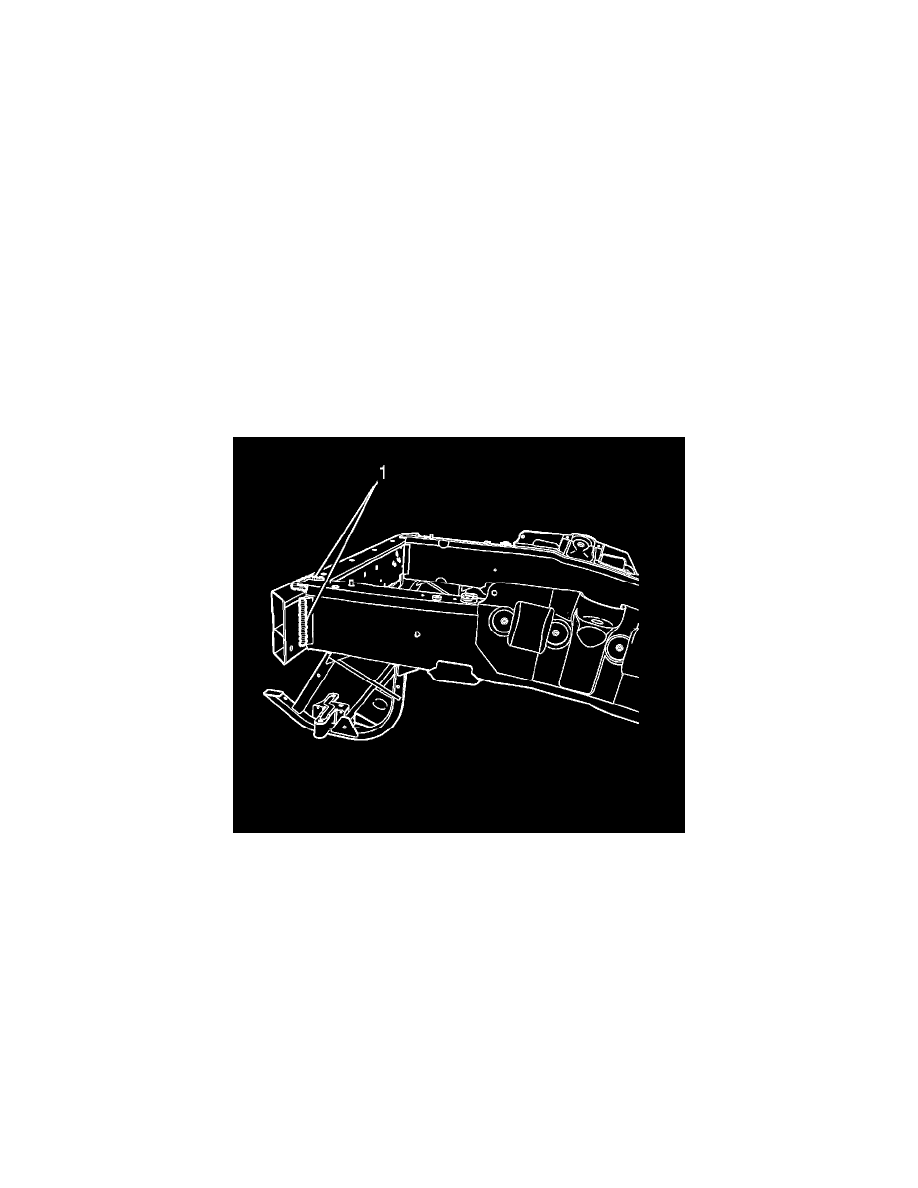
7. Locate and remove all factory welds (1) attaching the front bumper bar to the front frame rails. Note the location of the welds for installation of the
new bumper bar.