
Corvette V8-6.2L (2008)
Important: DO NOT top coat the bonding surface of the rear bar. Use primer only on bonding surfaces. Refer to adhesive
manufacturer's recommendations.
4. Clean and prepare all bonding mating surfaces according to adhesive manufacturer's recommendations.
5. Apply a consistent bead of structural adhesive to the top impact bar to bond to the rear compartment panel. Refer to Sheet Molded Compound
(SMC) Panel Bonding () .
6. Position the bumper impact bar to the vehicle using 3-dimensional measuring equipment.
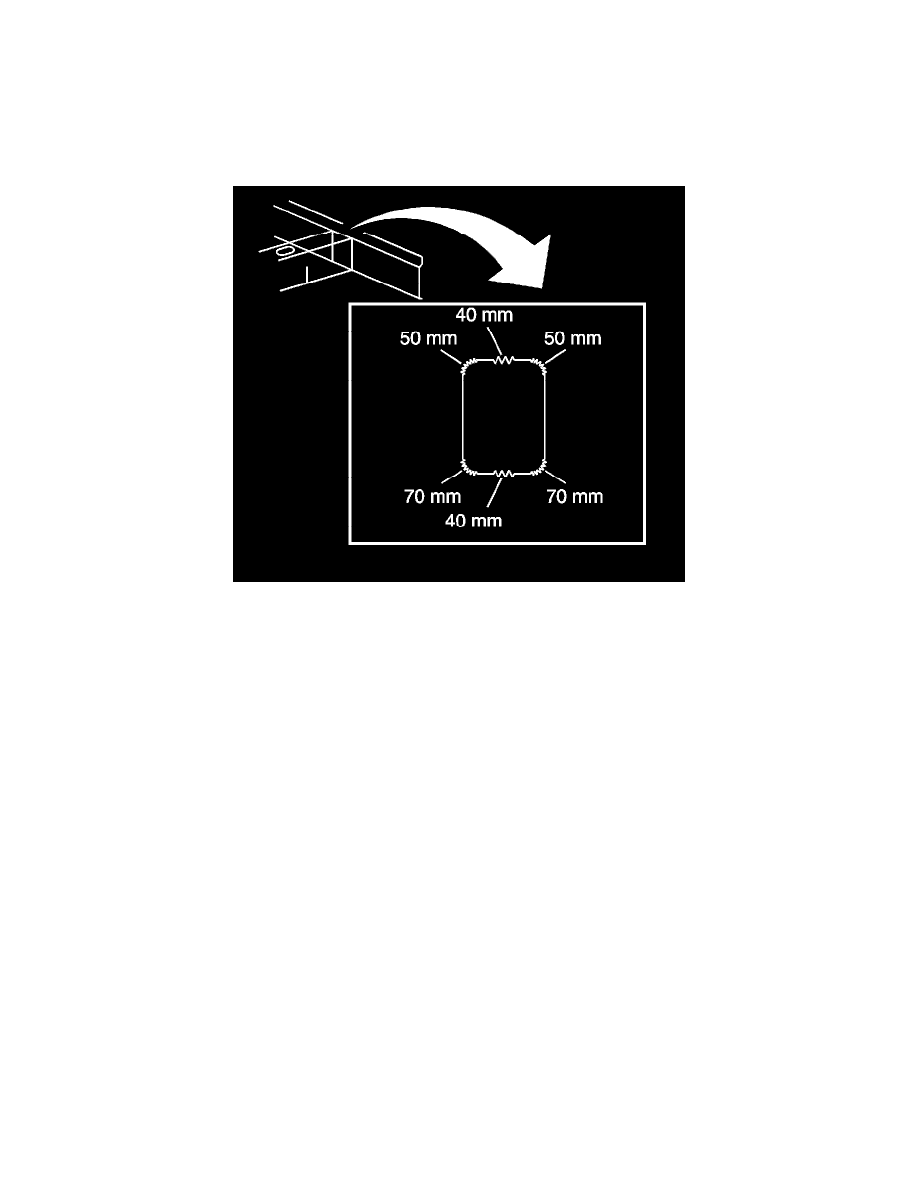
Important: If no trace of the original welds are present, follow the pattern specified for welding the side rails to the impact bar.
7. Using a metal inert gas (MIG) welder, stitch weld the rear bar to the frame rail ends.
8. Apply the sealers and anti-corrosion materials to the repair area. Refer to Anti-Corrosion Treatment and Repair () .
9. Paint the repair area. Refer to Basecoat/Clearcoat Paint Systems (See: Paint, Striping and Decals/Paint/Application and ID/Basecoat/Clearcoat
Paint Systems) .
10. Install all related panels and components.
11. Connect the negative battery cable. Refer to Battery Negative Cable Disconnection and Connection (6.0L) (See: Starting and
Charging/Battery/Battery Cable/Service and Repair)Battery Negative Cable Disconnection and Connection (7.0L) (See: Starting and
Charging/Battery/Battery Cable/Service and Repair) .
12. Enable SIR system. Refer to SIR Disabling and Enabling (See: Interior Moulding / Trim/Dashboard / Instrument Panel/Air Bag(s) Arming and
Disarming/Service and Repair) .