
Corvette V8-6.2L (2008)
Note
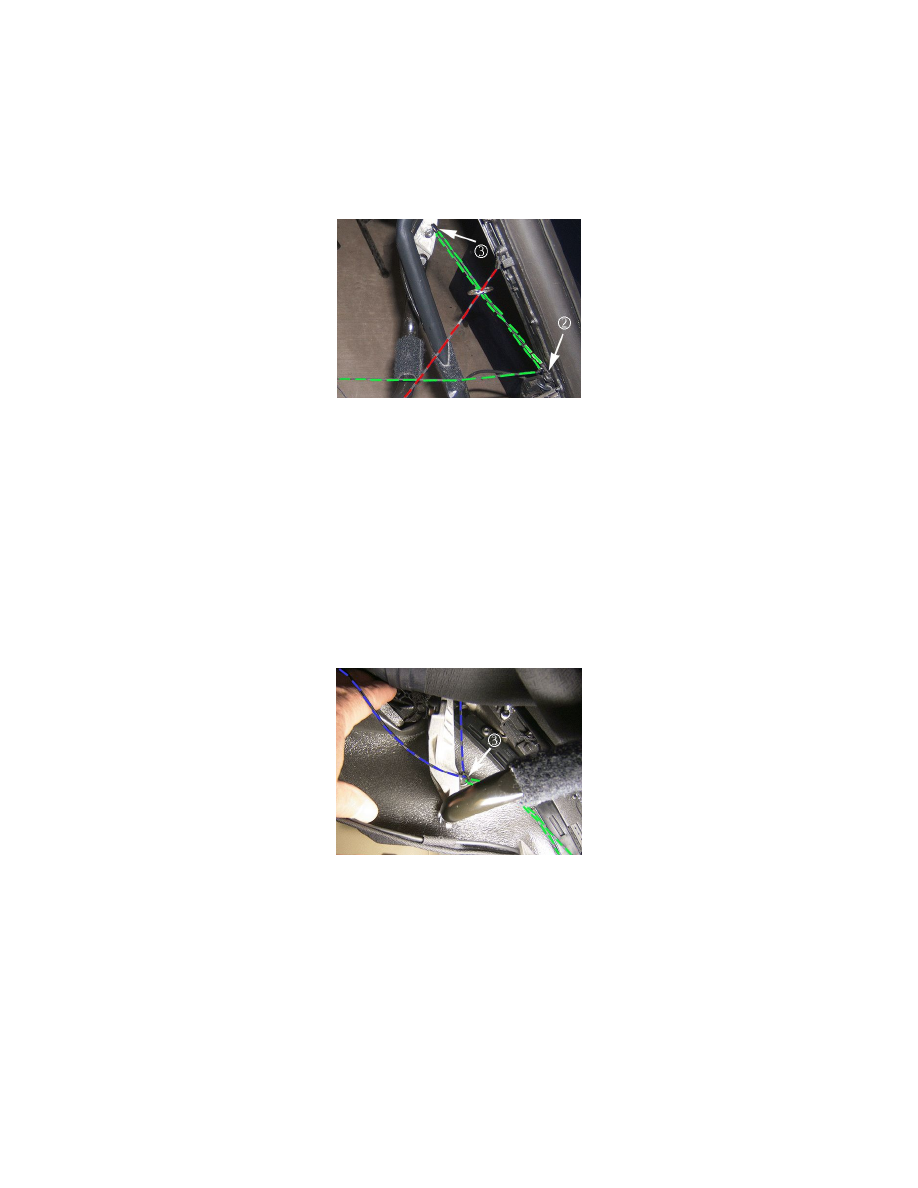
If the P-clip is not on the new headliner string, install the ones retained from the original headliner.
Important
Prior to securing the rivet, ensure that the short headliner string (shown in blue above) is routed through the P-clip and that the
D-ring and P-clip are in the proper orientation. The P-clip should point to the outside of the vehicle and the D-ring should point
forward.
1. Attach the third D-ring (2) and the P-clip (3) to the side rail link using a rivet (1), on the right and left side.
Note
Though not attached yet, the anti-glare cover string (in red) is shown in the above graphic for illustration purposes. This helps show the proper
orientation of the D-ring and the metal key ring, when the top is in closed position.
Important
The short headliner string (shown in blue in the graphic below) must be routed through the third D-ring (3) of the longer string. This
is easier to do PRIOR to attaching the third D-ring and can be accomplished by slightly opening up the diameter of the D-ring to
allow the short string's end eyelet to pass through.
2. Attach the screw that retains the third D-ring (3) to the side rail link, on the right and left side. Ensure that the D-ring is pointed to the front of
the vehicle, as shown above.
Tighten
Tighten to 2 Nm (18 lb in).
Important
Prior to attaching the end eyelets, ensure that the short headliner string (shown in blue above) is routed through the P-clip (design one) or
fed through the third D-ring (3) of the long headliner string (design two, shown above).