
Corvette V8-6.2L (2008)
Alignment: Testing and Inspection
Trim Height Inspection
Tools Required
*
J 42743 Trim Height Adjustment Tool
*
J 42854 Trim Height Measurement Gage
Trim Height Measurements
Important: Check the vehicle trim heights when diagnosing suspension concerns and before checking wheel alignment.
Trim height is a predetermined measurement relating to vehicle ride height. Incorrect trim heights can cause bottoming out over bumps, damage to the
suspension components and symptoms similar to wheel alignment problems.
Trim Height Measurement Preliminary Procedure
Perform the following before measuring the trim heights:
1. Set the tire pressures to the pressure shown on the certification label. Refer to Vehicle Certification, Tire Placard, Anti-Theft, and Service Parts ID
Label (See: Application and ID) .
2. Check the fuel level. Add additional weight if necessary to simulate a full tank. If additional weight is added, distribute the weight at the rear of the
seat cushions or the front of the rear compartment.
3. Make sure the rear compartment is empty of cargo.
4. Make sure the vehicle is on a level surface, such as an alignment rack.
5. Close the doors.
6. Close the hood.
7. Secure the convertible top or removable roof panel, if equipped, in the fully closed position.
8. All dimensions are measured vertical to the ground. Z and D trim heights should be within 6.4 mm (0.25 in) of nominal to be considered correct.
Z Height Measurement
Important: The Z height dimension measurement determines the proper ride height for the front end of the vehicle.
1. Lift the front bumper of the vehicle up about 38 mm (1.5 in) then allow the vehicle to settle.
2. Repeat this operation 2 more times for a total of 3 times.
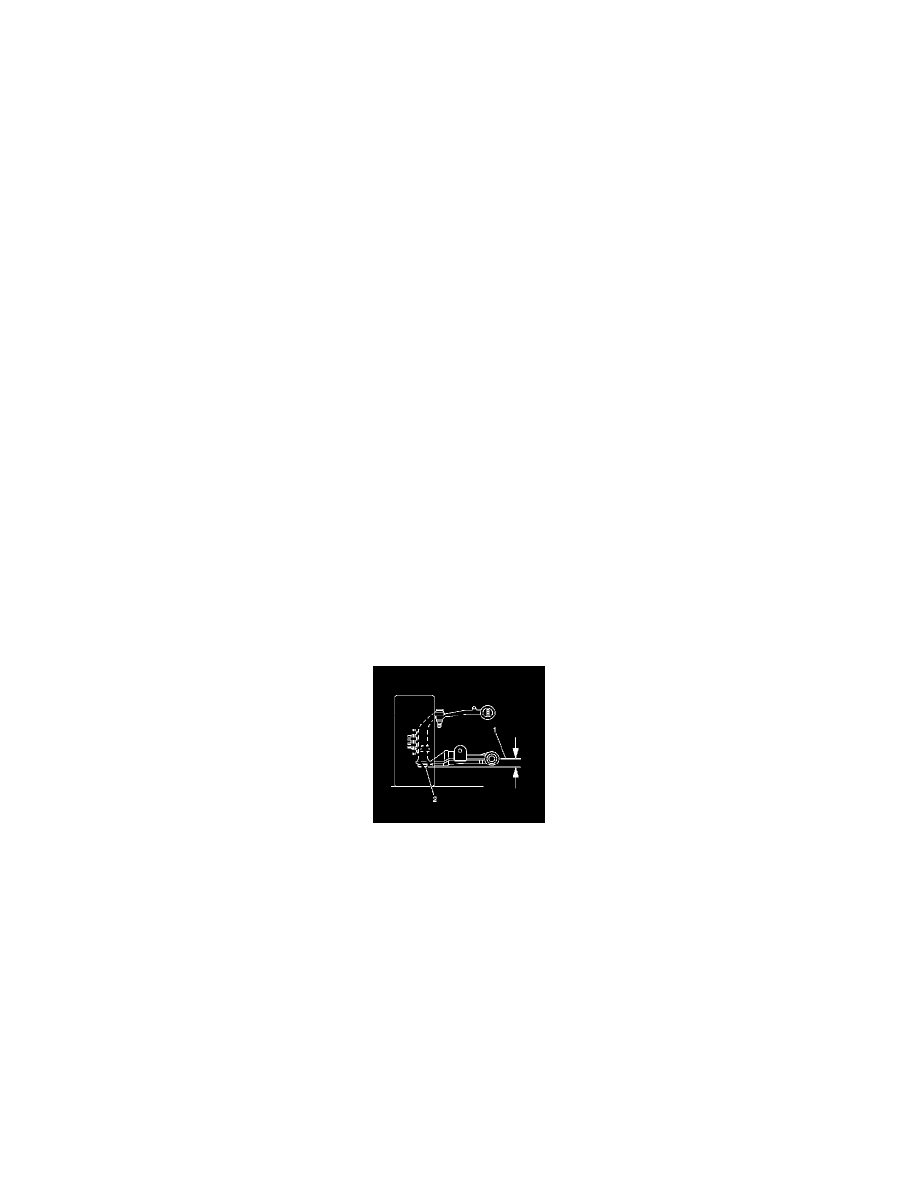
Z Height Measurement
3. Use the J 42854 to measure the distance between the lowest point of the ball joint (2) and the center of the front side of the lower control arm
forward mounting bolt (1). Measure both sides of the vehicle.
4. Push the front bumper of the vehicle down about 38 mm (1.5 in) then allow the vehicle to rise.
5. Repeat this operation 2 more times for a total of 3 times.
6. Use the J 42854 again to measure the distance between the lowest point of the ball joint (2) and the center of the front side of the lower control
arm forward mounting bolt (1). Measure both sides of the vehicle.
7. The true Z height dimension number is the average of the high and the low measurements. Refer to Trim Height Specifications (See:
Specifications/Mechanical Specifications/Suspension/System Specifications/Trim Height Specifications) .
Z Height Adjustment
Important: The Z trim height should be the same for the left and right side of the vehicle. The Z trim height requires adjustment if one of the
following criteria is met:
*
The measurement from either side of the vehicle is out of specification.