
Corvette V8-7.0L (2007)
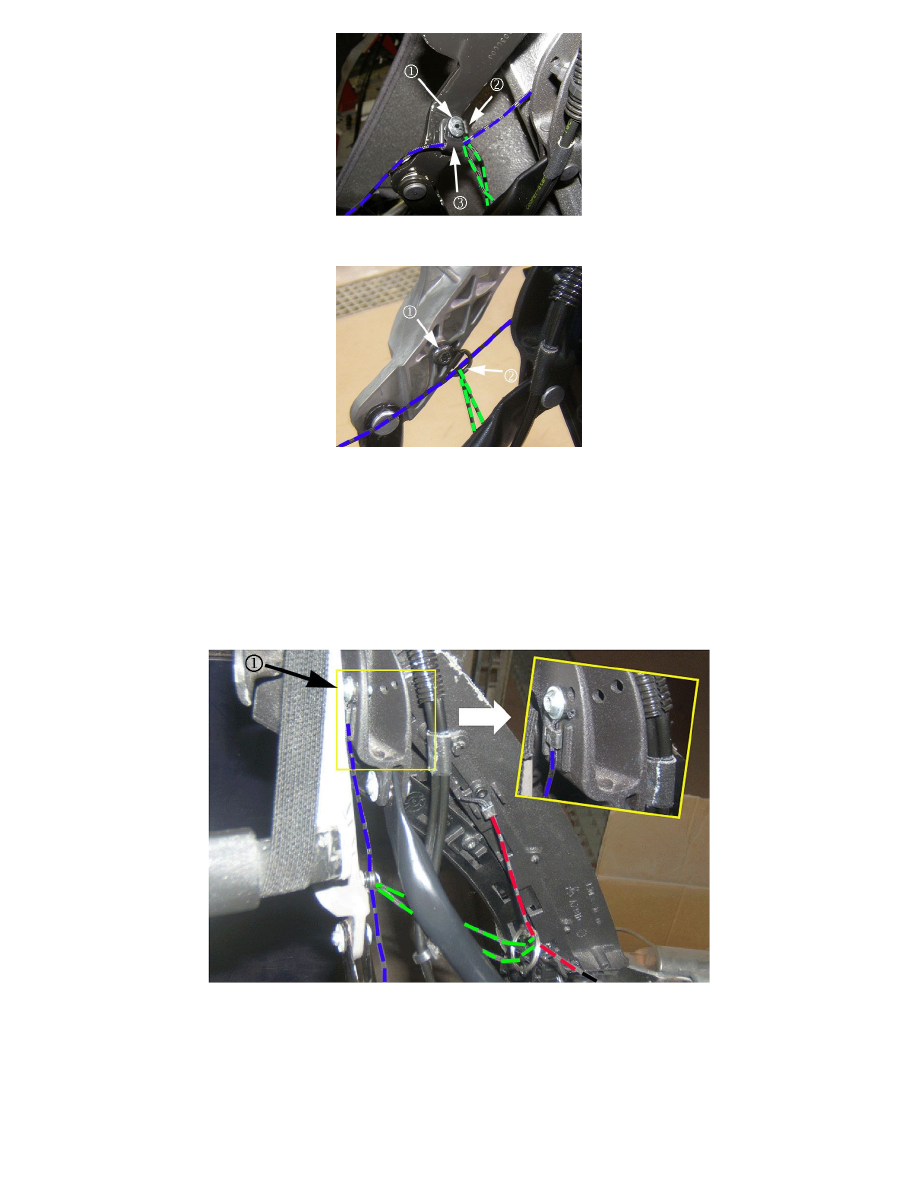
Figure 4 - Second Design Side Rail Link
Note
Vehicles built prior to March 15, 2008 have the first design side rail links shown in Figure 3. This design had a rivet (1) securing a D-ring (2) and
a metal P-clip (3). As shown in Figure 4, vehicles built after that date are a second design that have a larger metal casting side rail link with a
screw (1) securing the D-ring (2), and no P-clip. For first design vehicles, complete steps 12.1-12.3; for second design vehicles, begin with step
12.4.
1. Protect the rear compartment from drill shavings.
2. Drill out the rivet, Figure 3 (1), holding the third D-ring and metal P-clip on the right and left side. Retain the P-clips.
3. Proceed to step #13.
4. Remove the screw, Figure 4 (1) from the third D-ring (2) on the right and left side.
Note
Temporarily lowering the #1 bow will allow for easier access to the short headliner string attachment screw locations.
13. Remove the screw (1) holding the end eyelet of the short headliner string to the inboard side of the side rail links (shown in blue above), from the
right and left side.
14. Disconnect the rear defroster wiring harness.
15. Remove the headliner by sliding it through the #2, #3 and #4 roof bows. Slide the material simultaneously within the bows in order to avoid
binding.