
Corvette V8-7.0L (2007)
19. Cap or tape the TXV (3).
Installation Procedure
Important: If replacing the evaporator rear line assembly, add the specified amount of polyalkylene glycol (PAG) oil directly to the
evaporator rear line assembly. Refer to Refrigerant System Capacities.
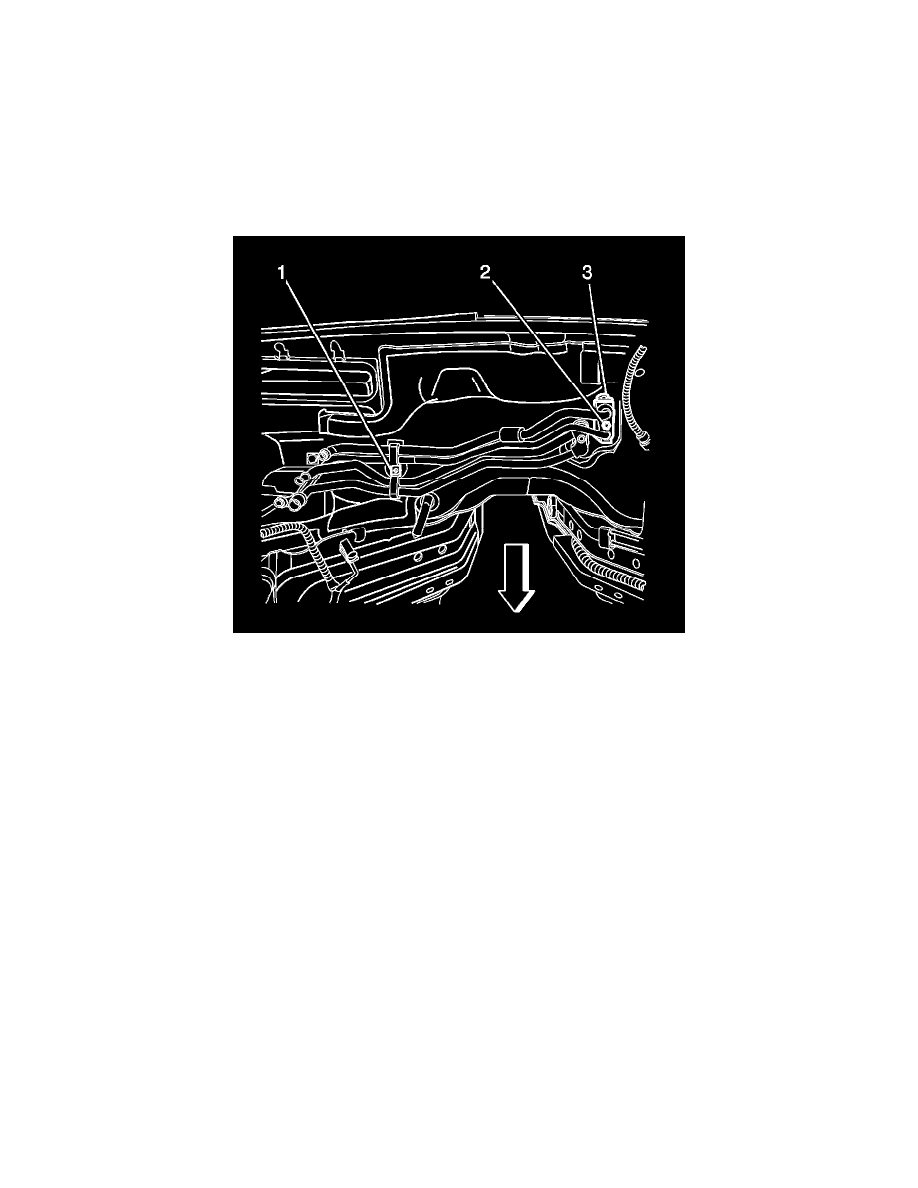
1. Remove the cap or tape from the TXV (3).
2. Install new seal washers to the evaporator rear line assembly.
3. Install the evaporator rear line assembly to the vehicle.
4. Connect the evaporator rear line assembly to the retainer bracket stud.
5. Connect the evaporator rear line assembly to the TXV (3).
Notice: Refer to Fastener Notice in Service Precautions.
6. Install the TXV block fitting nut (2).
Tighten the nut to 20 N.m (15 lb ft).
7. Install the heater pipe bracket retaining nut (1) to the cowl stud.
Tighten the nut to 10 N.m (7 lb ft).