
Corvette V8-7.0L (2007)
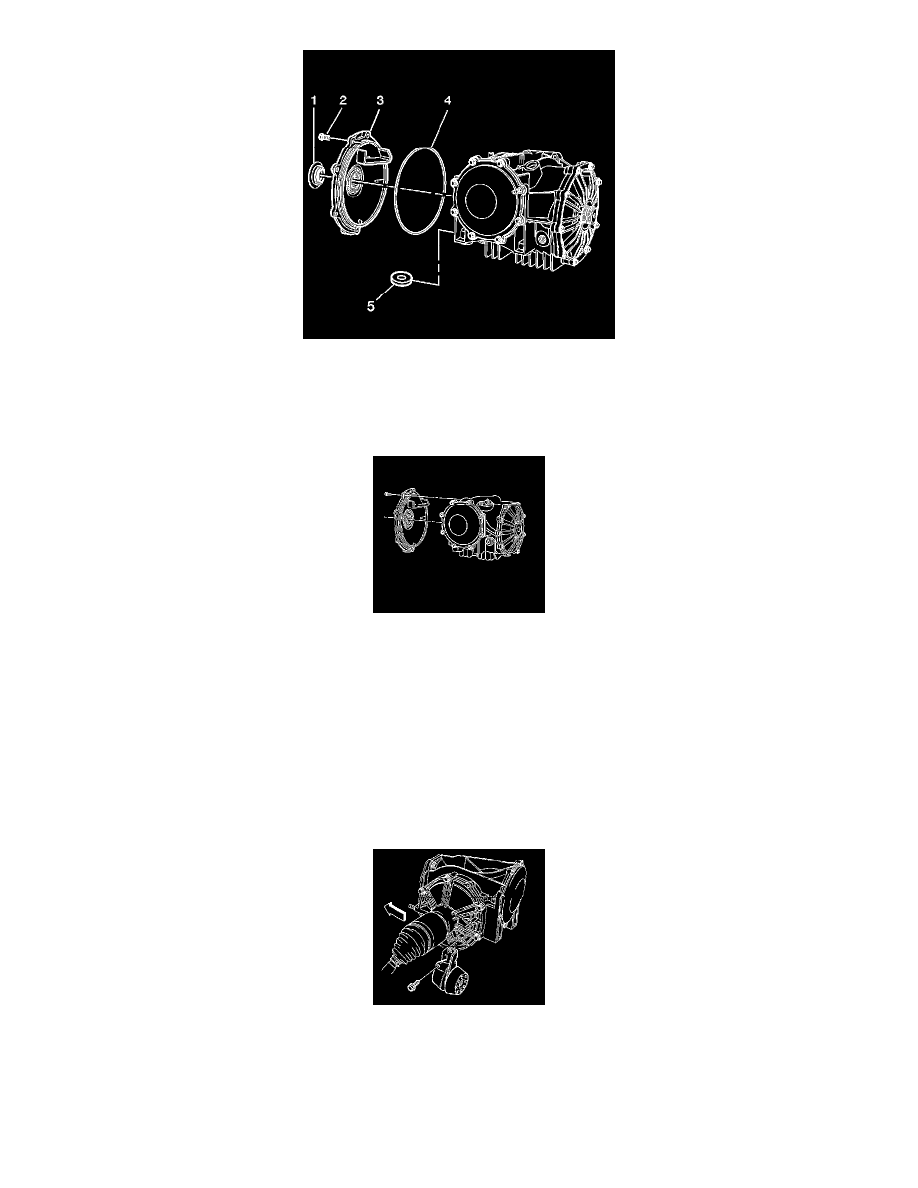
1. Clean the O-ring sealing surface on the differential cover (left) and the differential housing.
2. Install a new O-ring seal (4) to the differential cover (left).
3. Install the differential cover (left) to the differential.
Notice: Refer to Fastener Notice in Service Precautions.
4. Install the differential cover (left) retaining bolts.
Tighten the differential cover (left) bolts to 25 N.m (18 lb ft).
5. Using two nuts installed on the stud, install the transmission mounting stud to the differential cover (left).
Tighten the transmission mounting stud to 42 N.m (31 lb ft).
6. Remove the second nut from the transmission mounting stud.
7. Tighten the nut retaining the transmission to the transmission LH mounting stud.
Tighten the differential to transmission nut to 50 N.m (37 lb ft).
8. Install the damper/tuned absorber to the differential cover (left).
9. Install the bolts mounting the damper/tuned absorber to the differential cover (left).
Tighten the damper/tuned absorber mounting bolts to 25 N.m (18 lb ft).
10. Fill the differential with the proper fluids and to the proper level. Refer to Lubricant Change.
11. Install the LH muffler assembly.