
Corvette V8-7.0L VIN E (2006)
Shift Solenoid: Service and Repair
Reverse Lockout Solenoid Replacement
Reverse Lockout Solenoid Replacement
^
Tools Required
-
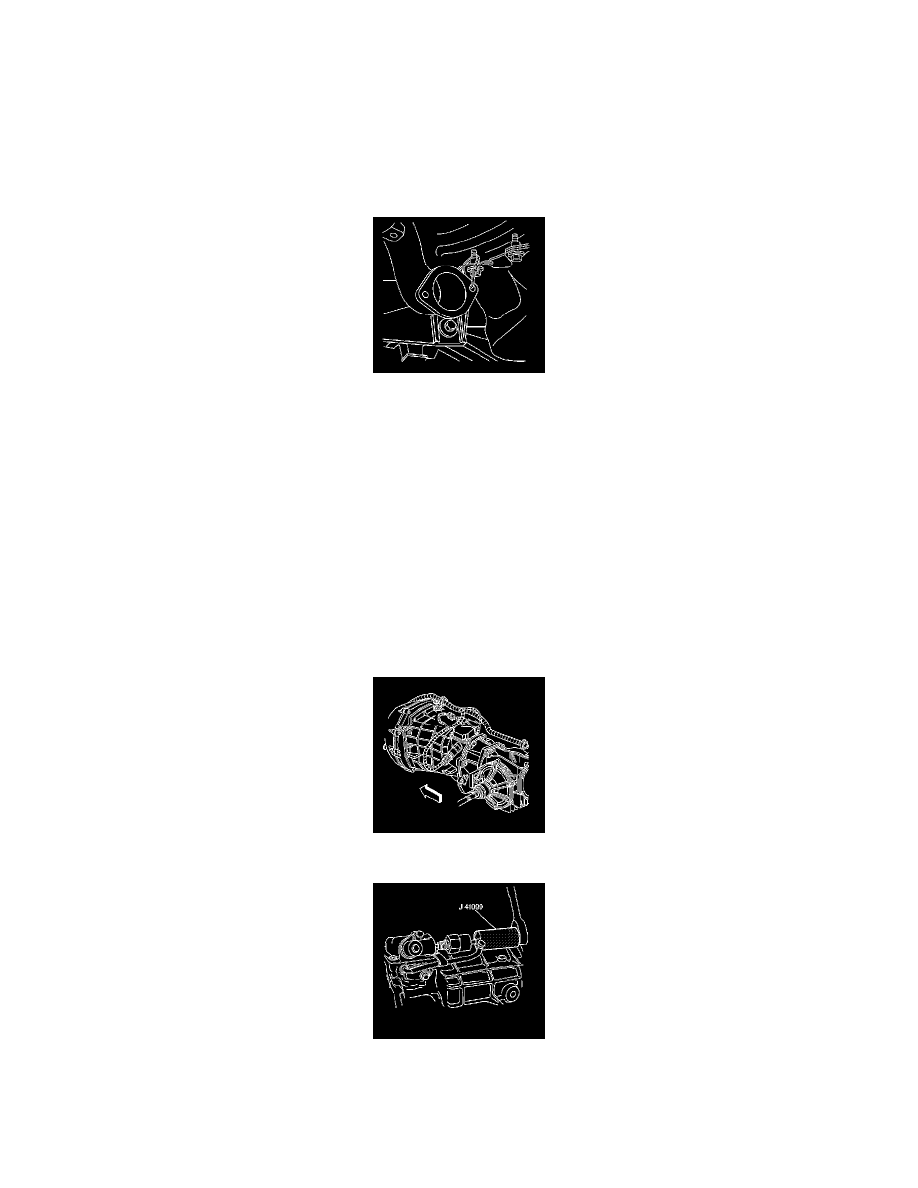
J 41099 Gear Select/Reverse Lockout Solenoid Socket
Removal Procedure
1. Caution: Refer to Battery Disconnect Caution in Service Precautions.
Disconnect the negative battery cable.
2. Raise and suitably support the vehicle. Refer to Vehicle Lifting.
3. Remove the rear tire and wheel assemblies.
4. Remove the intermediate exhaust pipe to muffler bolts.
5. Tie off the mufflers to the underbody to support out of the way.
6. Remove the rear transverse spring.
7. Disconnect the wiring harness and brake pipe clip retainers from the rear suspension crossmember.
8. Position a transmission jack under the rear suspension crossmember and firmly secure the crossmember to the jack.
9. Using ONLY HAND TOOLS, remove the rear suspension crossmember mounting nuts.
10. Important: Observe the clearance between the driveline and the driveline tunnel closeout panel.
Slowly lower the rear suspension crossmember, along with the attached driveline, approximately 4 cm (1 1/2 inch). (Lower the rear suspension
crossmember and driveline for access to the reverse lockout solenoid.)
11. Disconnect the reverse lockout solenoid electrical connector.
12. Using the J 41099, remove the reverse lockout solenoid.
Installation Procedure